As millions of devices are infected every day by cybercriminals, which are the main source of account breaches and data loss, antivirus scanning is essential for computer users.
Despite the fact that scanning is crucial, the time it takes to do so might occasionally take a few minutes, a few hours, or even a few days.
Although well-known antivirus products like Malwarebytes and Kaspersky are known to be reliable tools that can identify nearly all malware currently in use, and despite the fact that these programs generally focus on ensuring quick scanning speeds, there are occasional instances where system scans take longer than usual.
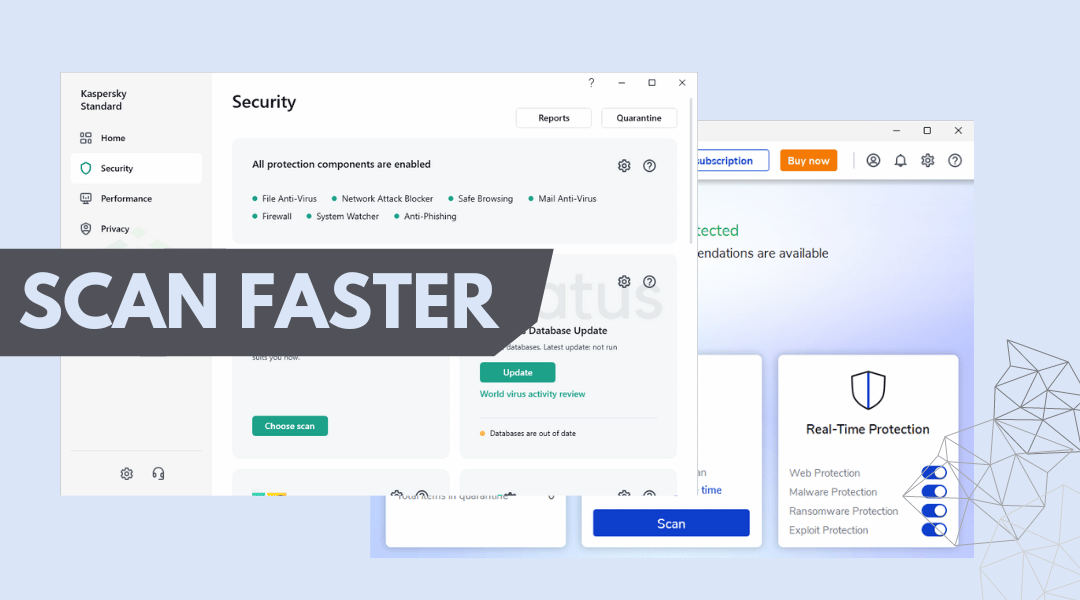
Not only are these two antivirus applications affected, but practically all antivirus programs have issues with scanning time.
The reason why the scan takes longer may not be due to the antivirus program itself but because of the computer and factors within it. Here are a few factors that are known to have an effect on the scan time of an antivirus:
- Large and bulky files on the computer, ranging in size from gigabytes to even terabytes, will undoubtedly take longer to scan.
- Older computer models will scan more slowly than current, newer models as there is a big difference in the processor speed.
- Your computer will run slower if it is in power-saving mode since it will use less hardware.
- Antivirus scanning relies heavily on computer RAM since quicker read and write speeds are achieved with more RAM.
There are many more factors that can affect how long an antivirus scan takes, whether or not it’s because of one or more computer problems.
In order to successfully remove malware, scanning must be quick; otherwise, malware may do harmful acts on the computer.
Following these considerations, here are ten suggestions for speeding up antivirus scanning on your computer.
Tips to Make Antivirus Scanning Faster
The methods provided below are intended to help you make the antivirus scanning process faster.
Please follow each suggestion to ensure that it will work for you because the scan time may vary depending on a variety of factors, and some may work for you but not for others.
1. Do not use your computer when scanning
The majority of the computer’s hardware resources must be used by your antivirus program when it is performing a scan. If you are using the computer at the same time, the antivirus program will have to share those resources with your activities, which will make it slower than if it had sole access to the computer’s resources without interference from any other applications.
Make sure there are no other programs open on the computer while a scan is being done, and refrain from using the computer at all. Before using the computer again, wait until the computer’s scanning is complete.
This is crucial because, for instance, running an antivirus scan while playing a resource-intensive game will cause the scan to run slowly because both activities demand a lot of resources. If your computer has a slow CPU and little RAM, it may even overheat.
2. Disable Windows Defender Real-time protection before scanning
While Windows Defender Real-time Protection may be a nice feature and ensure that the computer is always secured from viruses, this is not the case if you already have a different antivirus software installed.
This is due to the fact that two separate types of protection software will demand resources on your computer as a result. However, having two antivirus programs installed on a computer is not advised, as this could result in conflicts.
Therefore, before starting a scan with your antivirus product, make sure Windows Defender Real-time protection is turned off to ensure that the main antivirus program has complete access to the hardware and is not being crowded out by another program that is doing the same function.
In order to disable Real-time protection, search for Windows Security in the Windows search box and select Virus & threat protection.
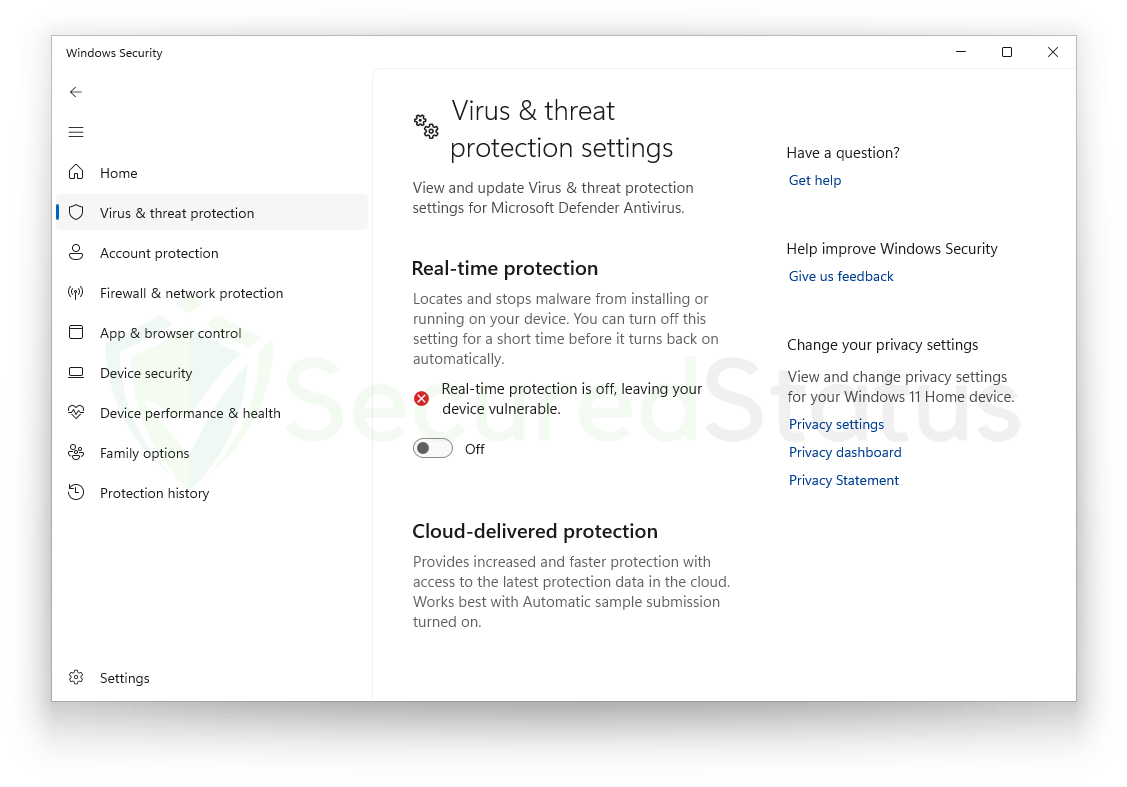
Once you’ve reached the page for virus and threat protection, scroll down to the section titled Virus & threat protection settings and click it. On the following page, toggle the Real-time protection feature Off and you may now proceed with the scan.
3. Make sure antivirus program is up-to-date
Since people these days have a very short attention span and may need to use their computer for other things rather than waiting for an antivirus to finish scanning, reputable antivirus software frequently makes updates to make sure the scanning will take longer than the previous version.
If your antivirus program hasn’t received an update in a while and you see that it is now available, update it immediately since there may be a fix that will speed up scans.
Antivirus companies frequently make changes to their software to improve it, and updating the antivirus software may also ensure that the threat database is updated, which improves scanning and detection of new and up-to-date malware on computers.
4. Update your operating system
Updating your operating system will make sure that bugs and patches are fixed, but it will also optimize the operating system to be faster. This, in turn, will make the antivirus program scan faster as the system is more optimized. If you are using newer Windows versions, then they are more susceptible to fixes and optimizations.
Please check for a new Windows version update if you haven’t already by following the instructions for checking for system updates in Windows.
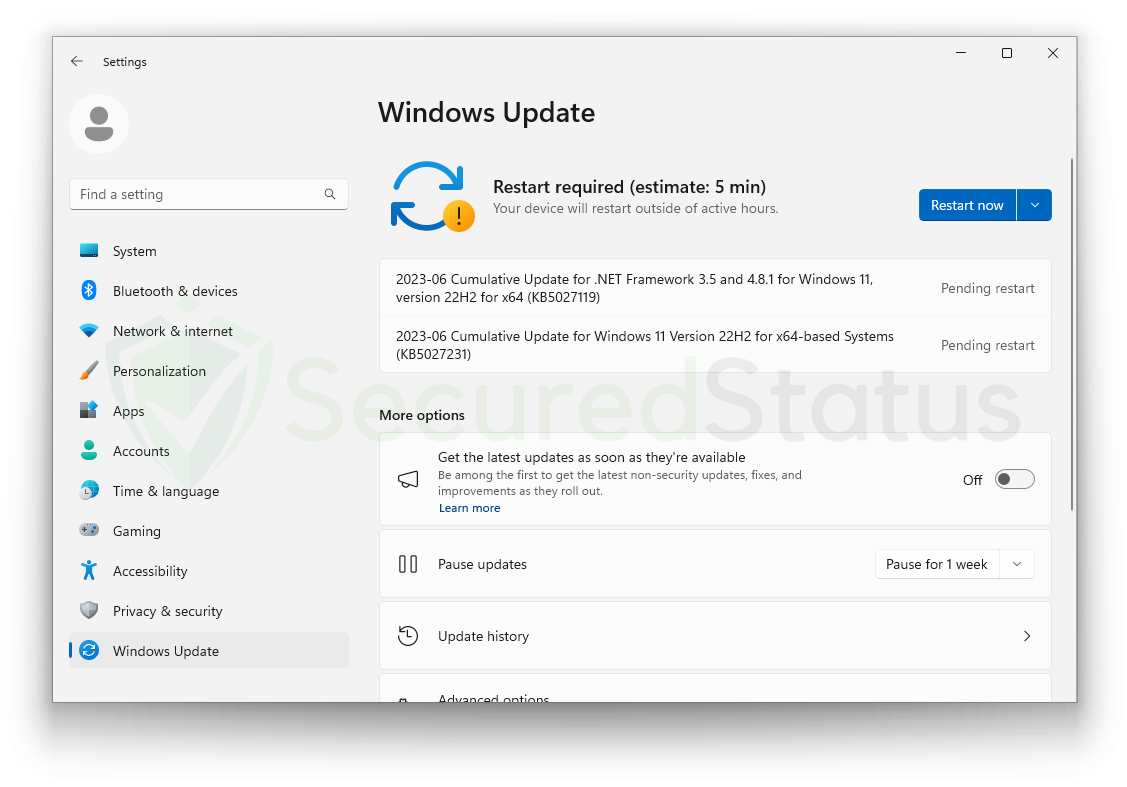
In order to update Windows to the most recent version, go to Start > Settings > Windows Update, and then click Check for updates. If it indicates that there is a new update, simply install the said update on your computer.
5. Use SSD instead of HDD drives
Since SSDs can access, read, and write data considerably more quickly than HDDs, they are known to be faster than HDDs. HDDs, the conventional storage units used by older computers, read and write data using spinning platters. SSDs, on the other hand, are faster, quieter, and use less energy since they instantly access memory chips.
Although both of them are storage devices, one is superior to the other. Despite being slower than SSDs, HDD drives are substantially less expensive.
You might use an SSD drive if you are using an HDD drive to ensure that scanning is quicker and the computer is overall faster, even during startup. Since antivirus programs use the disk to check for infected files, a faster disk will shorten the time spent scanning the files.
6. Disable background apps when scanning
Background apps also use a great deal of computer resources even when you do not see them; hence, they run in the background while the user does not see them. If you are not aware of background apps, then you should disable the ones you do not use or disable them all if background apps do not concern your computer.
Depending on how many applications you have installed, you may also have a great number of apps running in the background. That could cause slowness when an antivirus is scanning due to additional hardware usage in the background.
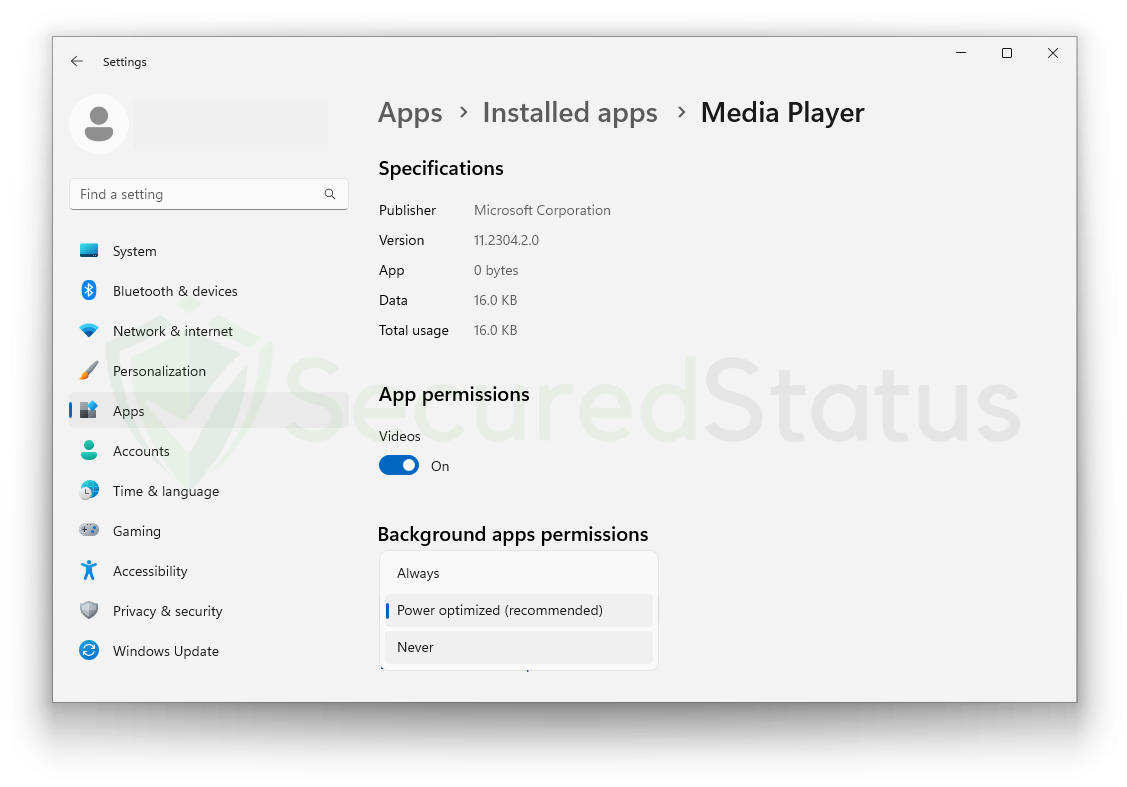
Open Settings and select the Apps from the left panel. Click Apps and Features from the menu. Now search through your programs for intensive ones like utility tools or check them all, then click the three-dot menu next to them and access the Advanced options. From here, you will have Background App Permissions, and you can select it to Never so that it will disable the app from running in the background.
7. Set antivirus priority to high
Reducing hardware usage is one technique to ensure that the antivirus uses all the CPU and RAM, but it’s another thing to ensure that the system acknowledges that the antivirus is a top priority.
You must set the antivirus program’s priority to a high level in order to ensure that the system provides adequate resources to ensure a quick scan. To accomplish this, please follow the instructions given below.
Open Task Manager by pressing Ctrl+Shift+Esc simultaneously, and once it opens, choose Details from the menu.
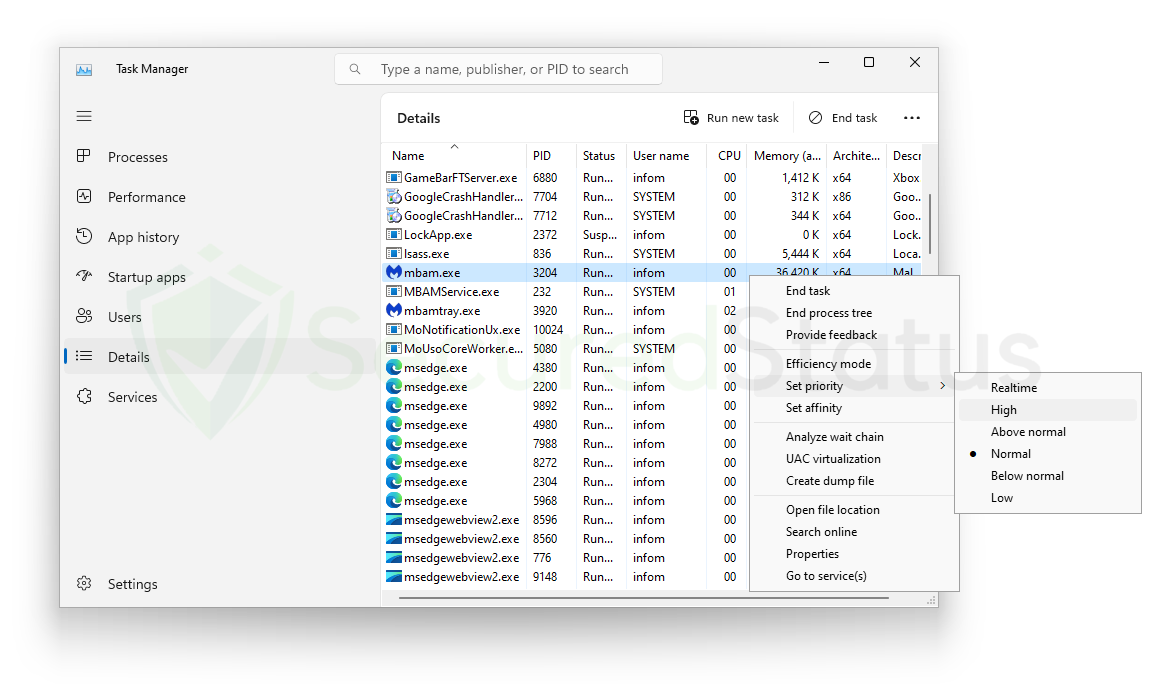
You will see a list of the programs and processes that are currently executing on the computer. Right-click your antivirus program and hover your mouse over the priority setting. For the time being, set it to high priority, and we have to note that the setting is not permanent and will return to normal after you restart the computer.
8. Change power plan to High Performance mode
Most users don’t even configure the computer’s power plan, which is somewhat of a hidden feature for others. Windows does not set every device to high performance mode and has a default option that places the device in normal usage.
You can go to Settings and set it to high performance mode, which makes it faster but also consumes battery more quickly. Users might not be aware of this.
Open Control Panel, choose Power Options from the list of items that appears, and you will be sent to a page where you may choose a power plan.
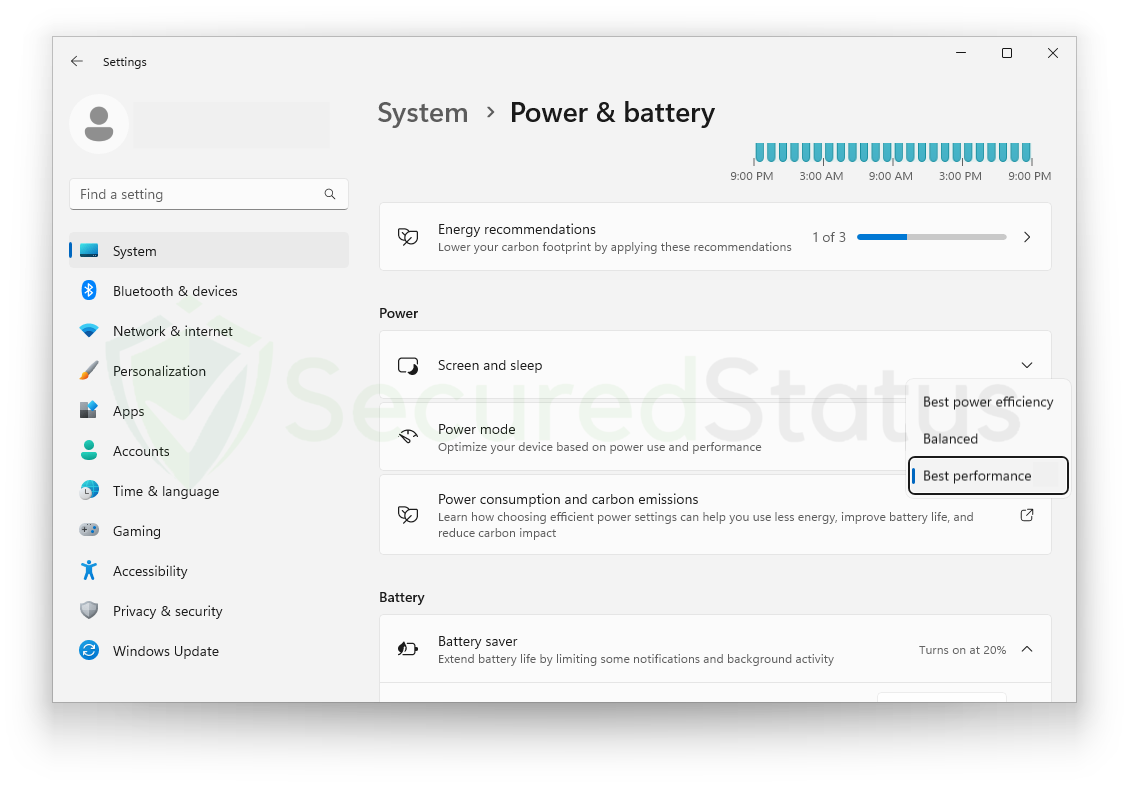
By default, this feature will not change; select the High Performance option, shut the power option window after it is finished, and then start scanning.
9. Run System File Checker and DISM Cleanup before scanning
DISM Cleanup and the command-line tool Windows System File Checker can also be used to verify the stability of all significant system files. Additionally, it checks to determine whether any system files are missing or corrupted by comparing them to their original versions.
To do an SFC and DISM scan, please follow the instructions below.
1. Click the Windows Button from the keyboard and search for CMD,or Command Prompt.
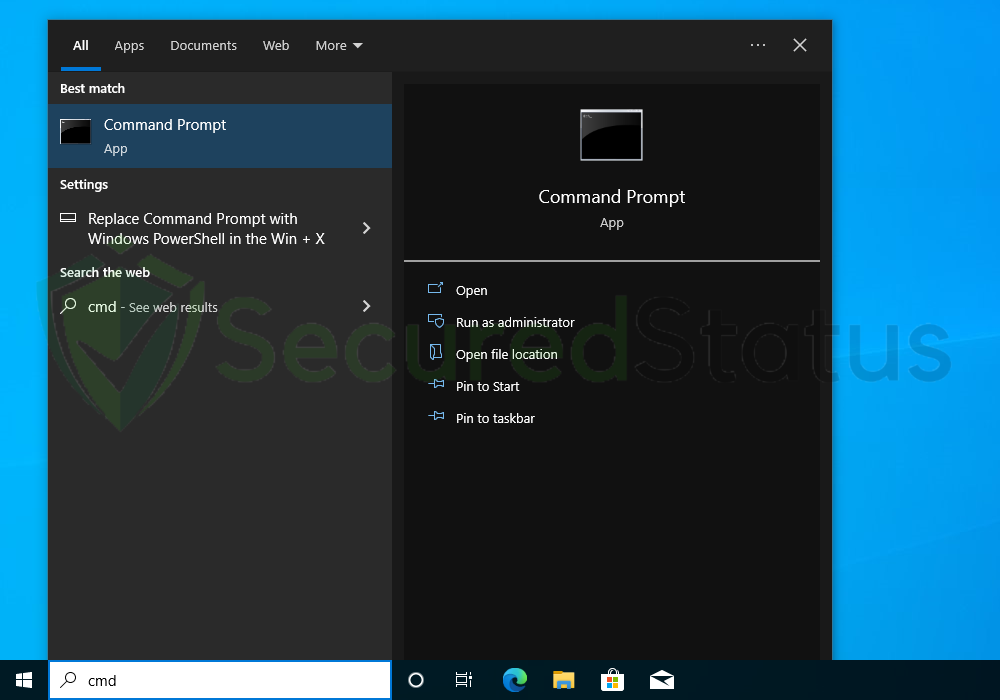
2. Right-click the Command Prompt application and select Run as administrator.

3. The User Account Control confirmation message will pop up; click Yes to proceed.
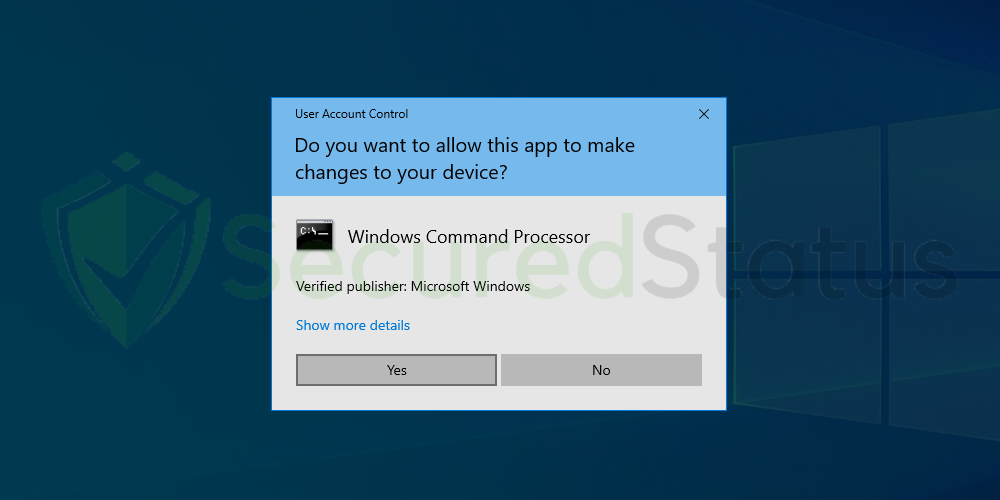
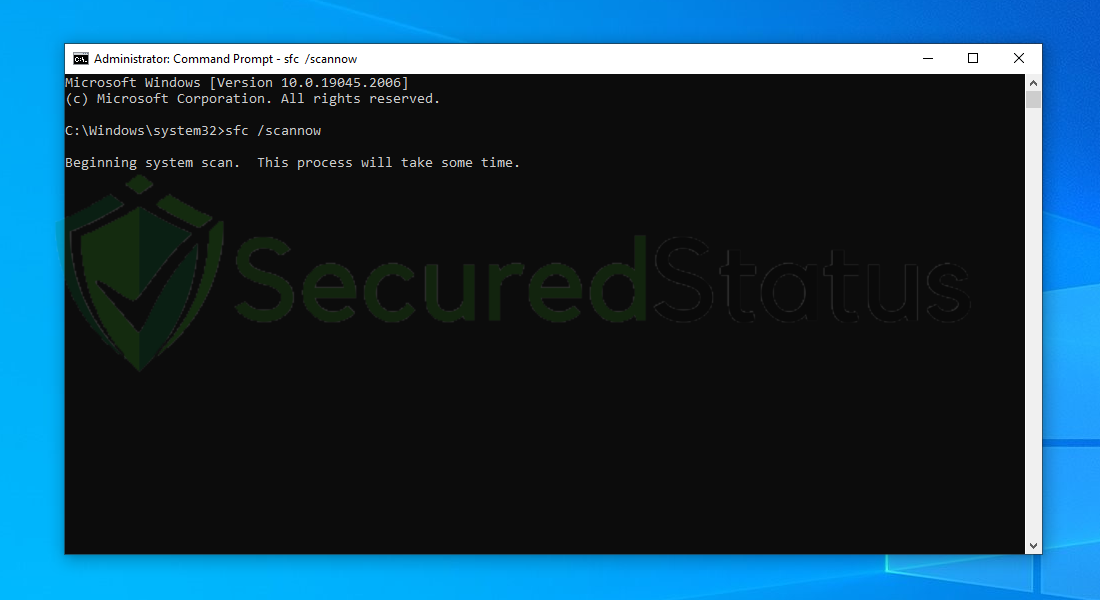
4. Once the Command Prompt opens, type sfc /scannow and hit enter. Please be patient for a few minutes, as the scan will start and could take some time.
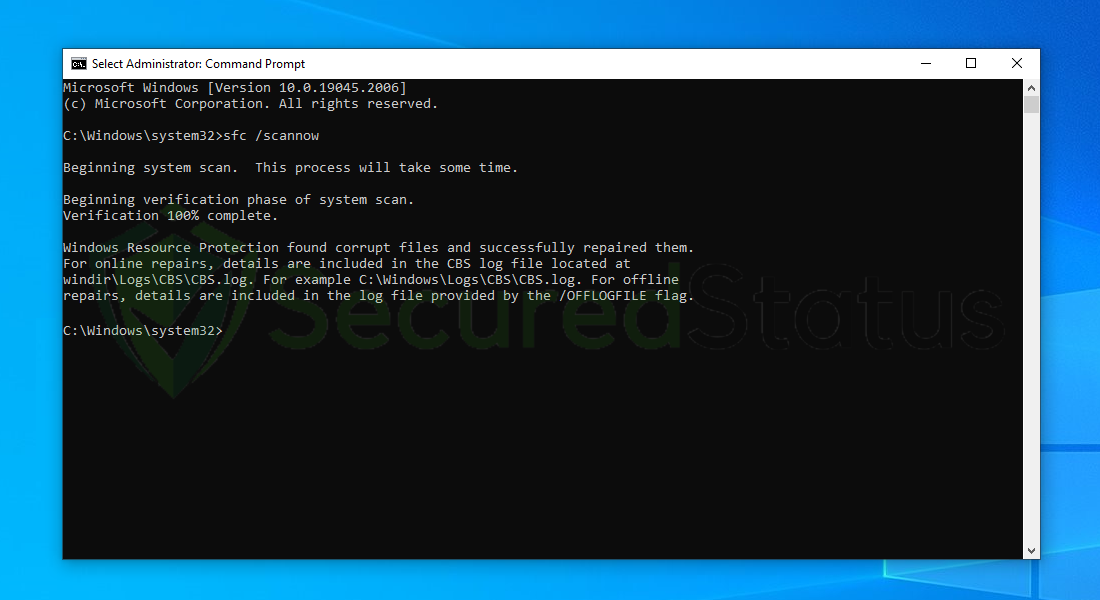
5. After the scanning process, it will report that it has successfully found corrupt files and repaired them.
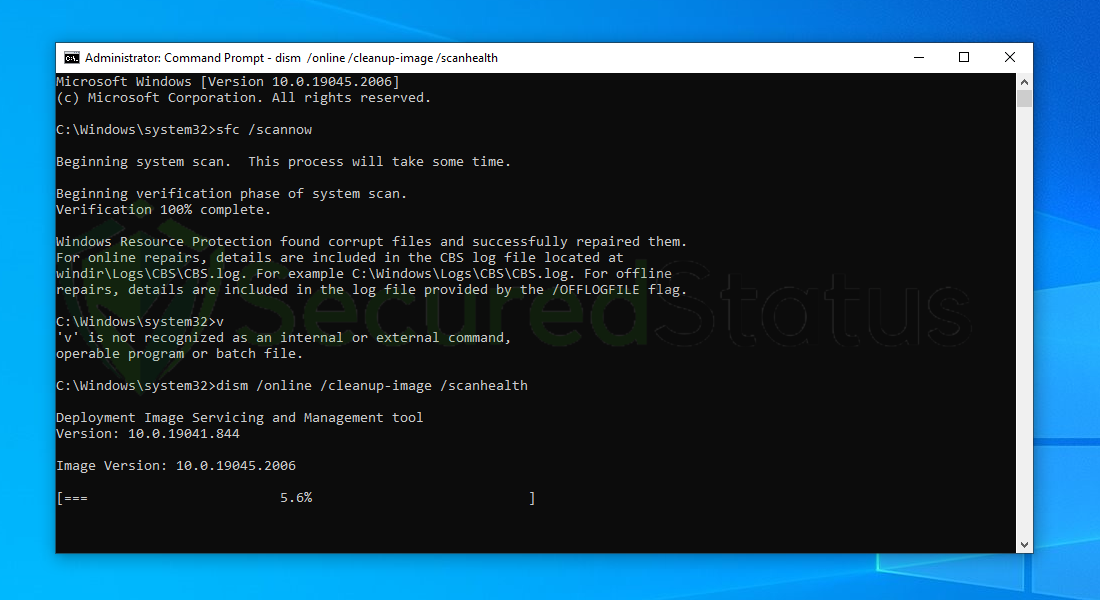
6. Next, use the DISM Cleanup to patch faulty files in the computer system. Type dism /online /cleanup-image /scanhealth onto the command line and hit enter. Wait for a few minutes while it is scanning.
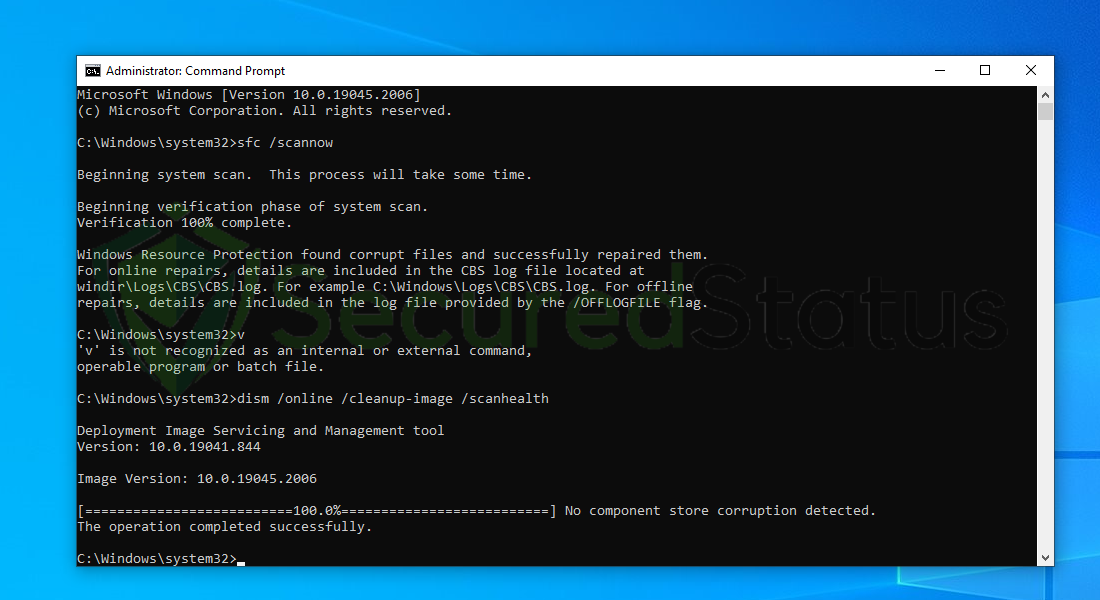
7. After the scan is complete, it will report that the operation was successful and that all corrupted components will be fixed.
8. Lastly, in order to fix serious Windows errors, we will use the restore health command. Type dism /online /cleanup-image /restorehealth and hit enter once again to start the scanning process.
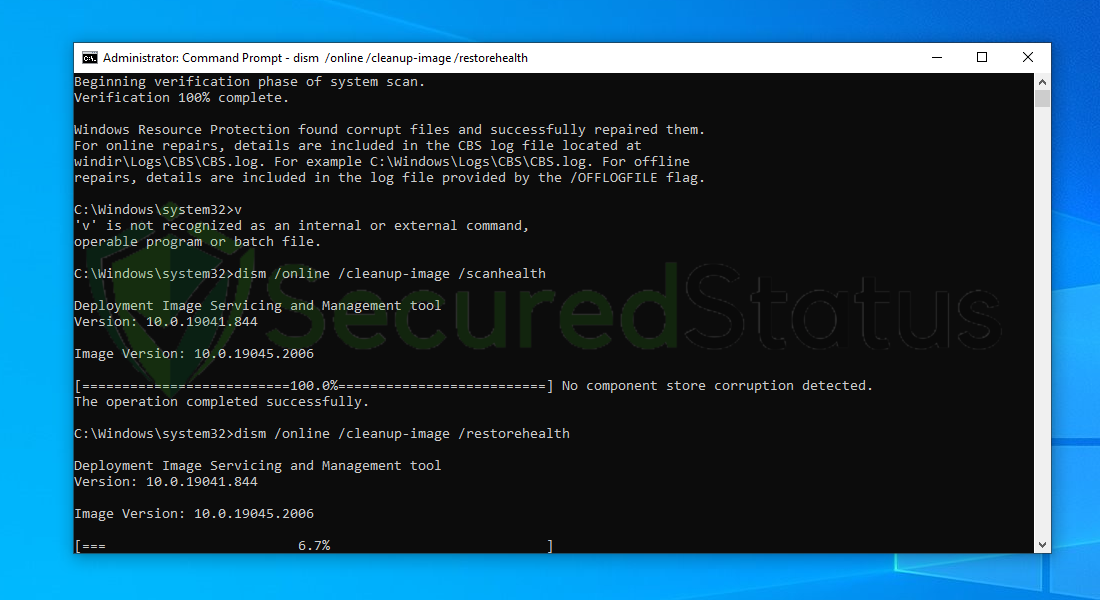
9. Once the scan is complete, it will report that the operation was successful and that corrupted files and entries have been resolved.
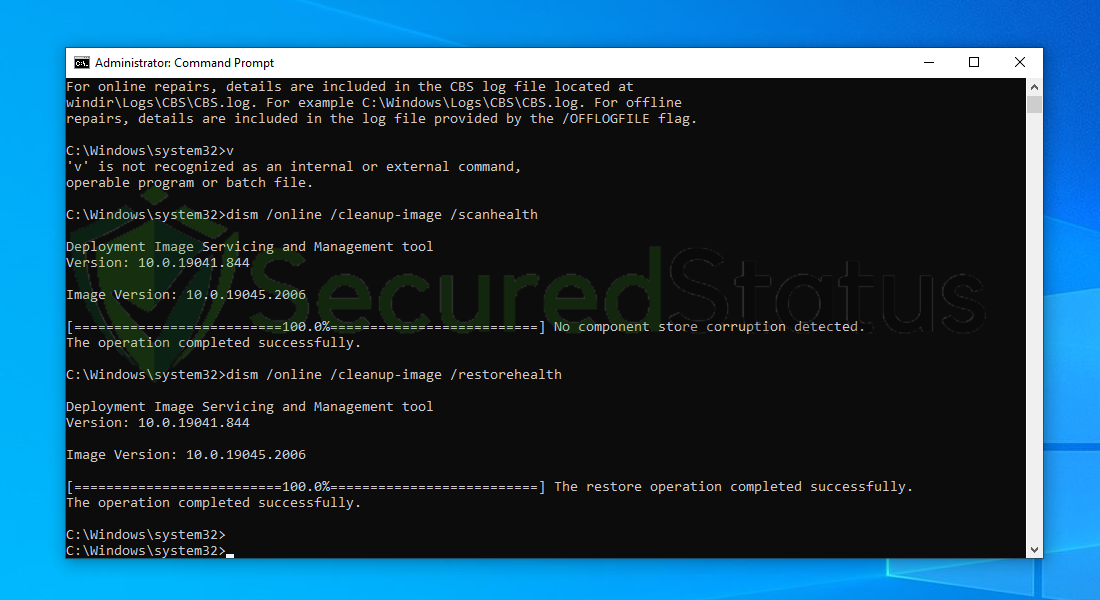
After doing the procedure, you may now try and run an antivirus scan once again and check if there was an improvement in the scan time.
10. Uninstall programs you do not use
Since antivirus software must check all of a computer program’s files and registry, programs with large file sizes should be uninstalled if you don’t use them frequently and don’t believe they contain malware in order to speed up antivirus scanning.
For instance, you can delete games that take up more than 100GB of space if you don’t play them to prevent needless scanning of those files from increasing scanning time.
If the programs come from reputable developers and aren’t intended to be malware, you can also exclude them from scanning, unless you’ve downloaded mod packs and customizations from outside sources.
Conclusion
If you have a problem with the scanning process taking hours or days, the solutions stated above will enable your computer and antivirus to scan for malware faster.
While the problem may be brought on by a number of different factors, we have outlined a few solutions to help people in this situation. Additionally, if you use all of the methods mentioned, the scanning time can significantly be reduced.
