Given how advanced technology is today, cybercriminals employ malware to infect users with their malicious programs, which have a terrible and damaging impact on the end user who has been infected.
This is done by utilizing their knowledge of coding and programming. Every computer user has long struggled with malware, and despite antivirus software’s claims that it has been eliminated, we will always have concerns that it may still be lurking in the background of our computer system.
We cannot rest easy knowing that they could still be inside the computer, aware of what we are doing, and could launch an attack at any time.
That is why it is necessary to thoroughly inspect the system once again in order to determine whether a virus has been totally removed from the computer. To be sure a virus has been successfully eliminated, follow these steps:
Double check by scanning the system with up-to-date antivirus software: The initial step is to do a thorough scan of the system using up-to-date antivirus software. Any lingering infections on the system will be easier to find thanks to this. If you have already done a scan before, try doing so with a different antivirus since they have different threat and signature databases to detect malware in the system.
Check for suspicious processes: Look for any suspicious or unknown processes in the list of active processes on the system. Malware frequently starts background activities that are simple to miss. It is crucial to remember that discovering such processes can be challenging for normal users; look for processes using a lot of hardware.
Look for modified system files: Malware frequently modifies or replaces system files, therefore it’s crucial to make sure that all of them are in their original configuration.
Check the registry: The Windows operating system’s crucial registry is a frequent target for malware. Check to see whether the registry hasn’t been harmed or altered by the infection. Even though it could be challenging, manual verification is required to ensure malware is completely removed. Look through these directories where malware is most likely to be hidden:
- HKEY_LOCAL_MACHINE\Software\Microsoft\Windows\CurrentVersion
- HKEY_CURRENT_USER\Software\Microsoft\Windows\CurrentVersion
Keep an eye on network activity: Keep an eye on network traffic to spot any odd activities. This can assist in locating any persistent malware that is in contact with outside command and control servers.
Here is a step-by-step guide on how to confirm that all malware on the device has been totally eliminated for those who are not very tech-savvy.
Step 1: Conduct a malware scan with a powerful antivirus.
We recommend using Malwarebytes Anti-malware because we have determined that it can remove most types of malicious threats when we conducted malware tests.

Malwarebytes also offers a free 14-day trial when you download it for the first time, so you might want to use the remaining time of the trial to test out the premium features.
1 Click the button above to download the latest version of Malwarebytes Anti-malware.

2 Open the installation file after the download and follow the procedure shown.
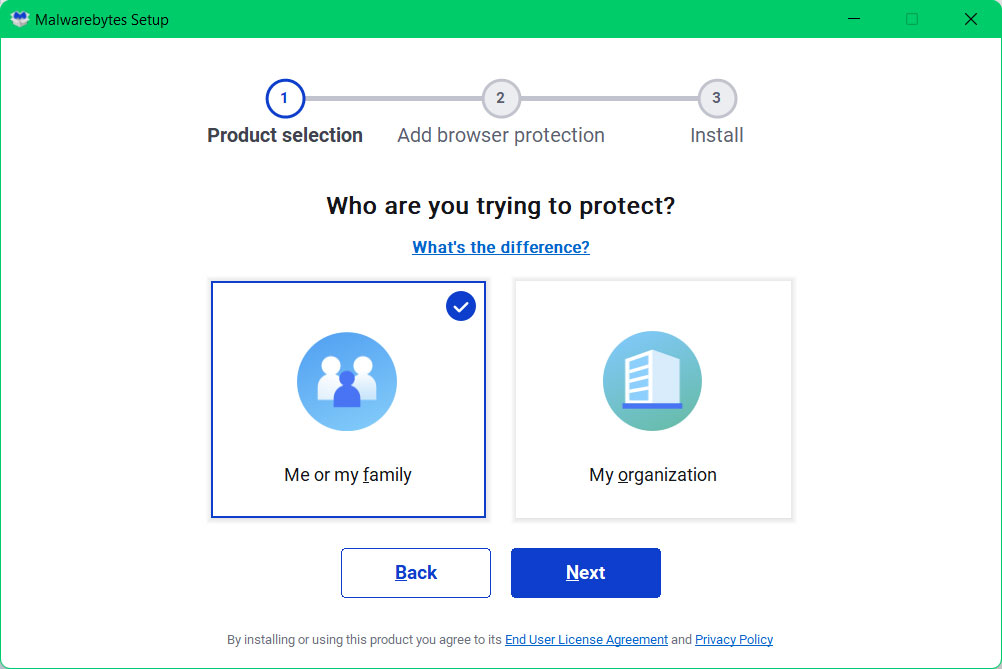
3 After following the software setup instructions, wait for the application to finish installing.

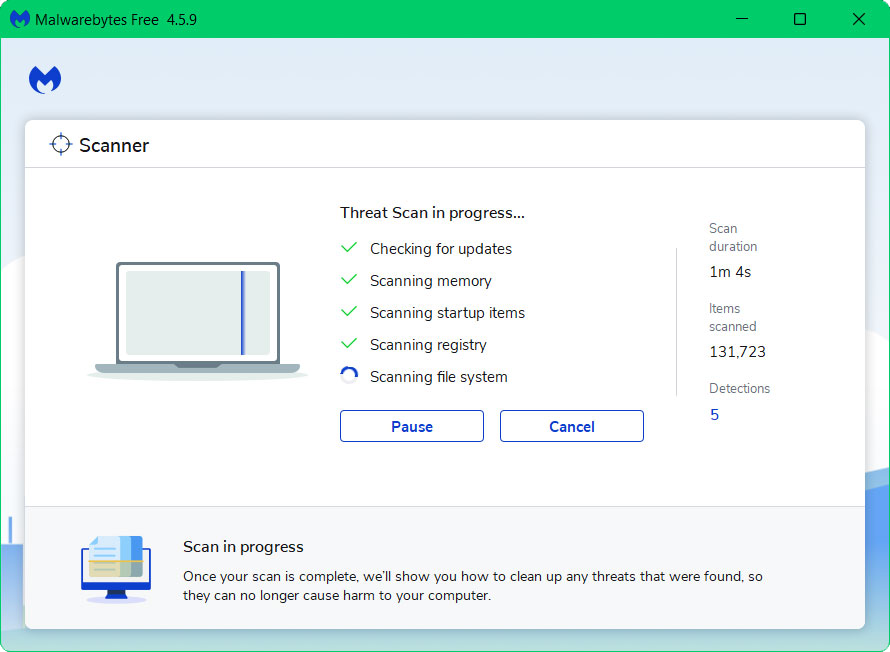
4 Once the application is installed, you may now run your first computer scan and wait for it to finish.
5 All discovered malware on the computer will be displayed on the screen, and you can eliminate them by pressing the “quarantine” button.
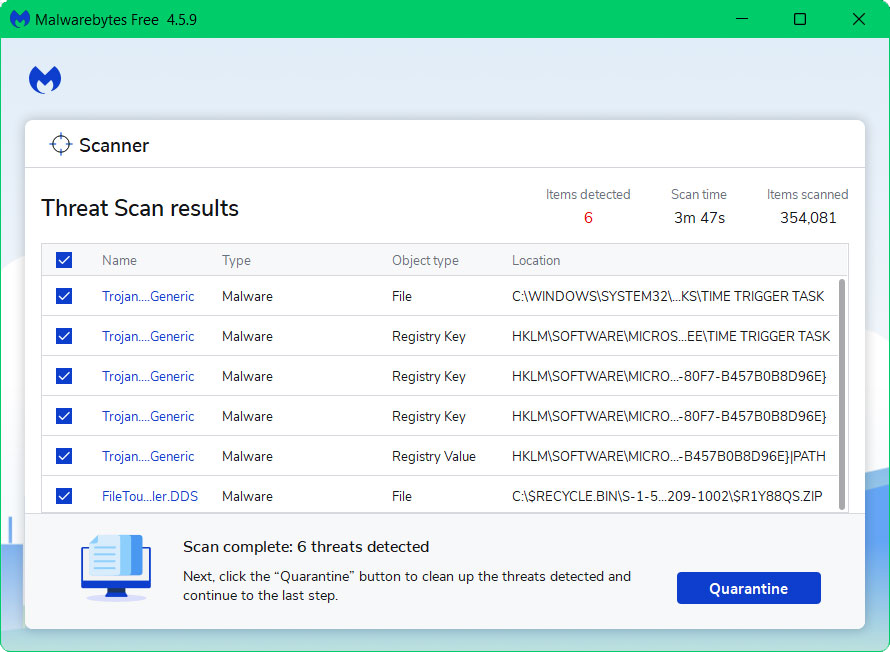
Any hidden malware that might have been lurking on your system has been removed, and any changes it made to the system have been reversed. You could ensure that your device is completely virus-free.
Alternative: Utilize Kaspersky Antivirus
As we have previously stated, there may be instances where a different antivirus can find something another antivirus cannot.
If you visit numerous forums and websites, you will see most users agree that Kaspersky is one of the best antivirus tool available. .

Since each antivirus application has its own threat database, Kaspersky’s detection technology may be able to find viruses that the prior program missed.
To ensure sure viruses are totally and undetectably removed from the system, we advise running a scan just in case. If you are downloading the application for the first time, you will also receive a 31-day premium trial.
1 Download the Kaspersky Security Cloud by clicking the button above.

2 Once the setup has finished downloaded, open the file and start the installation.

3 Wait until the wizard finds the latest version of the application or click Skip to install the current version stored.

4 Review the License Agreement. If you agree to its terms, click Continue.

5 Follow the installation instructions as shown then finally click install. (You may choose to uncheck the options shown if you do not want those features.)

6 Wait for the application to finish installing, then after the process is complete, click done.

7 Apply the recommended settings then start the application by clicking apply. Feel free to untick the options you do not desire.

8 You will be prompt to create an account and once you are finished, you will be redirected to the main screen. Select the Scan tab then click the run full scan and wait for it to complete. (Before scanning, we recommend you update the database to ensure any new malware variants are detected.)

9 After the scan has finished, the detected threats will be deleted from the computer.

Step 2: Use System File Checker and DISM Cleanup
DISM Cleanup and the command-line tool Windows System file checker can be used to verify the stability of all significant system files. Additionally, it checks to determine whether any system files are missing or corrupted by comparing them to their original versions.
1 Click the Windows Button from the keyboard and search for CMD or Command Prompt.
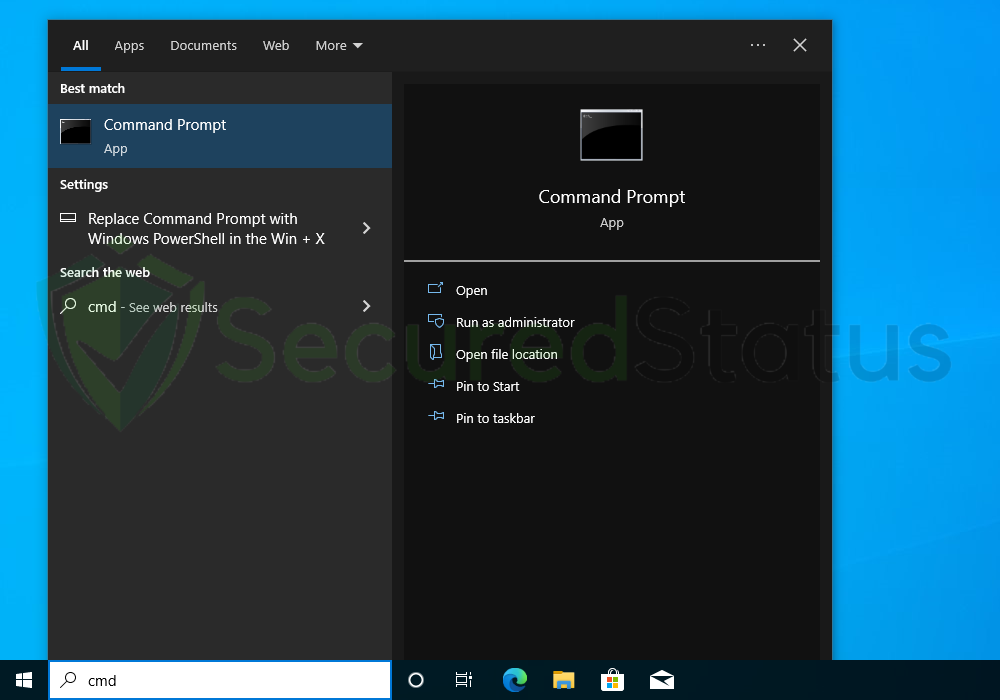
2 Right click the Command Prompt application and select Run as administrator.

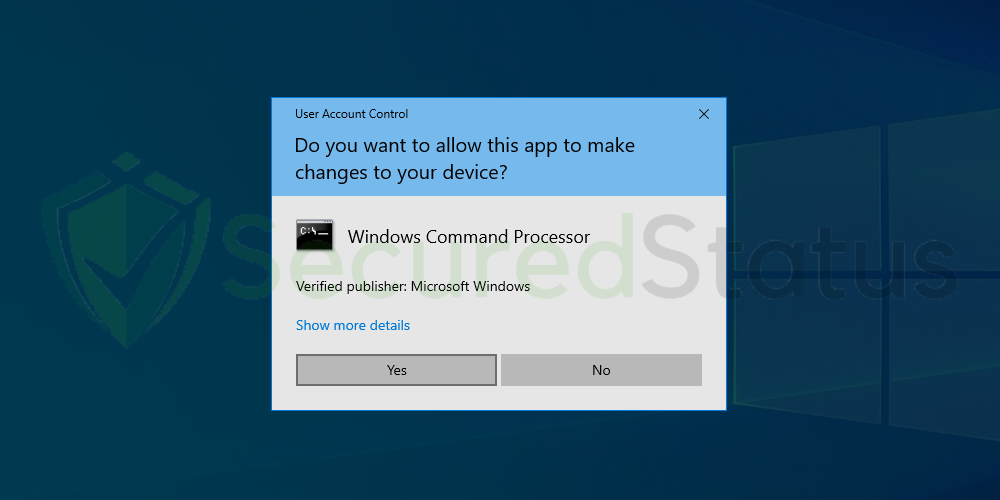
3 The User Account Control confirmation message will pop-up, click Yes to proceed.
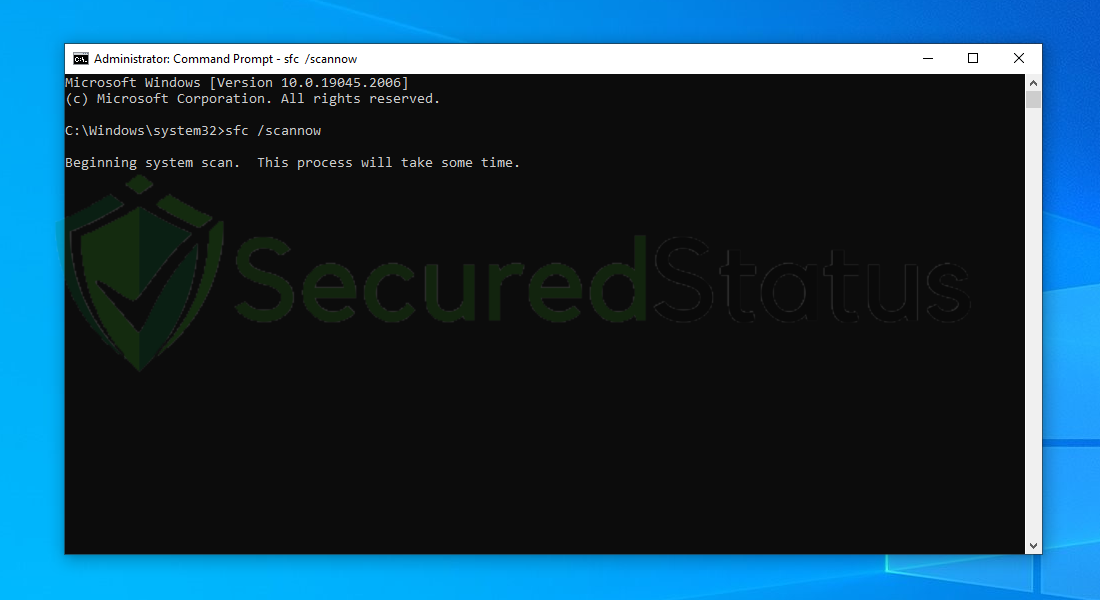
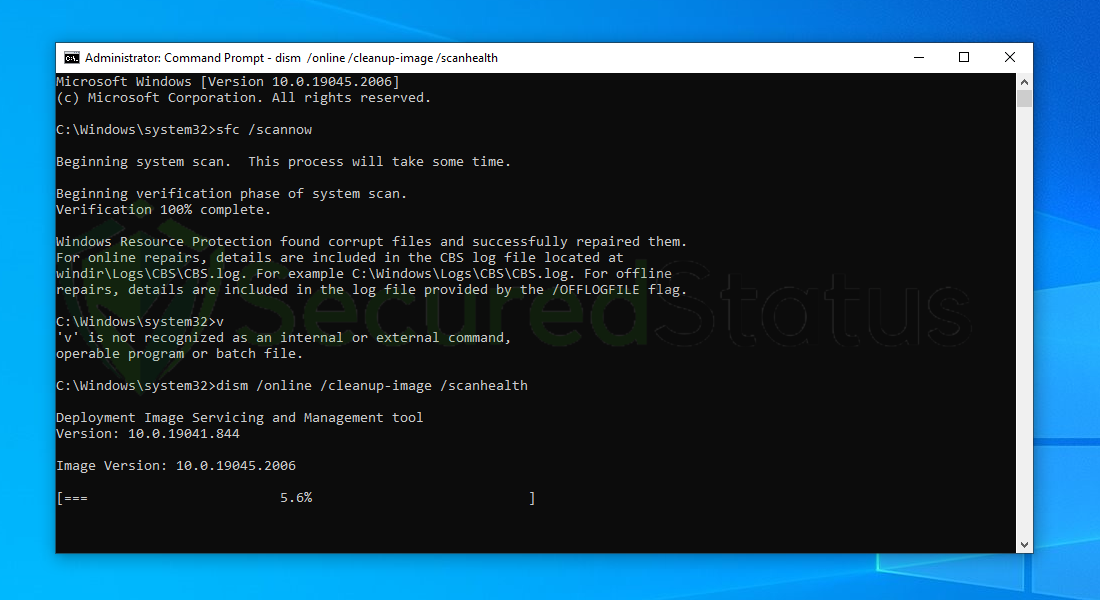
4 Once the Command Prompt opens, type sfc /scannow and hit enter. Please be patient for a few minutes as the scan will start and could take some time.
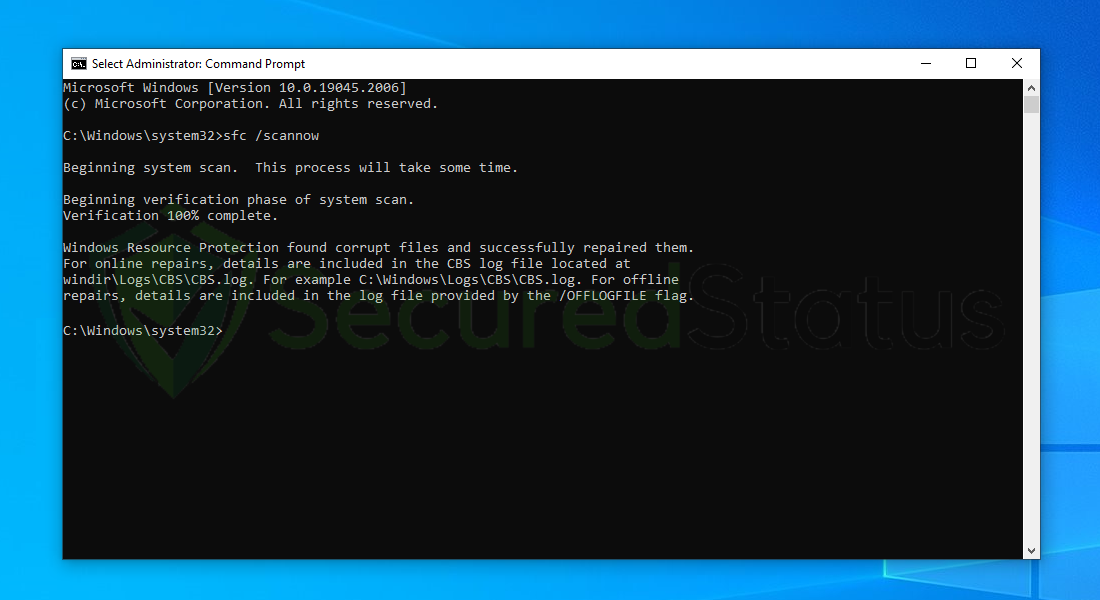
5 After the scanning process it will report that it have successfully found corrupt files and have repaired them.
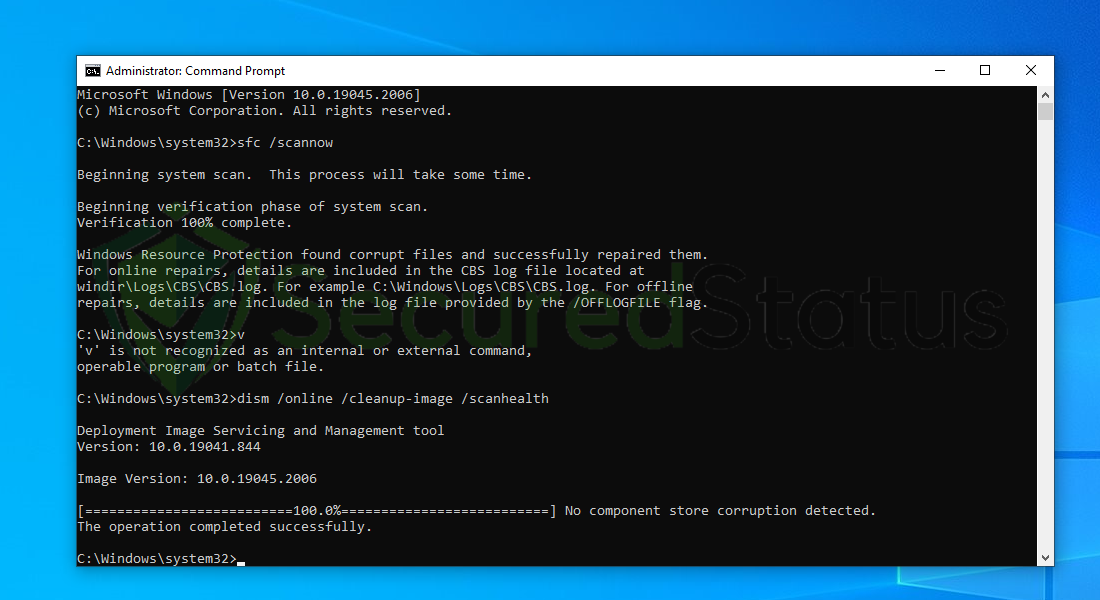
6 Next is to use the DISM Cleanup to patch faulty files in the computer system. Type dism /online /cleanup-image /scanhealth onto the command line and hit enter. Wait for a few minutes while it is scanning.
7 After the scan is complete, it will report that the operation is successful and that all corrupted components will be fixed.
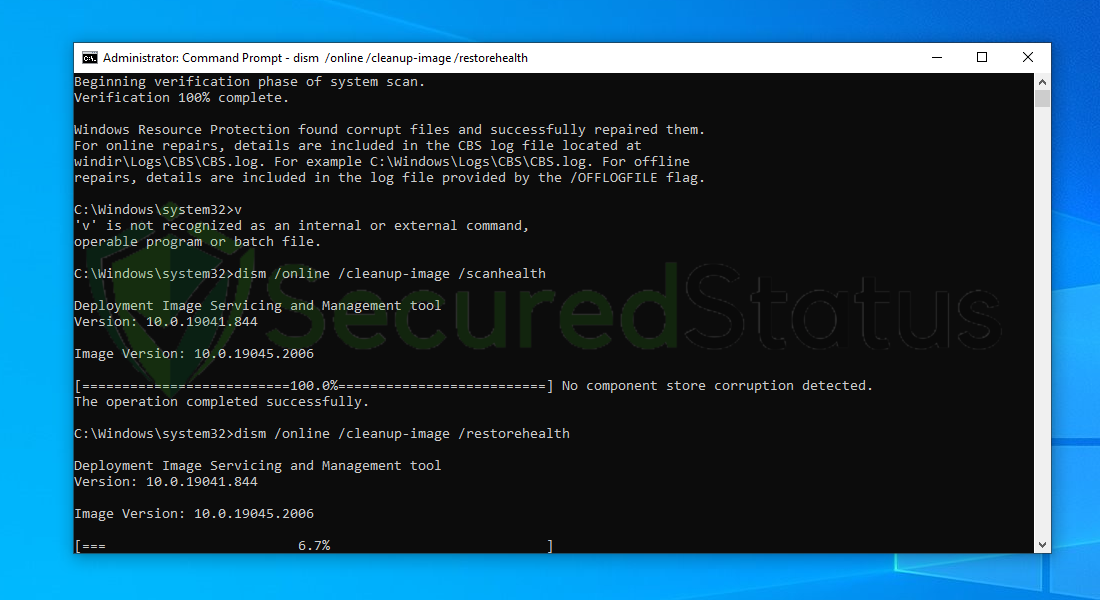
8 Lastly, in order to fix serious windows errors, we will use the restore health command. Type dism /online /cleanup-image /restorehealth and hit enter once again to start the scanning process.
9 Once the scan is complete, it will report that the operation was successful and corrupted files and entries are resolved.
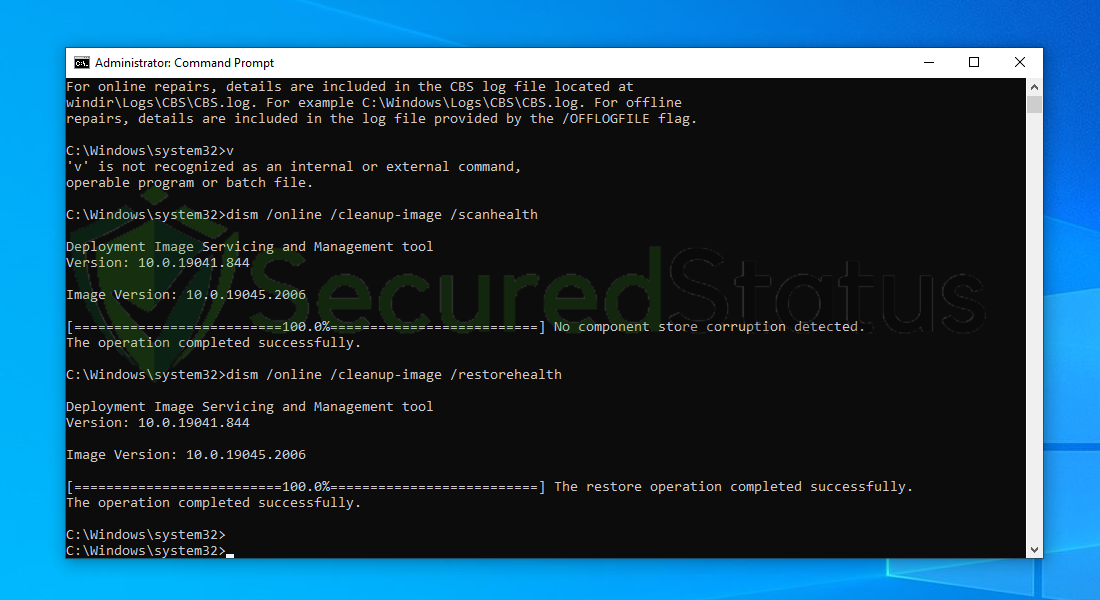
Since we performed a DISM cleanup, all malware that was still present in the system has been eliminated, and any damage it had caused to the Windows system files has been repaired. You can rest assure that all malware has been totally removed from your PC.
