Sorry, This Application cannot run under a Virtual Machine is an error message that means the program has identified your machine as a Windows system emulator.
If users do launch certain apps inside of a virtualized environment, they typically get this problem. However, there have been instances where people have experienced this problem while using physical computers.
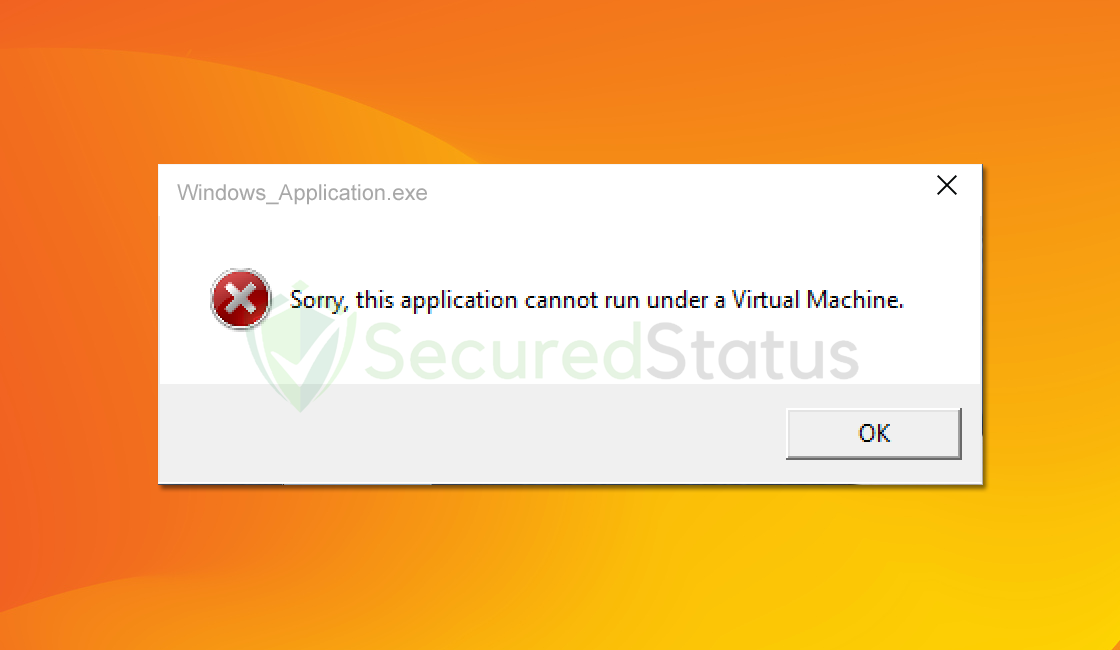
To distinguish a virtual machine from a real computer system, an application must take into account a variety of variables such as:
Device Name: You should check to see if you have personalized your computer’s name or if you haven’t changed it yet since you purchased it. If the device is named too generically and by default, such as “Computer” or “Device,” it may be identified as a virtual machine.
Files and Processes: Applications may check to verify if the system’s currently active processes and services are the default Windows system and if any new/third-party apps are installed. Whether you have fewer apps, the system can be mistakenly identified as a virtual machine because there aren’t as many processes, therefore you should check if that’s the case.
Previously Installed a Virtual Machine: The possibility that you have installed a virtual machine in the past could potentially affect whether or not your device is identified as one. Anything that has the words “Virtual” or “Machine” in it could be mistaken for one. If you had previously installed a VM application, you should examine your system for anything with the associated phrase because often VM apps create a registry containing such terms.
Using an Illegitimate/Cracked Windows Copy: A cracked version of Windows is one that has been altered to run on a computer without going through Microsoft’s product activation process. Processes and system files that have been altered can cause the machine to differ from a genuine copy. A nulled or pirated copy of the operating system may be to blame if a program notices something different on the system.
The instructions below will assist you to resolve the VM problem and eventually start the application, regardless of whether you are using a virtual environment or on an actual Windows PC.
Fix “This Application cannot run under a Virtual Machine” Error
Our team has tried and tested each of the methods listed below; if one doesn’t work for you, try the next one until the issue is resolved.
Method 1: Modify SystemBiosVersion in Regedit
Note: Before proceeding with the steps, make sure you are using the administrator account of the computer.
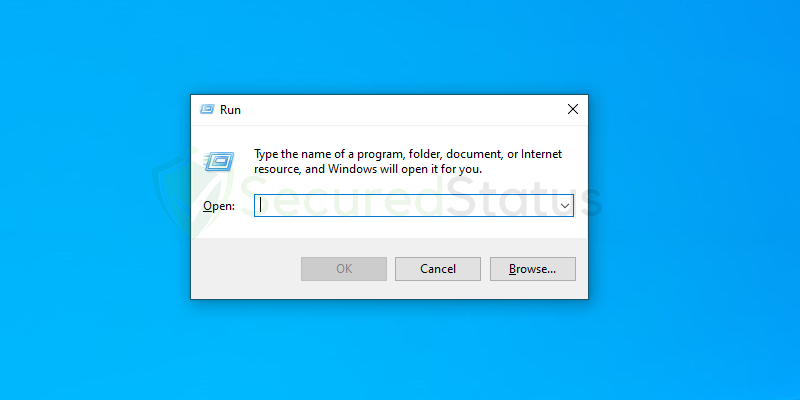
1 Type the Windows Key and R at the same time to open the Run application.
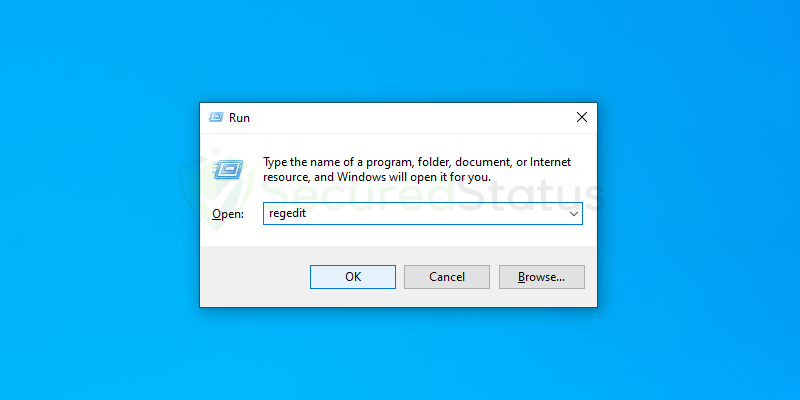
2 Once the Run terminal has opened, type regedit and click OK.
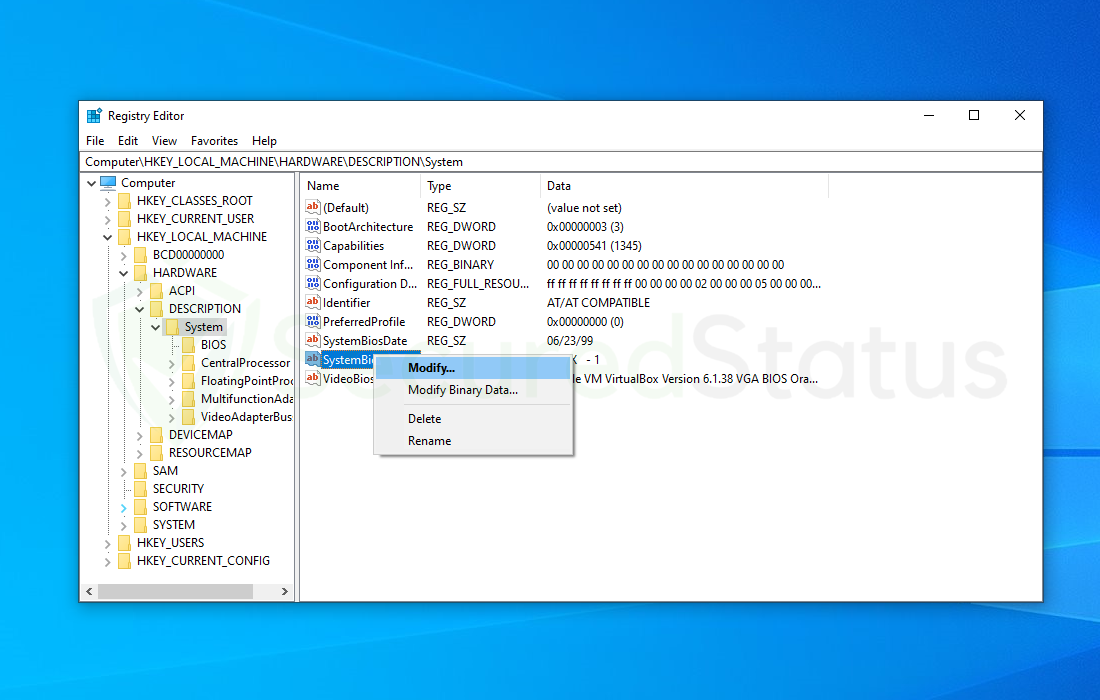
3 When the Registry Editor application launches, hover to the following directory: HKEY_LOCAL_MACHINE\HARDWARE\DESCRIPTION\System
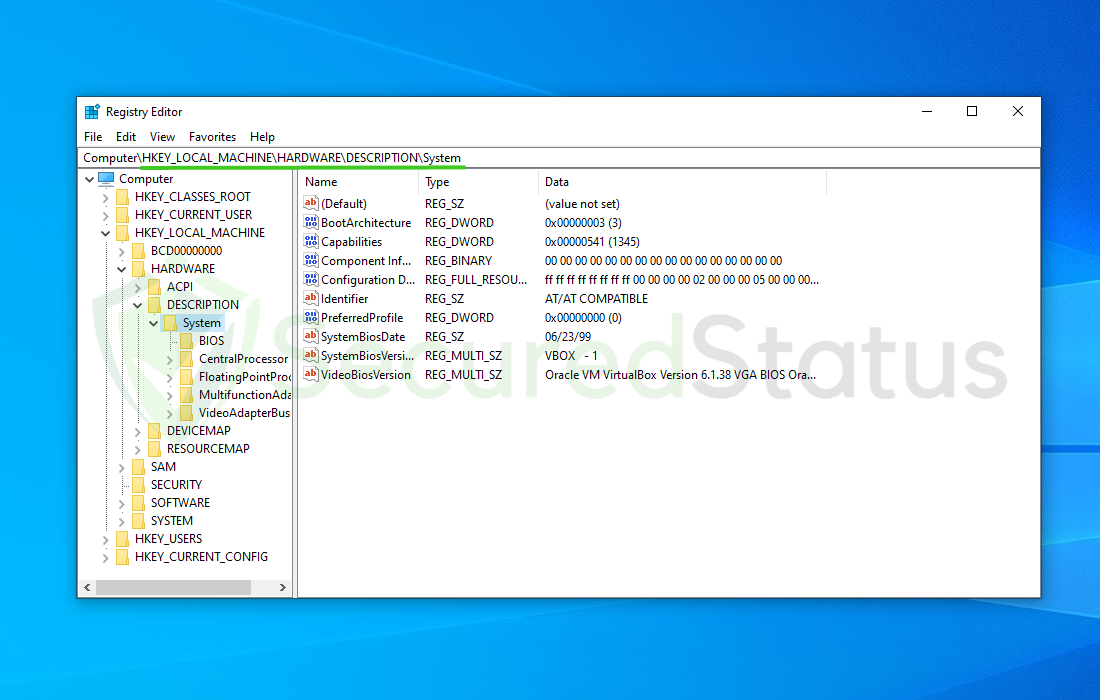
4 Right-click the SystemBiosVersion and select Modify.
5 Change the Value data from whatever is written into NOBOX -1 then click OK.
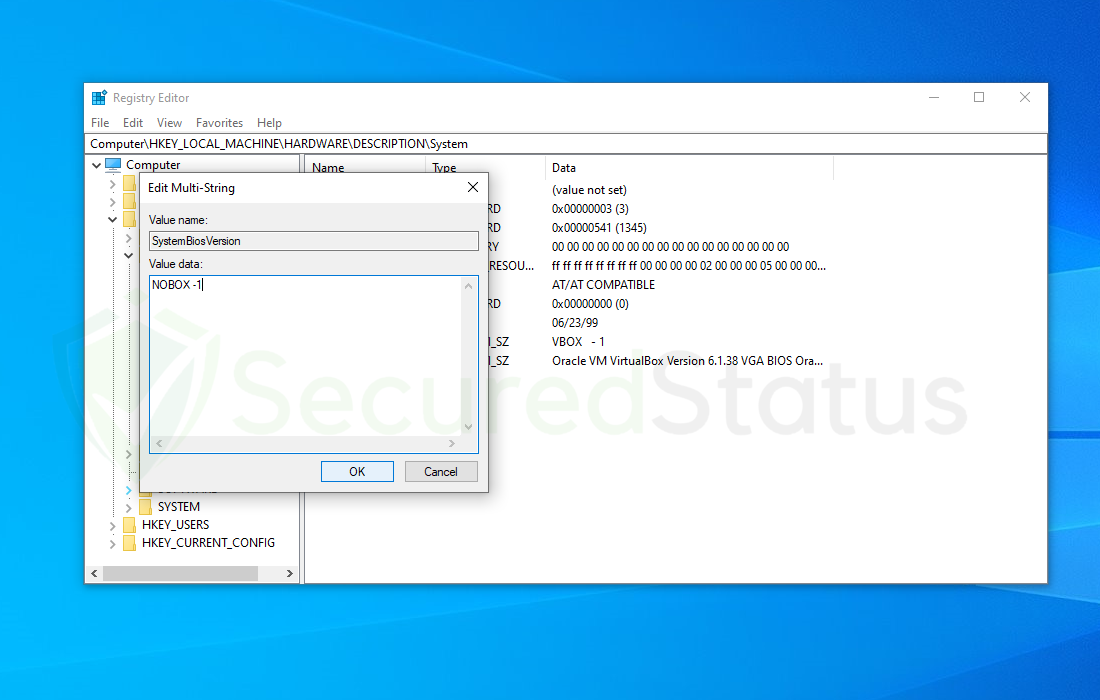
As stated earlier, make sure you are modifying the registry while in the administrator account otherwise the changes you made will be reverted once the system is rebooted.
Method 2: Turn Off the Windows Hypervisor Platform
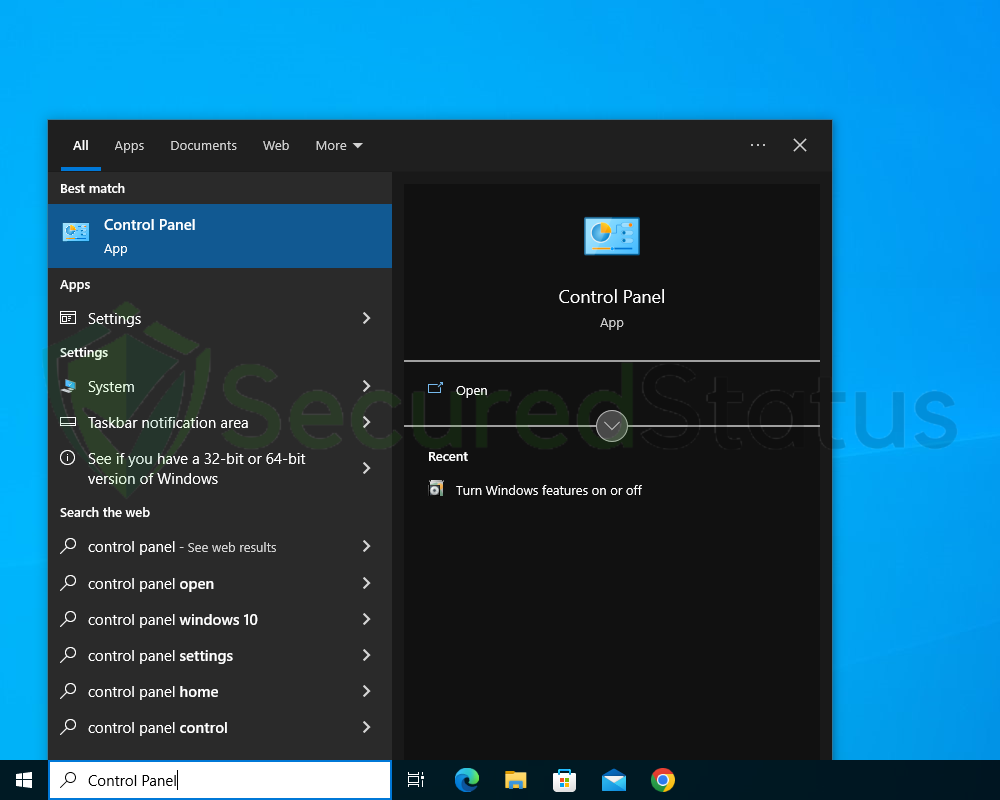
1 Type Control Panel in the Windows search bar and open the program.
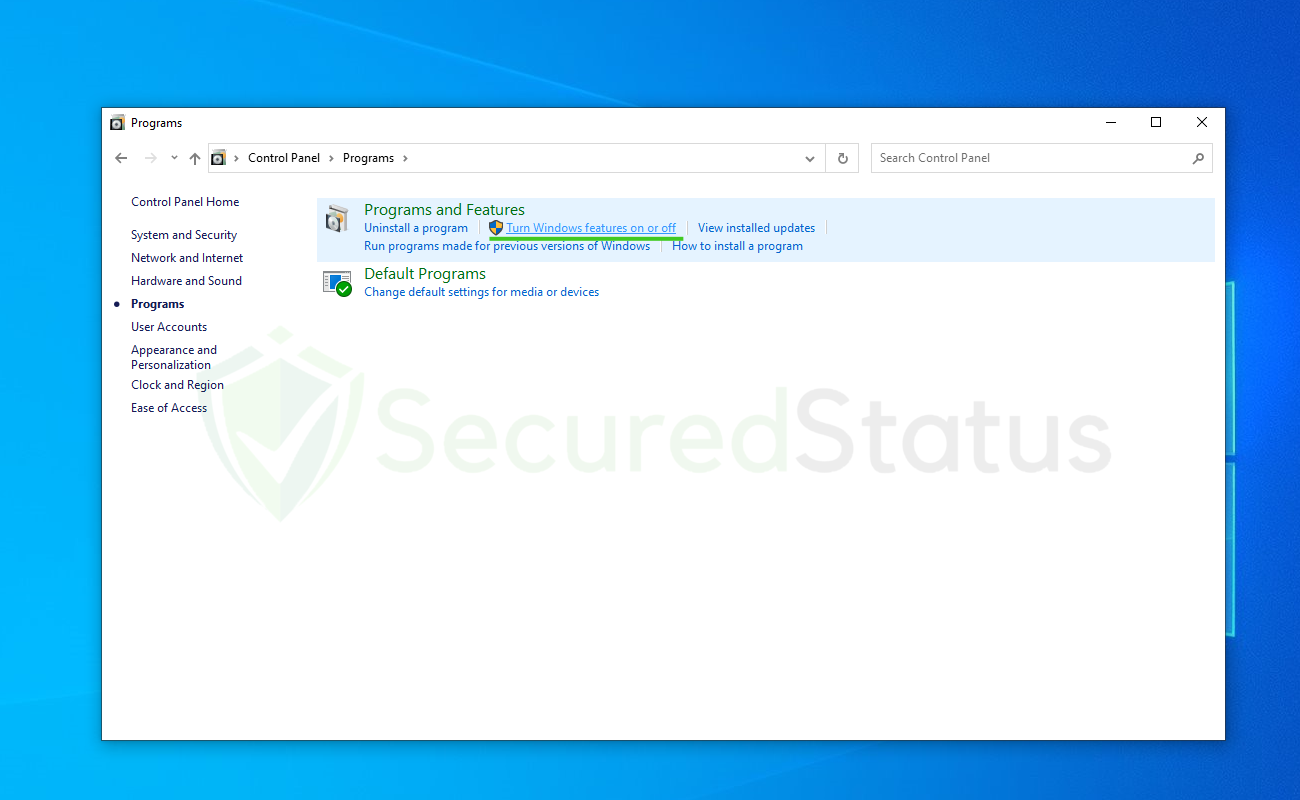
2 Once Control Panel opens up, click Programs and select Turn Windows features on or off under the Programs and Features option.
3 Scroll down and find Windows Hypervisor Platform, uncheck the said feature, and hit OK.
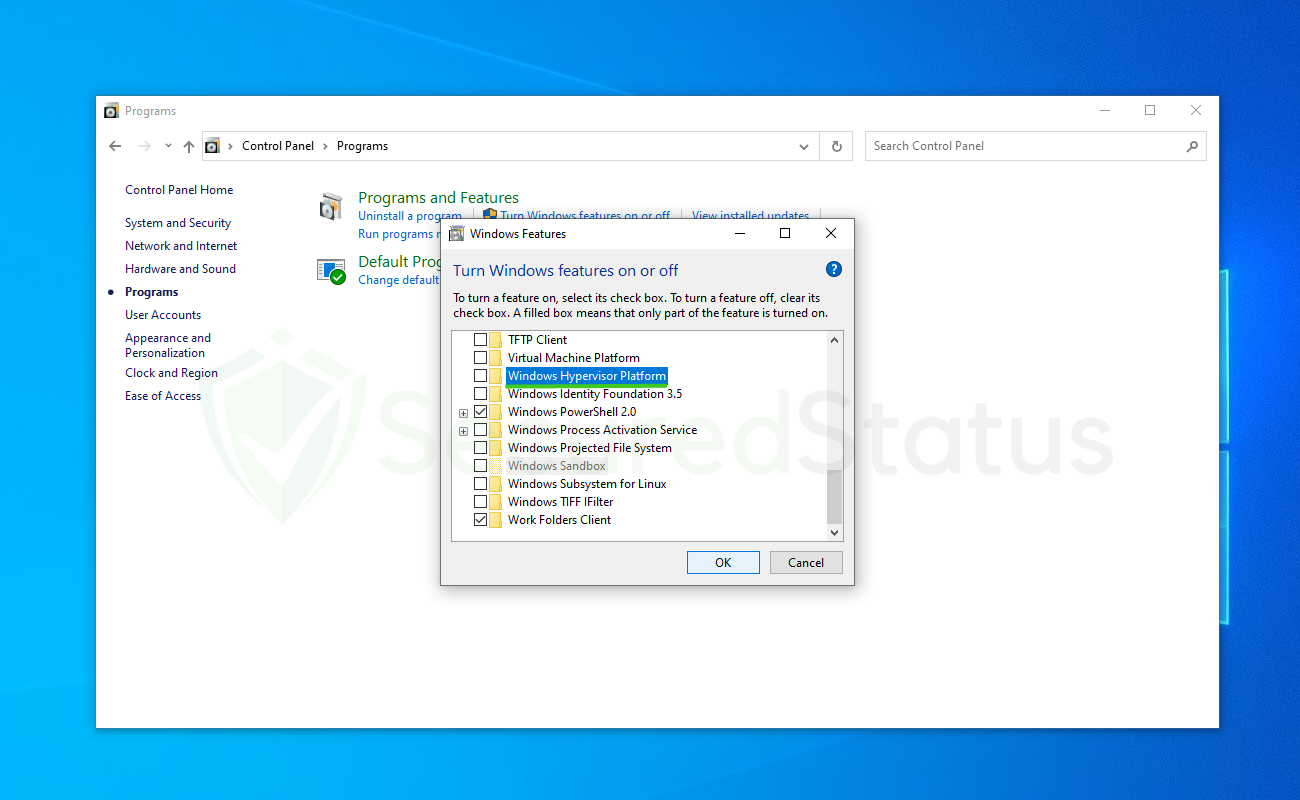
4 Wait for the changes to apply and once it is complete, restart the computer and the application should finally run.
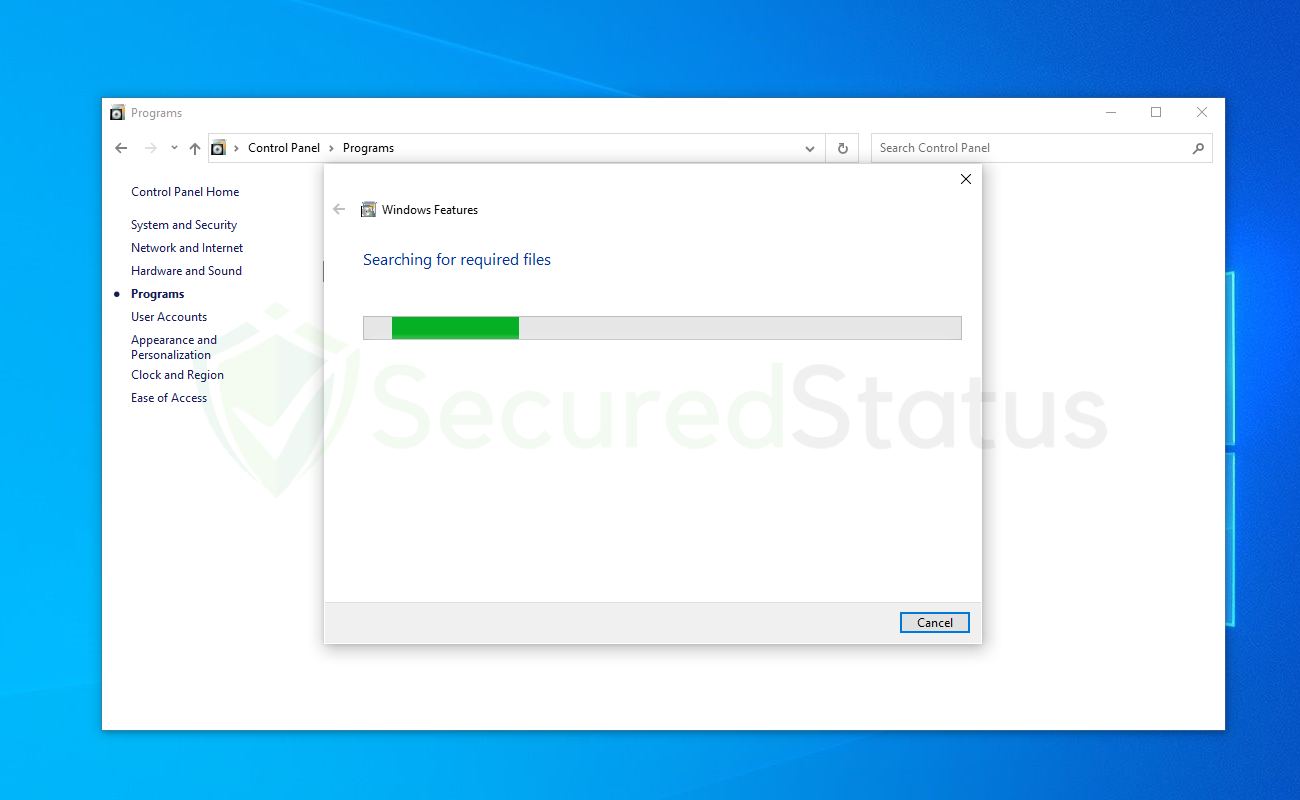
If you tried this and it did not work for you, you can try the other methods listed below. The next approach also needs administrator access to ensure that modifications are retained even after a reboot.
Method 3: Modify Driver Description in the Registry Editor
1 Open Registry Editor once again by clicking Windows Button + R at the same time. Then type regedit and hit OK.
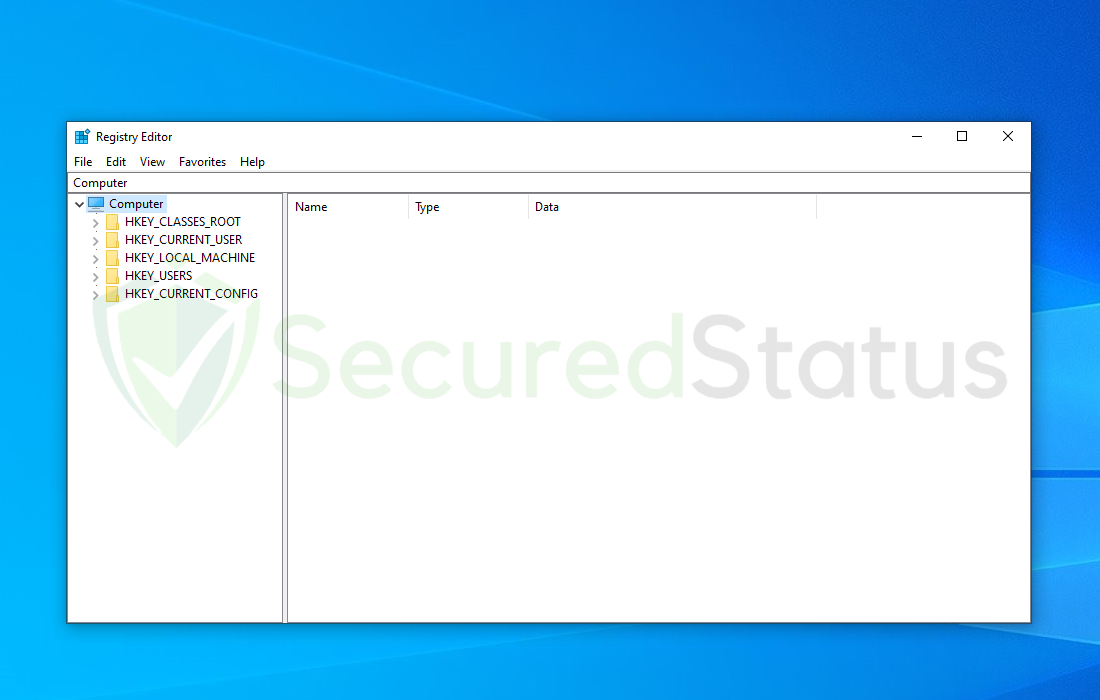
2 Open the directory HKEY_LOCAL_MACHINE\SYSTEM\CurrentControlSet\Control\Class\{4d36e968-e325-11ce-bfc1-08002be10318}\0000
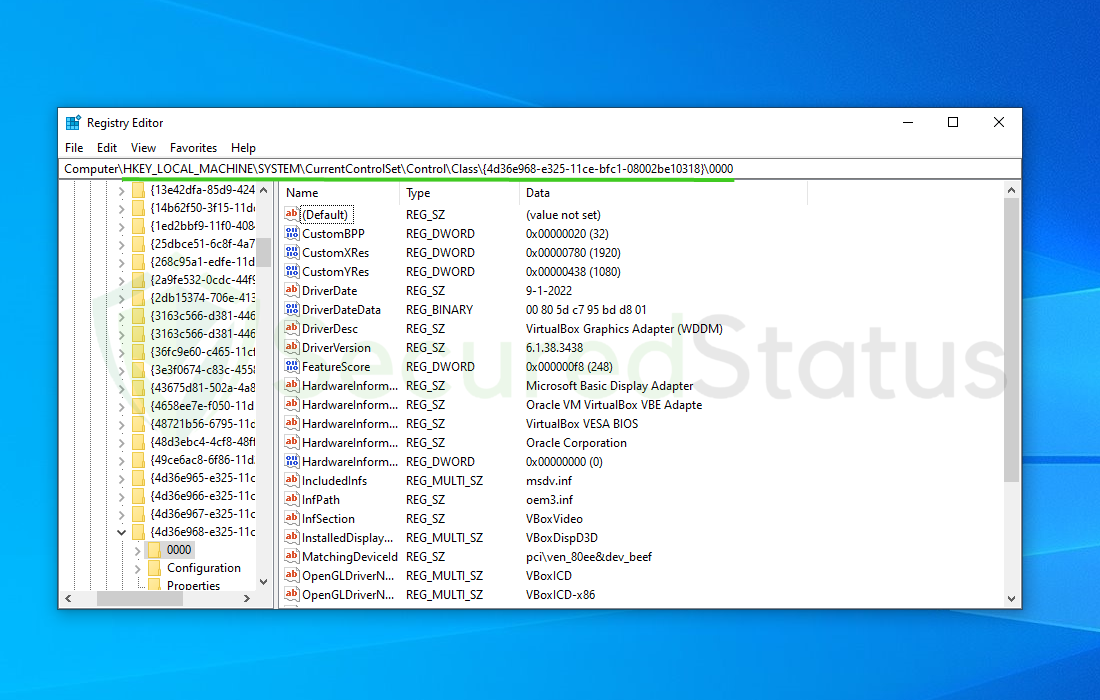
3 Right-click DriverDesc from the following registries and select Modify. (If you cannot find it, search different folders such as 0001, 0002, etc.)
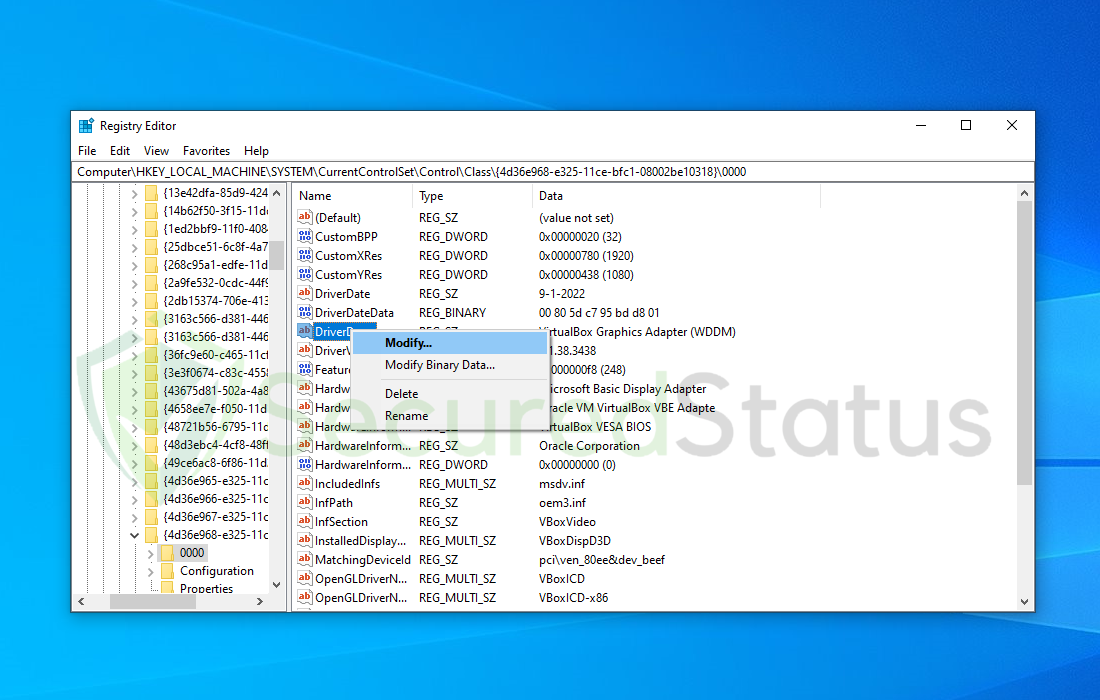
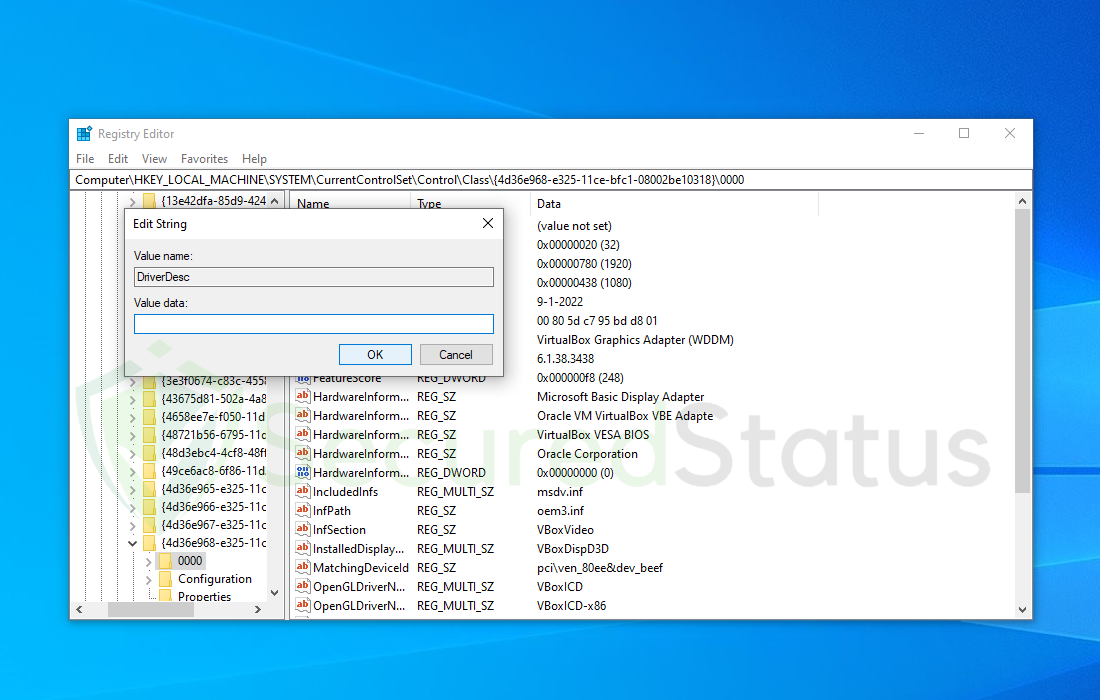
4 Delete everything inside the Value data and click OK.
Method 4: Scan for Malicious Viruses (For Physical Machine Only)
Although it may appear unnecessary, malware in the system can alter system files and the registry, which can lead to malfunctions.
They can insert themselves into crucial system processes that could result in an error. It could be beneficial to periodically scan your system for malware if you are seeing the VM error on a physical Windows PC.
We recommend using Malwarebytes Anti-malware because we have determined that it can remove most types of malicious threats when we conducted malware tests.

Malwarebytes also offers a free 14-day trial when you download it for the first time, so you might want to use the remaining time of the trial to test out the premium features.
1 Click the button above to download the latest version of Malwarebytes Anti-malware.

2 Open the installation file after the download and follow the procedure shown.
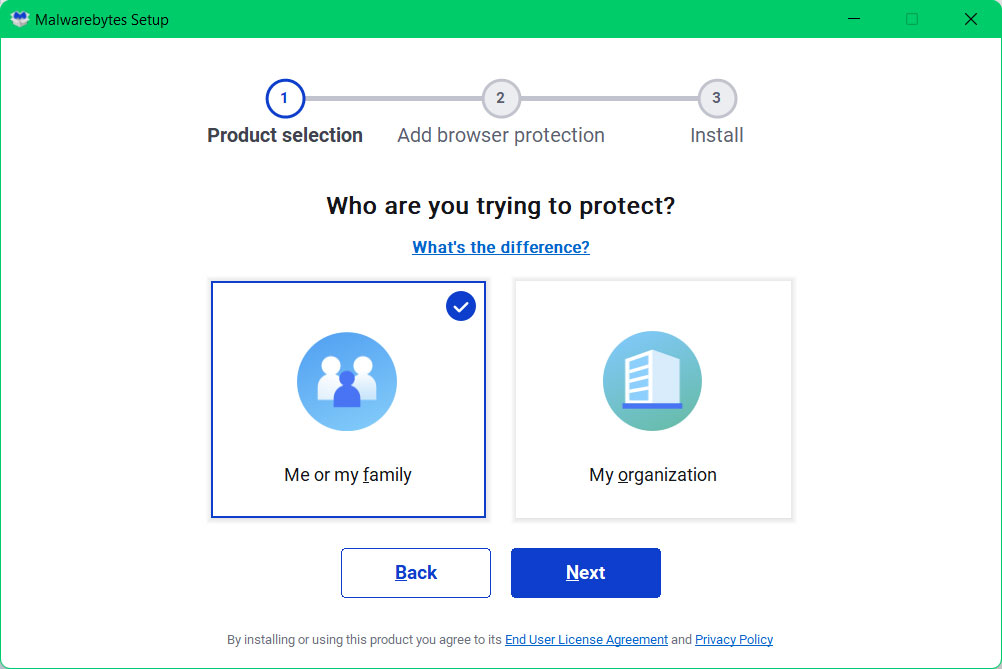
3 After following the software setup instructions, wait for the application to finish installing.

4 Once the application is installed, you may now run your first computer scan and wait for it to finish.
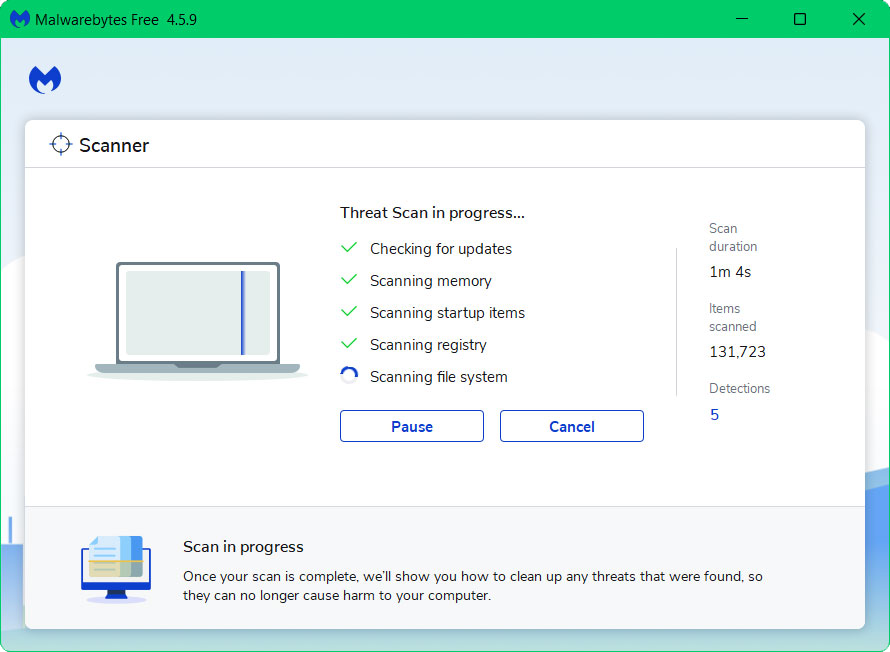
5 All discovered malware on the computer will be displayed on the screen, and you can eliminate them by pressing the “quarantine” button.
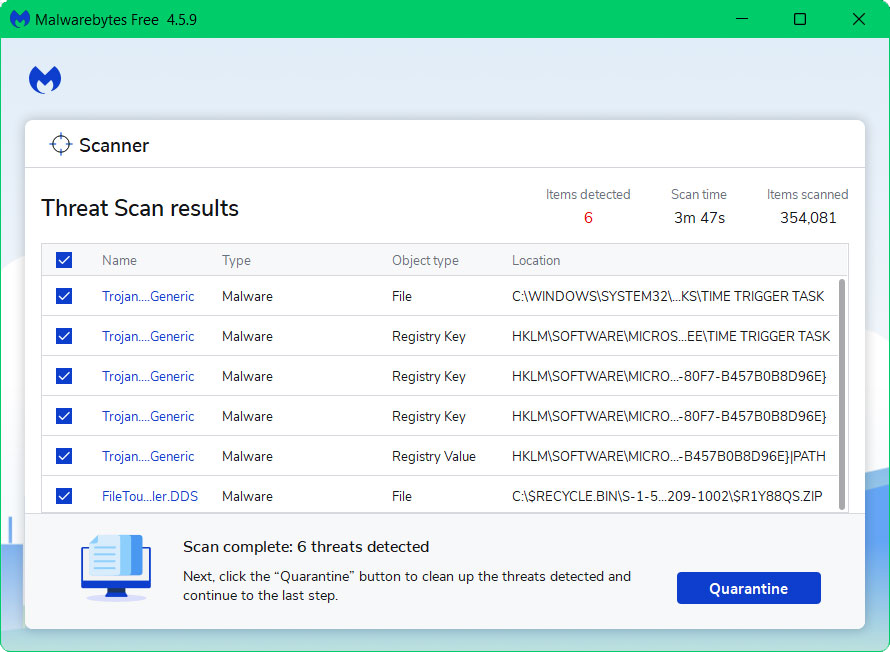
Any potential malware that may have been hiding on your system has now been eliminated, and the modifications it made to the system have been undone. You can check if the “application cannot run under a virtual machine” error is now resolved.
