Windows errors like the disk 0 not initialized prevent us from accessing the disk space. It may occur if Windows is unable to recognize the disk space or if it becomes unavailable.
Ideally, the disk unknown not initialized problem can occur in two different ways. Windows users frequently experience this problem, which prevents them from utilizing their hard drive in the typical manner.
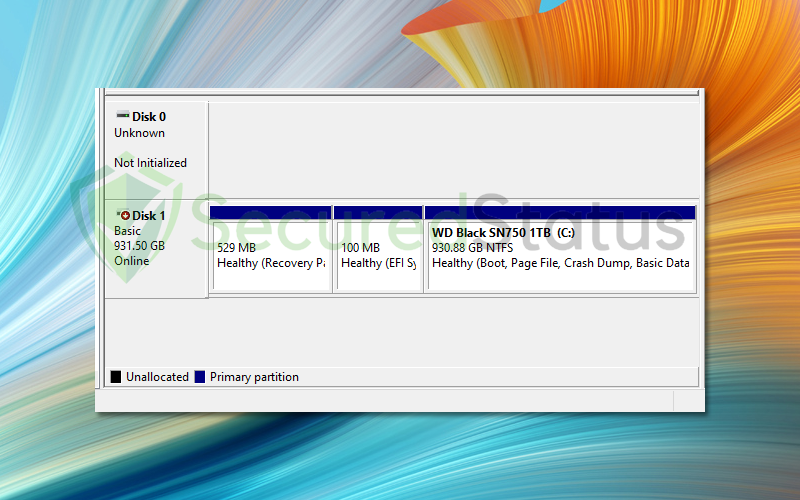
Even while external hard drives are more frequently in this condition, your system’s internal disk may also have this issue.
There are numerous reasons why disk 0 might not be recognized into the Windows system. Here are the most typical issues that users encounter:
- MBR (Master Boot Record) corruption on the disk 0. To get the stated disk back to functional, use a partition utility tool.
- The disk 0 may appear to be uninitialized if the driver is outdated. If so, update the driver as soon as one becomes available.
- Malware attacks might alter the disk and result in the error message mentioned. Check for viruses by running a scan.
- If you believe your driver has been in use for too long, it could be time to get a new one because worn-out drivers frequently contain damaged wires.
Leaving the explanation at that, here are a few solutions to the disk 0 not initialized problem and other related hardware errors.
Methods to Fix Disk 0 Unknown Not Initialized
The techniques below have all been tried and tested by our staff because there could be a number of causes for this problem. If the first one doesn’t work for you, try the next one until the problem is fixed.
Method 1: Initialize Disk 0
As suggested by the error statement, initializing disk 0 should be tried as the first step to solve the issue if it is unknown and not initialized.
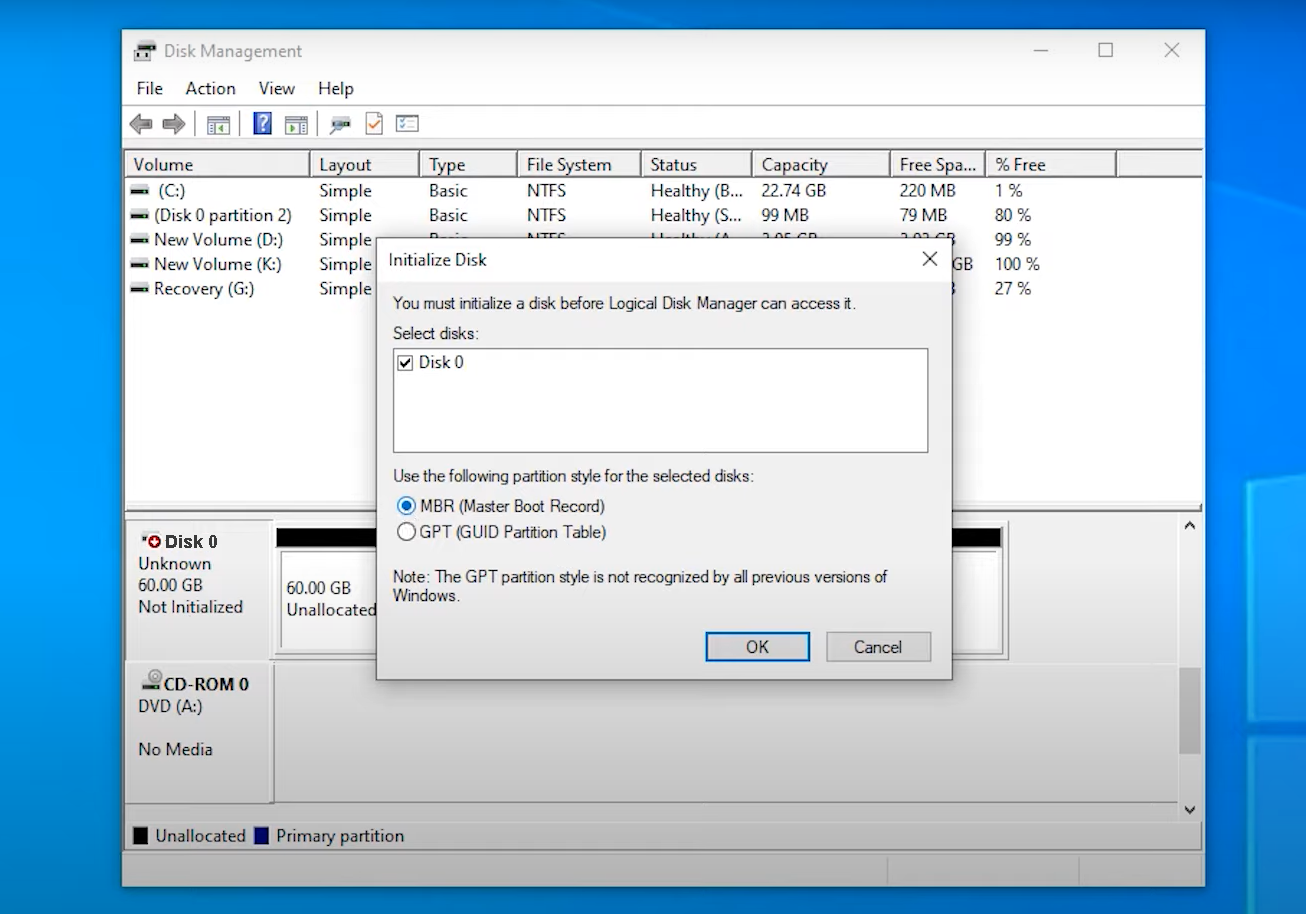
1 Click the Windows Button and search for the Disk Management program.
2 On the bottom section of the program, right click on Disk 0 and select Initialize Disk.
3 You may choose between MBR and GPT and click OK.
Here is an article to choose whether MBR or GPT is better for your computer.
Method 2: Update Disk Driver
As was already noted, the disk 0 unknown not initialized error message might also be brought on by an outdated disk. If you haven’t updated the disk driver yet, follow the instructions below to do so.
1 Click the Windows Button and search for Device Manager.
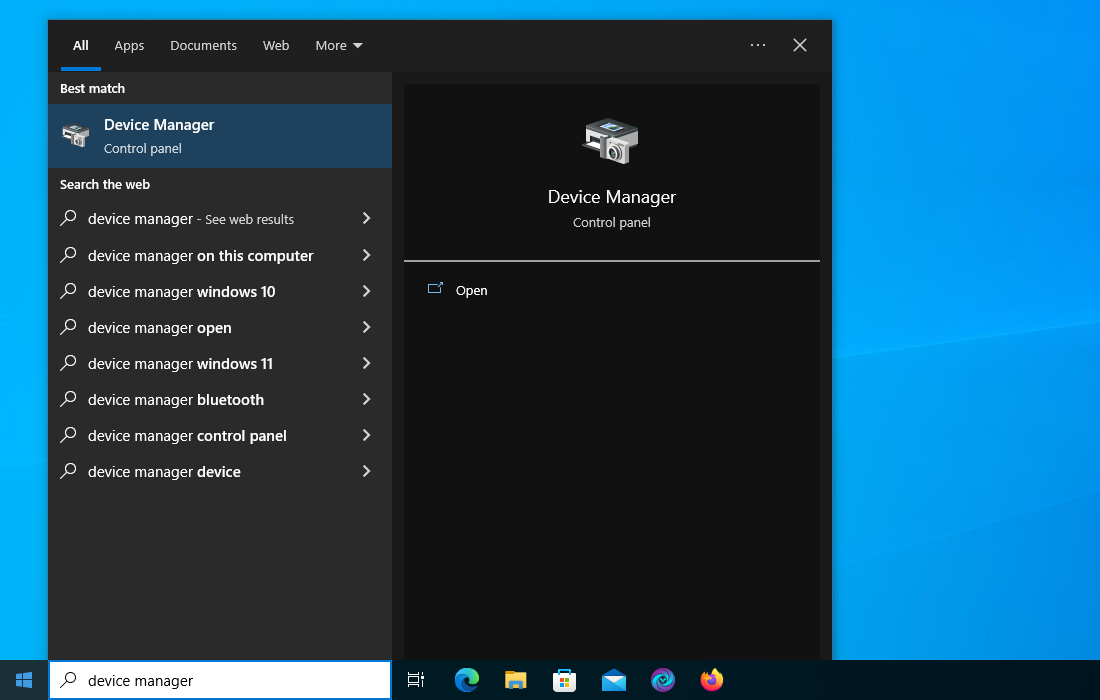
2 Open Device Manager and on the list of devices. double click Disk drives.
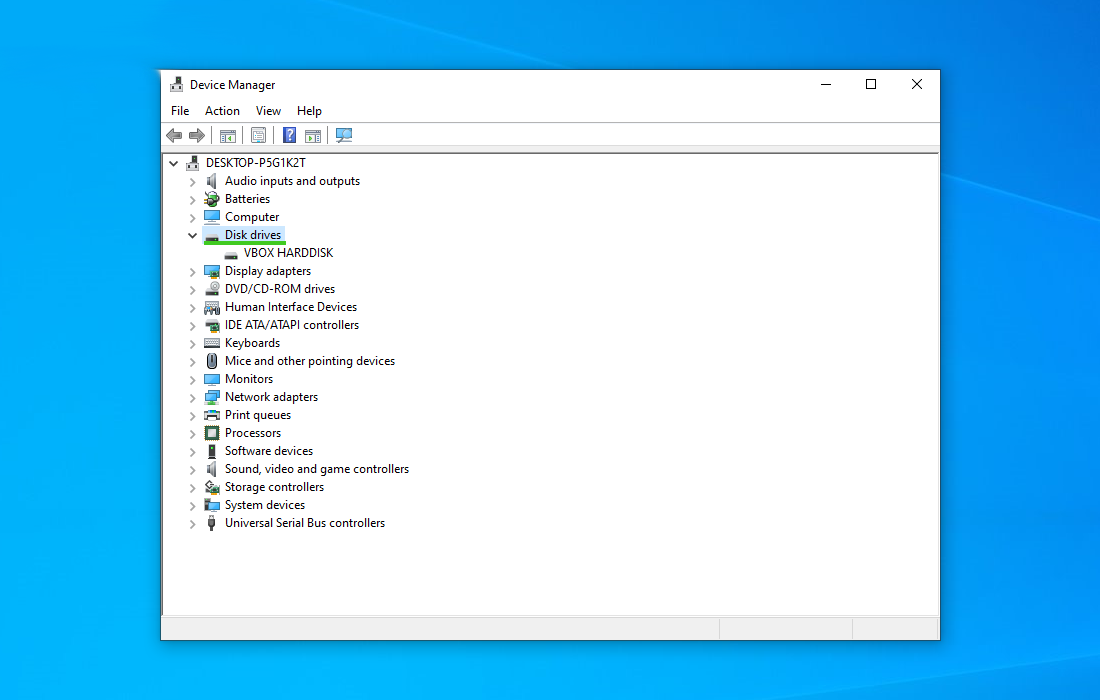
3 Right click on the drives and select Update Driver.
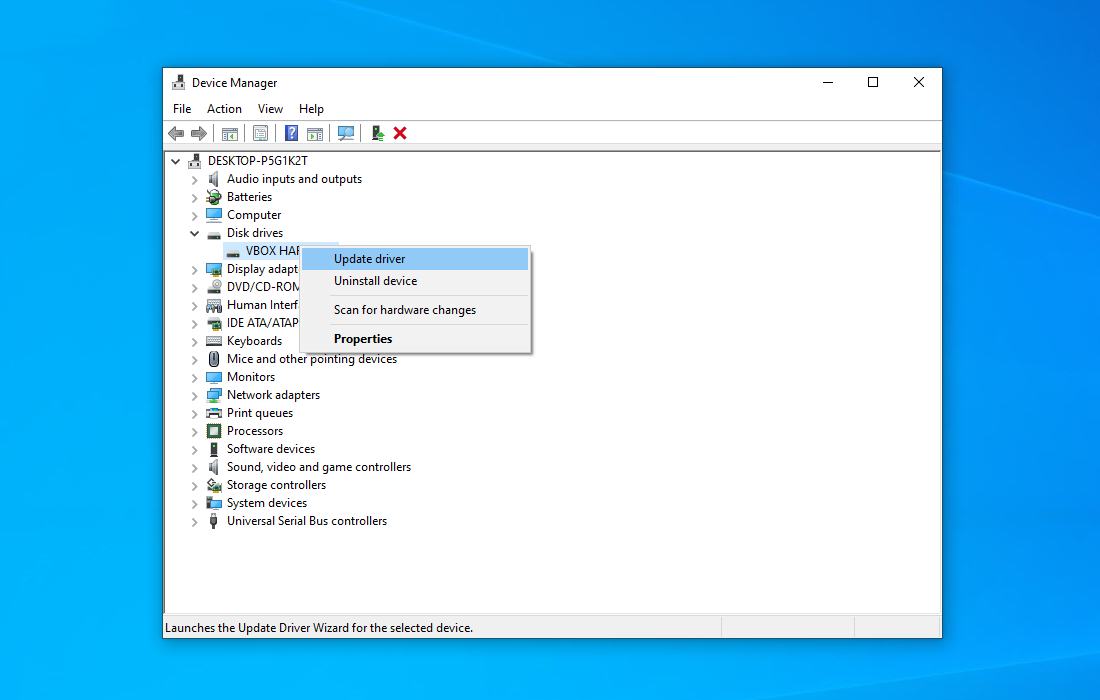
4 On the update driver preference window, click Search automatically for drivers.
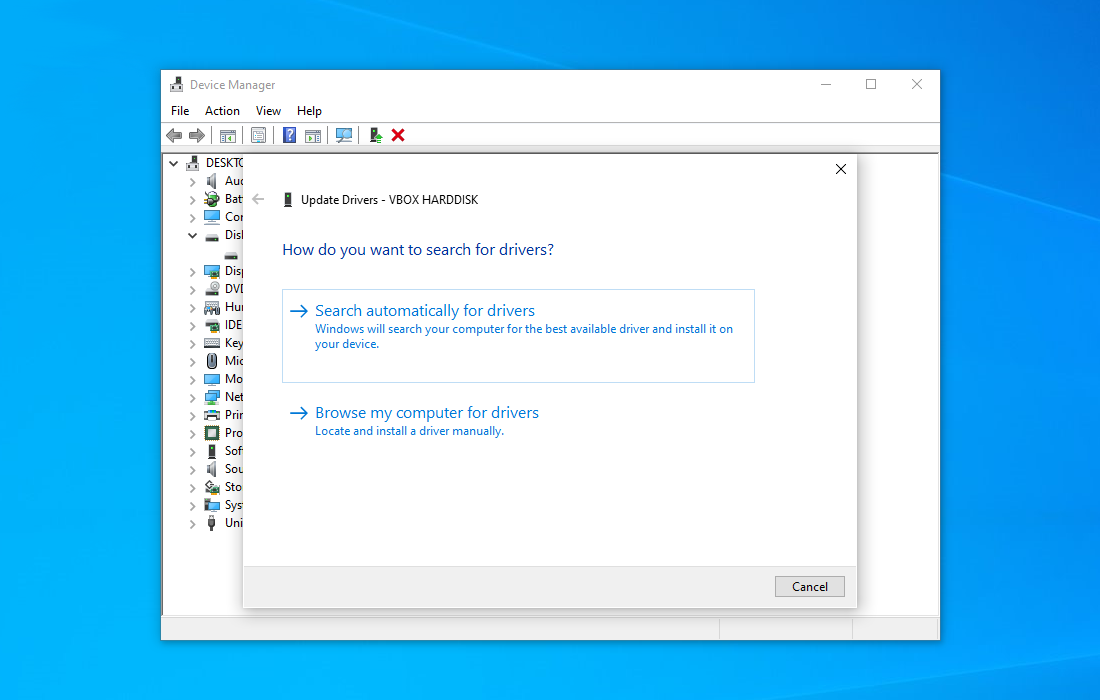
5 If the driver has a new update, it will now automatically update.
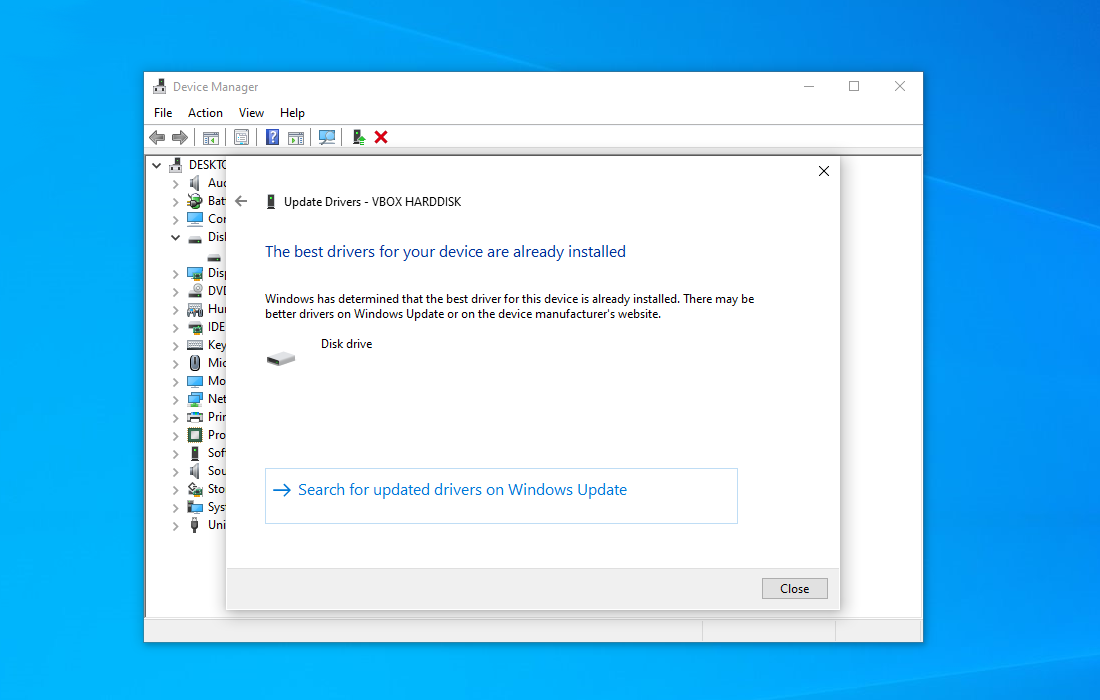
After that, check to see if the disk 0 unknown initialized issue still occurs; if not, a corrupted file system might be at cause. The following method below will help you fix every corrupted file on the computer.
Method 3: Use System File Checker and DISM Cleanup
DISM Cleanup and the command-line tool Windows System file checker can be used to verify the stability of all significant system files. Additionally, it checks to determine whether any system files are missing or corrupted by comparing them to their original versions.
1 Click the Windows Button from the keyboard and search for CMD or Command Prompt.
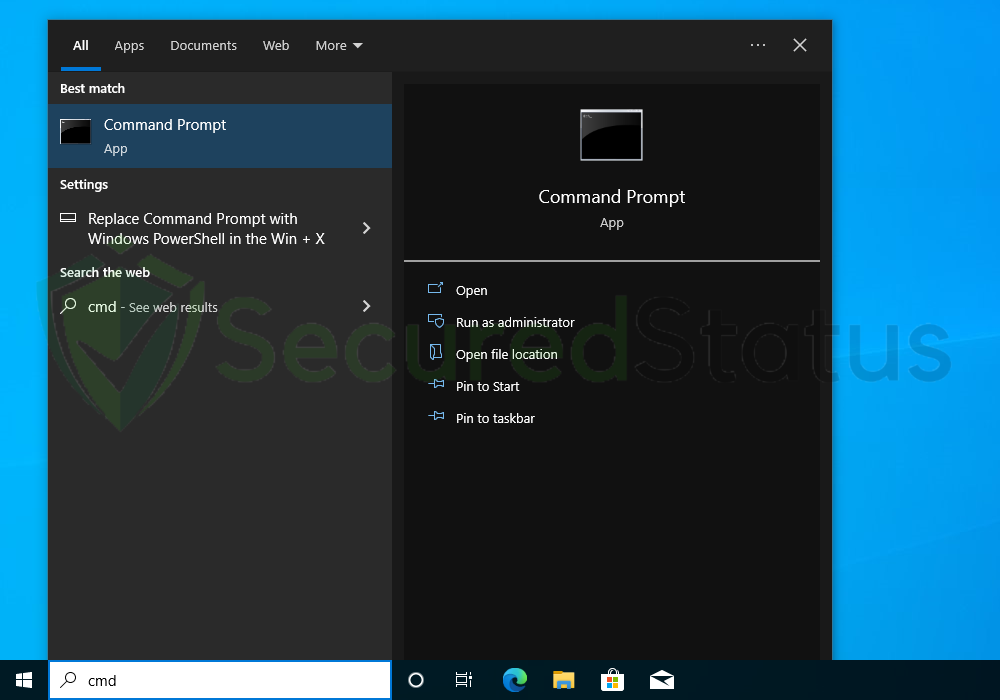
2 Right click the Command Prompt application and select Run as administrator.

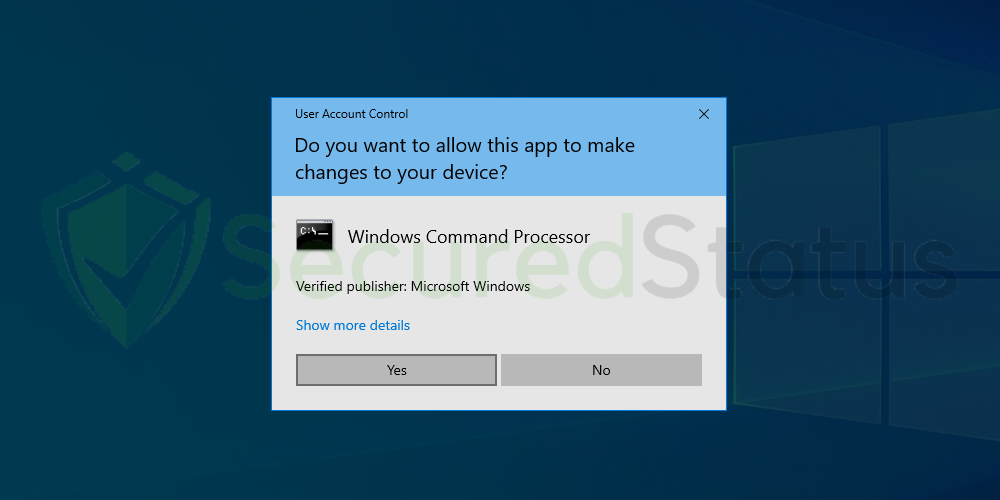
3 The User Account Control confirmation message will pop-up, click Yes to proceed.
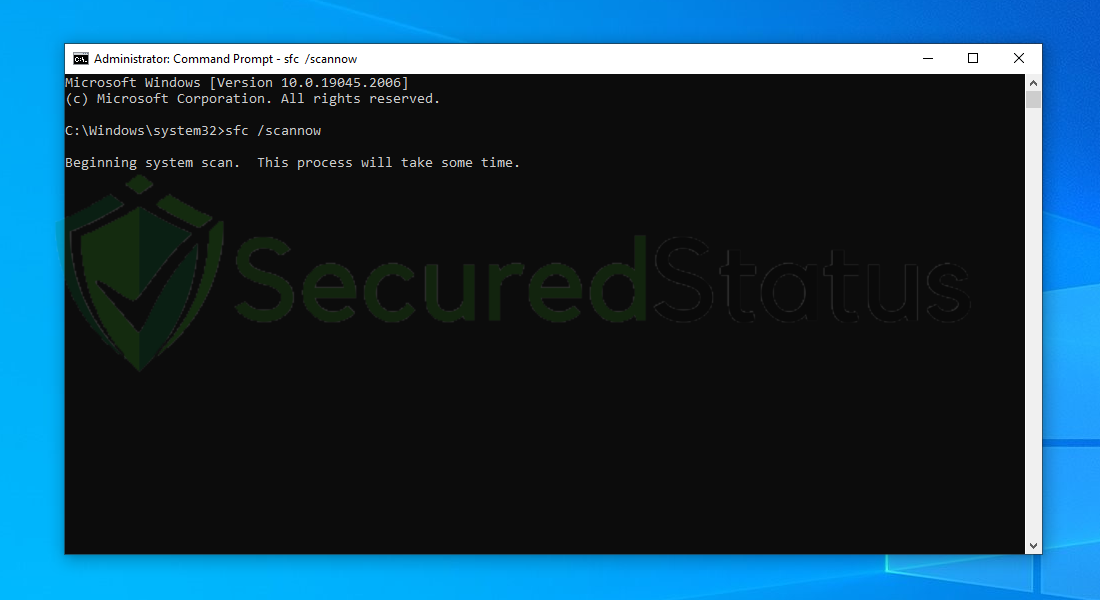
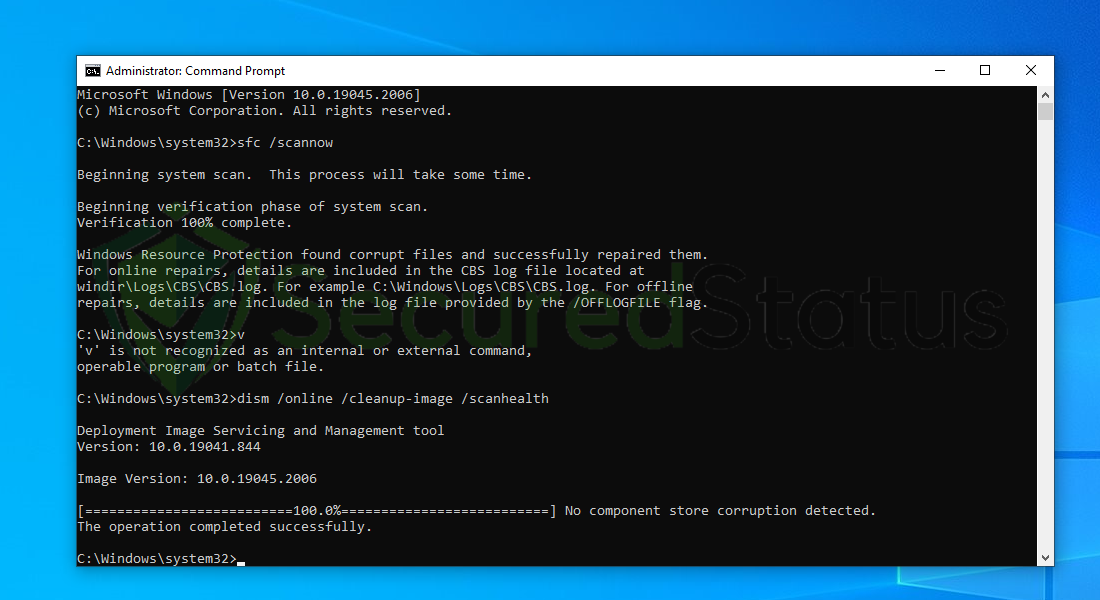
4 Once the Command Prompt opens, type sfc /scannow and hit enter. Please be patient for a few minutes as the scan will start and could take some time.
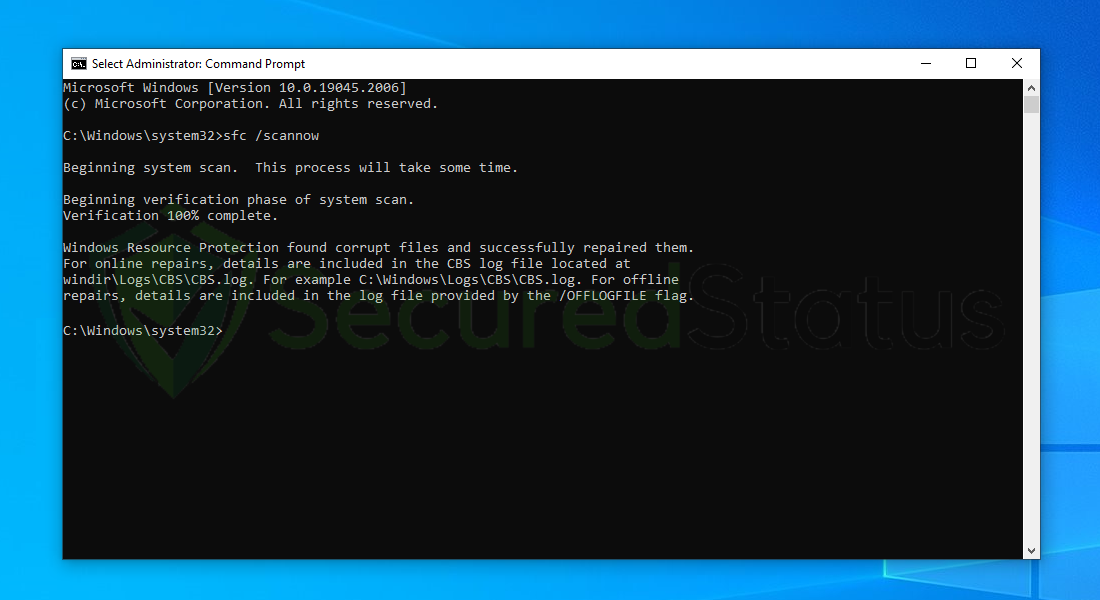
5 After the scanning process it will report that it have successfully found corrupt files and have repaired them.
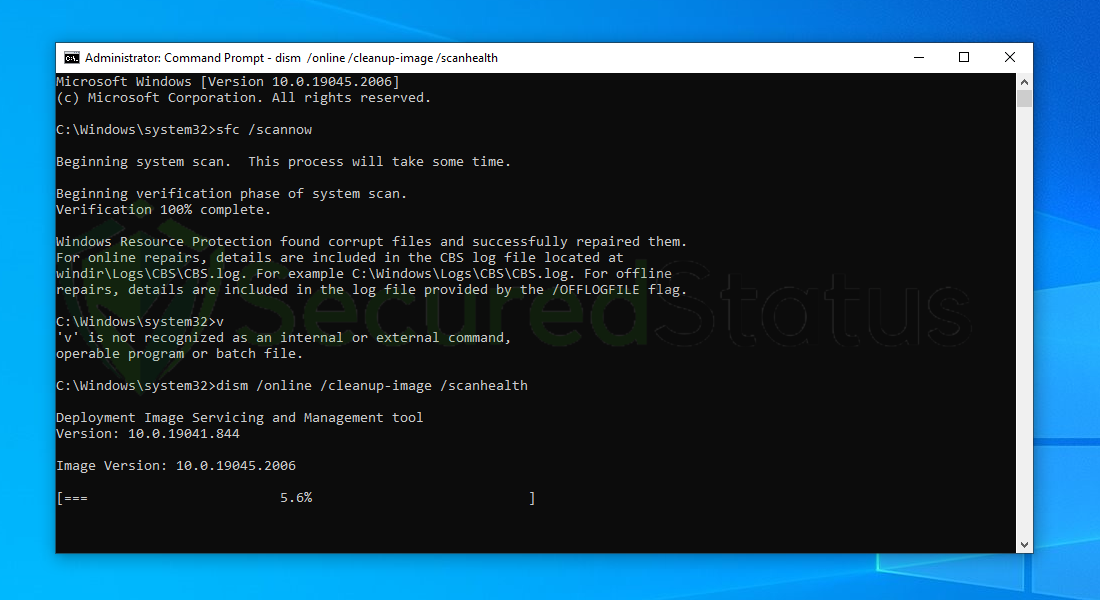
6 Next is to use the DISM Cleanup to patch faulty files in the computer system. Type dism /online /cleanup-image /scanhealth onto the command line and hit enter. Wait for a few minutes while it is scanning.
7 After the scan is complete, it will report that the operation is successful and that all corrupted components will be fixed.
8 Lastly, in order to fix serious windows errors, we will use the restore health command. Type dism /online /cleanup-image /restorehealth and hit enter once again to start the scanning process.
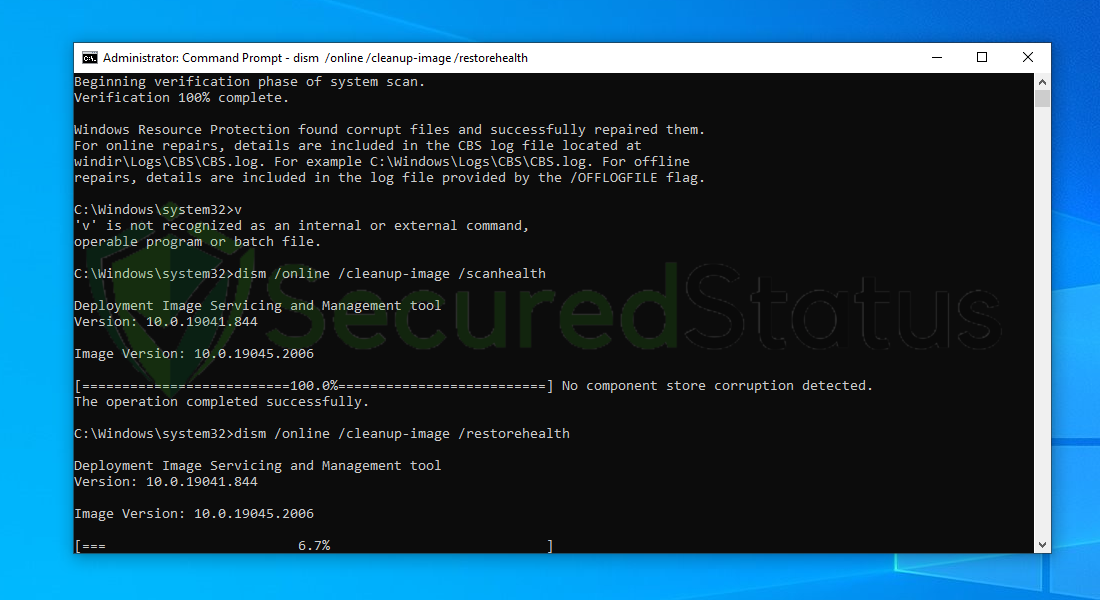
9 Once the scan is complete, it will report that the operation was successful and corrupted files and entries are resolved.
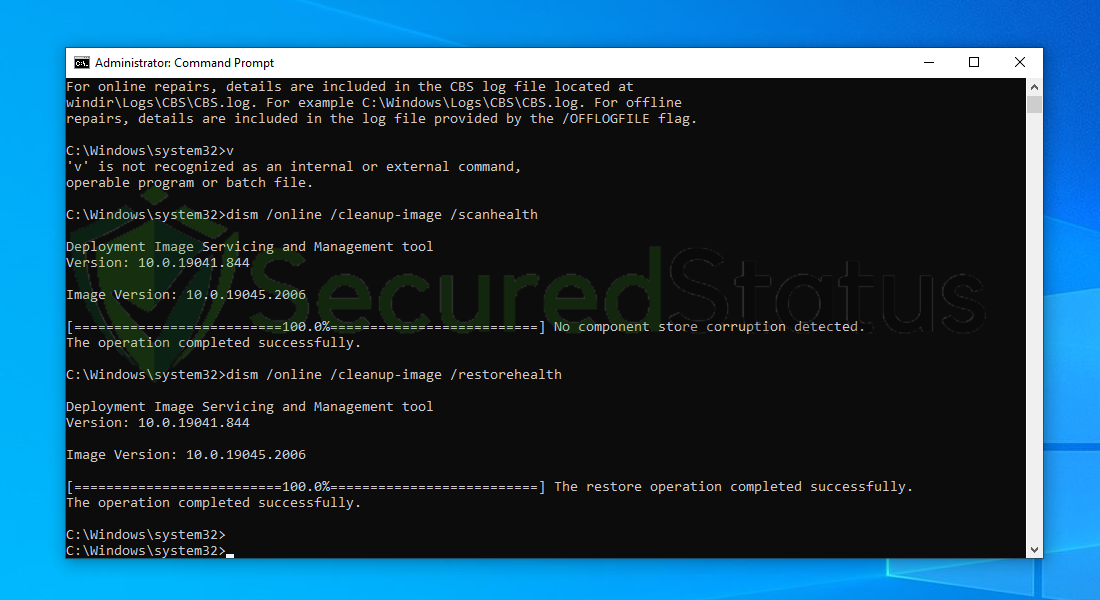
Check whether the following disk 0 problem still exists after restarting your computer.
Method 4: Utilize MiniTool Partition Wizard
MiniTool Partition Wizard functions as a disk troubleshooting software that measures disk read/write speed. The defective disk can be rebuilt, fixed, and made to work properly once more.
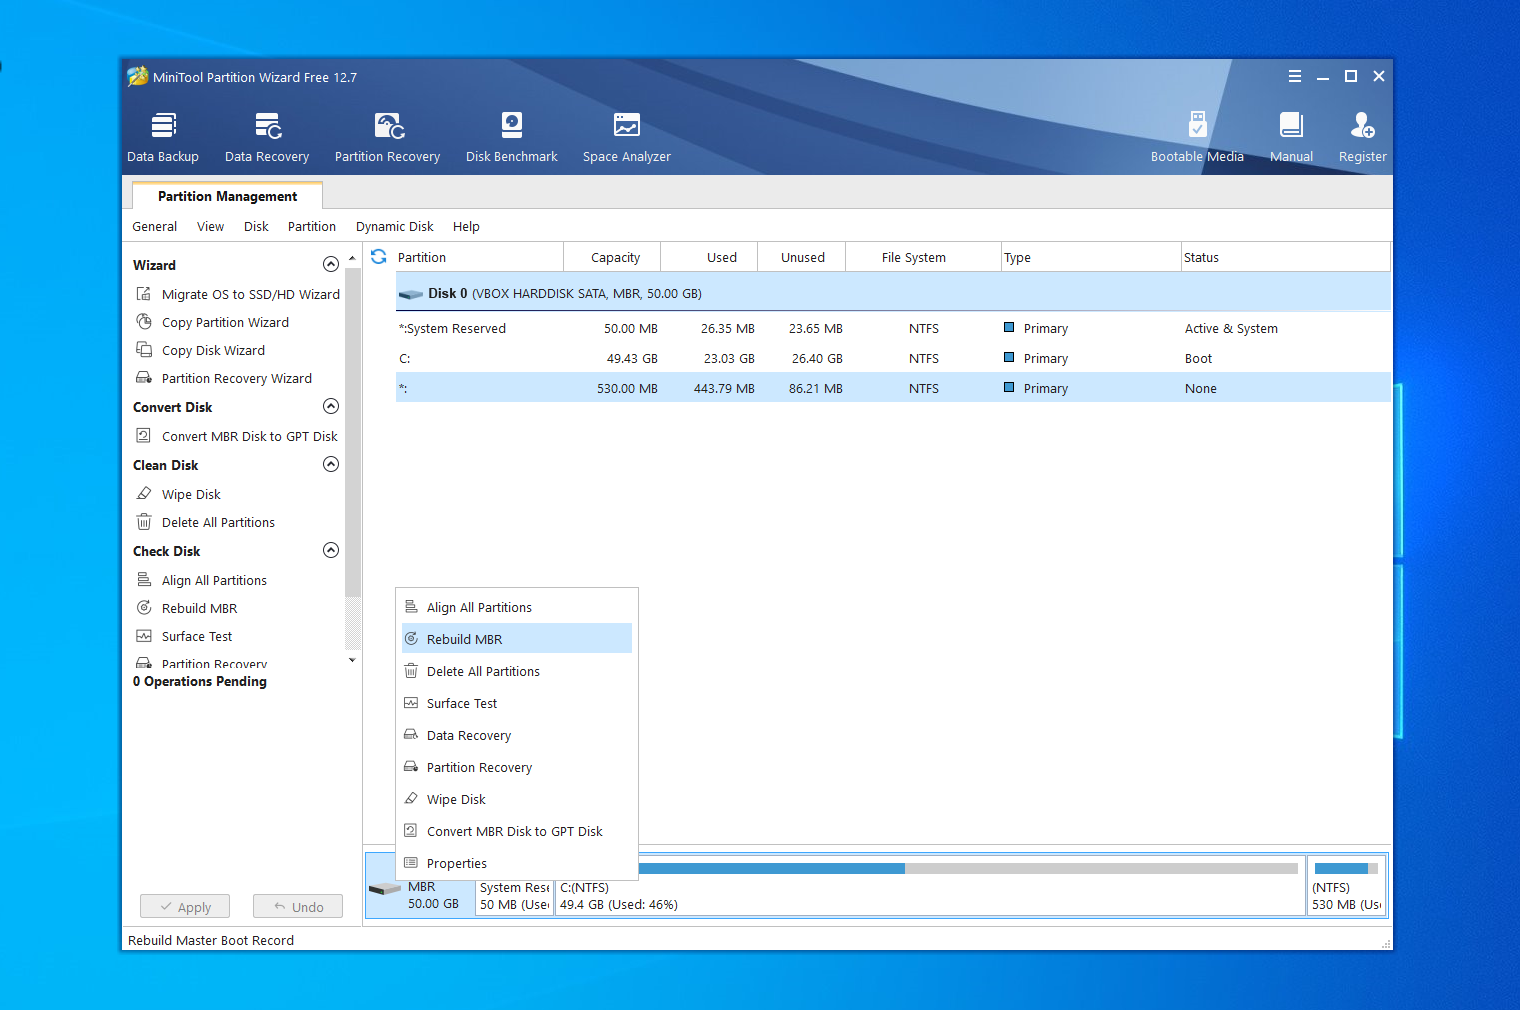
Please note that using the said application will delete every file inside disk 0.
1 Download Partition Wizard via the button above or go to their official website.
2 Run the installer and finish the setup.
3 Right click Disk 0 and select rebuild MBR.
4 Create new partition from the empty disk.
5 Once done, click Apply on lower left corner of screen.
Method 5: Scan for Potential Malware
Malware can also harm drives, and there’s a possibility that your computer may have a virus. If none of the preceding solutions have worked, you should try scanning for malware, even though it is not necessary for this kind of issue, it may somehow be the cause of the “not initialized” error.
We recommend using Malwarebytes Anti-malware because we have determined that it can remove most types of malicious threats when we conducted malware tests.

Malwarebytes also offers a free 14-day trial when you download it for the first time, so you might want to use the remaining time of the trial to test out the premium features.
1 Click the button above to download the latest version of Malwarebytes Anti-malware.

2 Open the installation file after the download and follow the procedure shown.
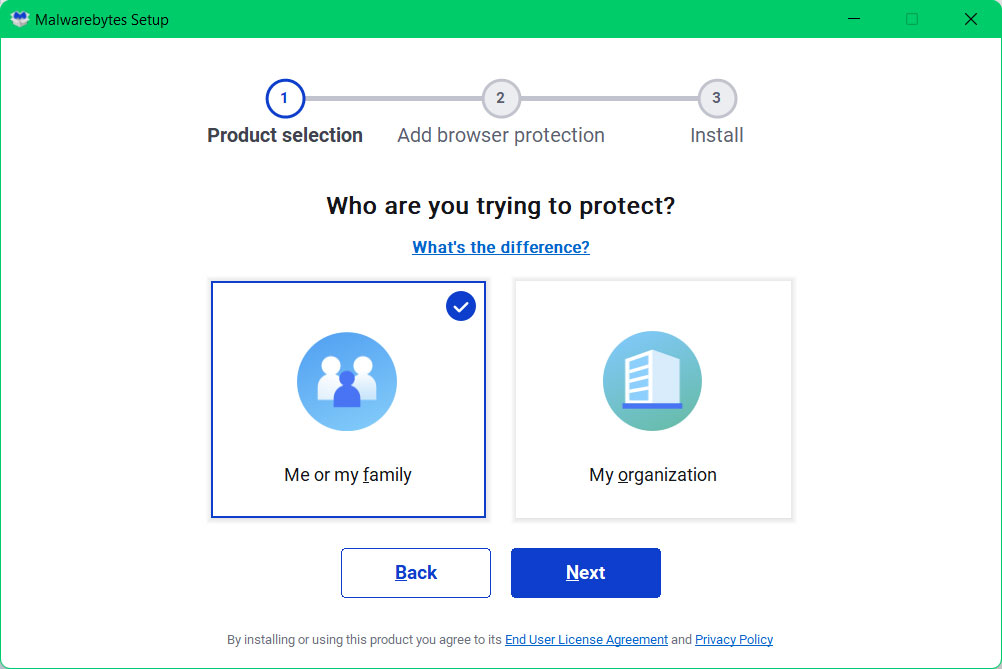
3 After following the software setup instructions, wait for the application to finish installing.

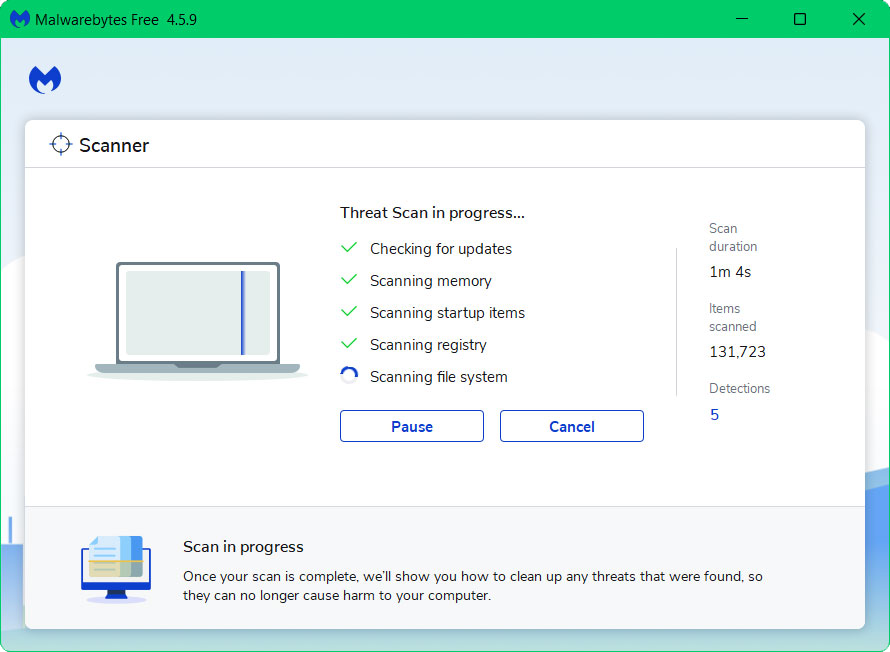
4 Once the application is installed, you may now run your first computer scan and wait for it to finish.
5 All discovered malware on the computer will be displayed on the screen, and you can eliminate them by pressing the “quarantine” button.
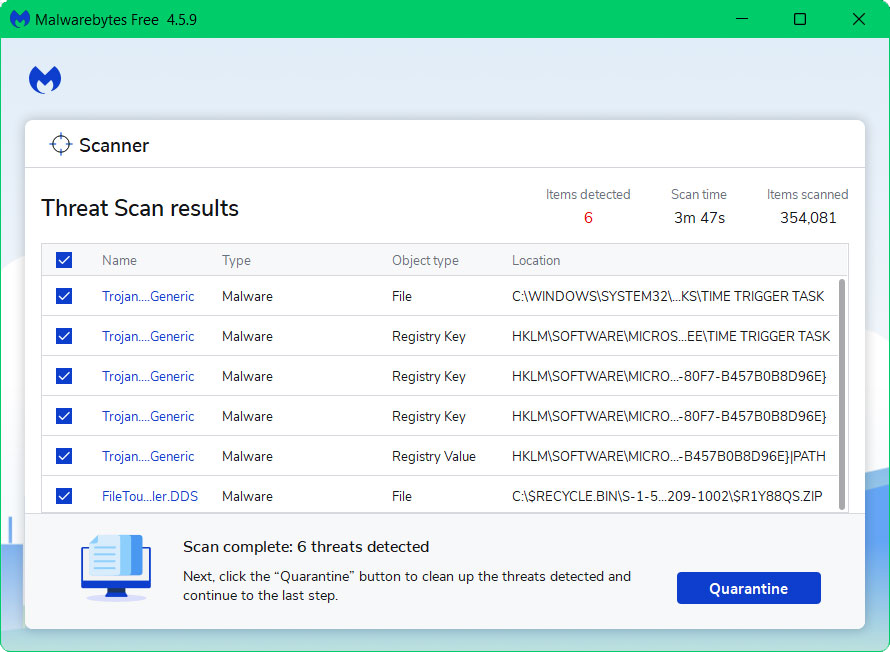
Any potential malware that may have been hiding on your system has now been eliminated, and the modifications it made to the system have been undone. If the problems persist, it may be time to purchase a new hard drive. This may be because the current drive is defective, regardless of how old it is, try inserting a brand new one and see if it gets detected.
