If you frequently encounter the “Windows Command Processor requesting permission to make changes” message when you start your computer, you’re not alone.
This message is part of the Windows User Account Control (UAC) system, a security feature to protect your computer from unauthorized changes.
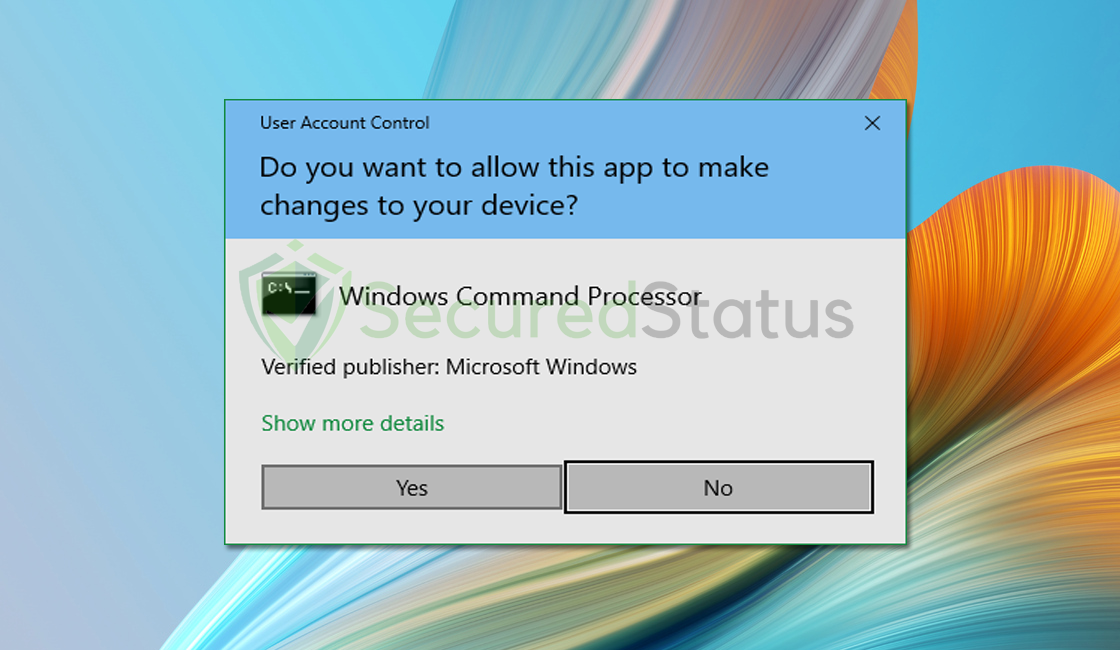
Reasons why Windows Command Processor is requesting permission to make changes:
1. The most common reason for UAC prompts is when an application or process requires administrative privileges to perform certain tasks. This can include software installations, system updates, or changes to system settings. Windows wants to ensure that only authorized and trusted processes can make such changes.
2. Malicious software, such as viruses or Trojans, often attempts to make unauthorized changes to your system. UAC prompts serve as a security barrier to prevent these unwanted alterations. If you encounter frequent UAC prompts, it could be a sign of malware attempting to compromise your system’s security.
3. When a process or program attempts to modify or delete critical system files or system registry settings, UAC prompts are displayed. This is crucial for safeguarding the stability and functionality of your operating system.
4. Making changes to system settings or configurations that affect the entire system can trigger UAC prompts. For instance, modifying firewall settings, network configuration, or User Account Control settings can lead to these prompts.
it’s an essential safeguard, these constant prompts can be annoying. In this article, we’ll explore various methods to resolve this issue.
Fix Windows Command Processor requesting permission to make changes
Please follow the steps below to stop the Windows Command Processor from requesting unwanted permissions on the computer.
Step 1: Utilize System File Checker and DISM Cleanup
DISM Cleanup and the command-line tool Windows System file checker can be used to verify the stability of all significant system files. Additionally, it checks to determine whether any system files are missing or corrupted by comparing them to their original versions.
1 Click the Windows Button from the keyboard and search for CMD or Command Prompt.
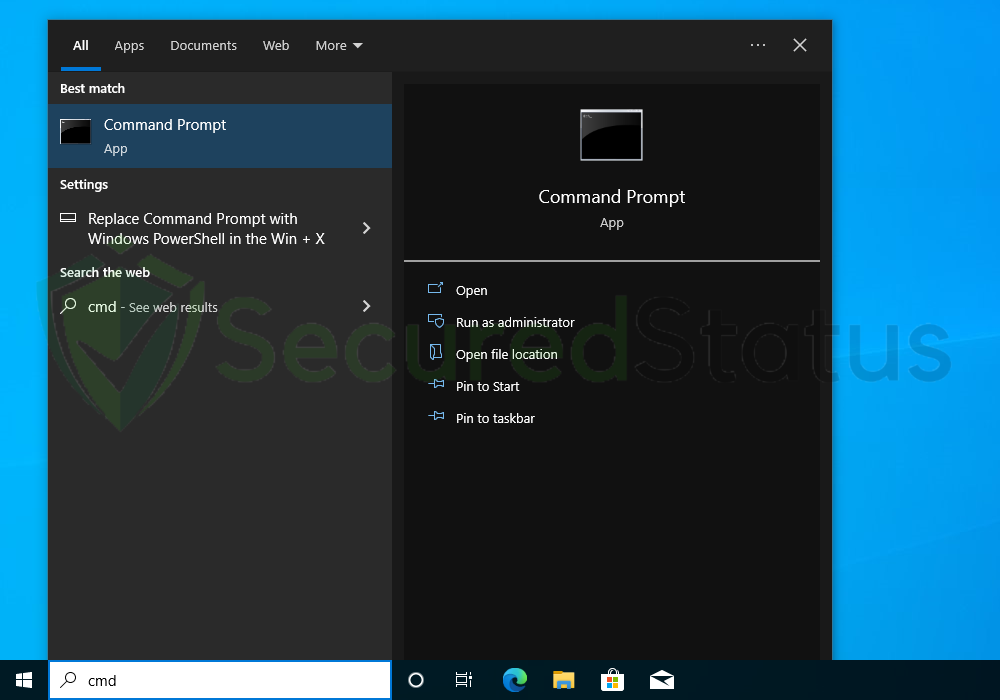
2 Right-click the Command Prompt application and select Run as administrator.

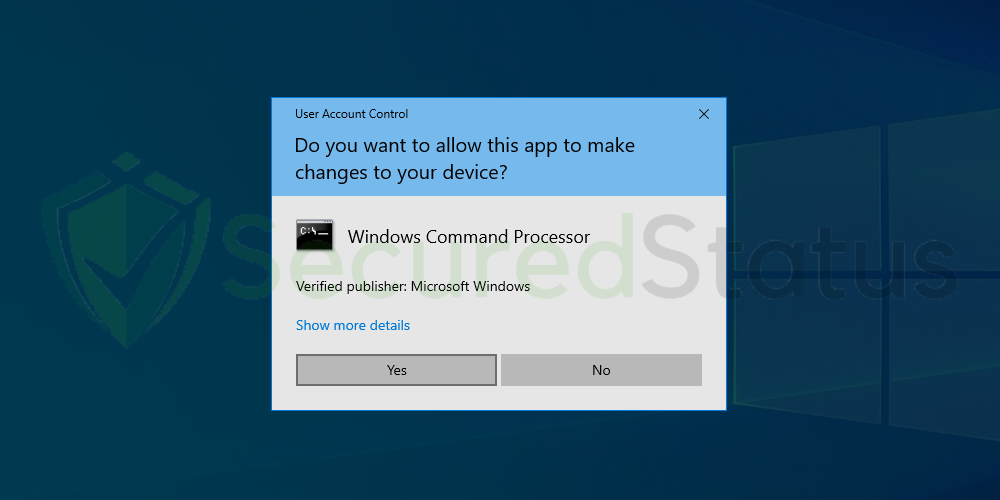
3 The User Account Control confirmation message will pop up, click Yes to proceed.
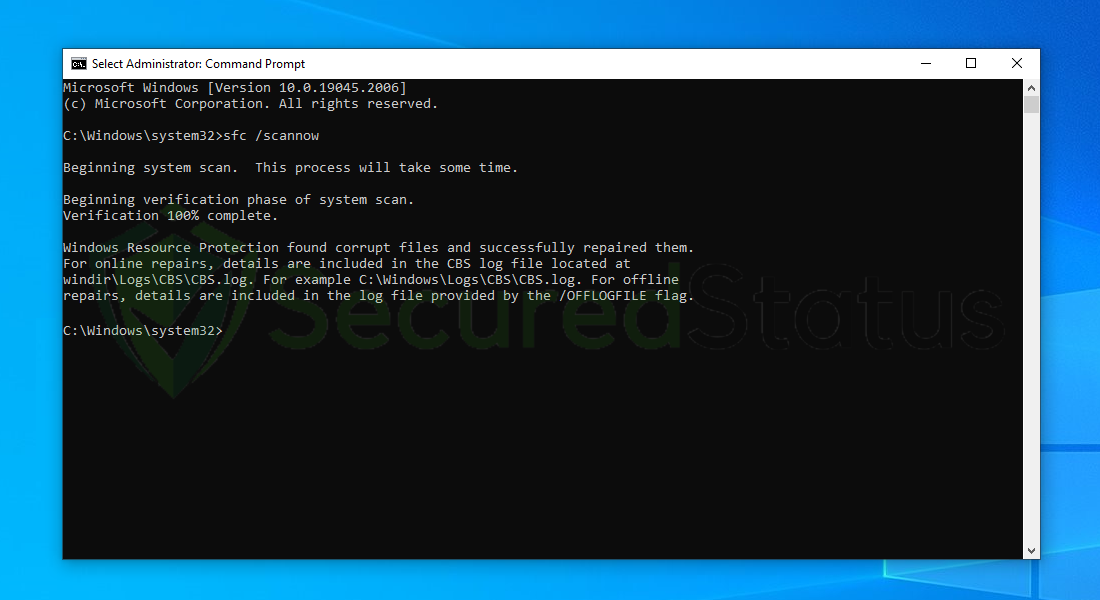
4 Once the Command Prompt opens, type sfc /scannow and hit enter. Please be patient for a few minutes as the scan will start and could take some time.
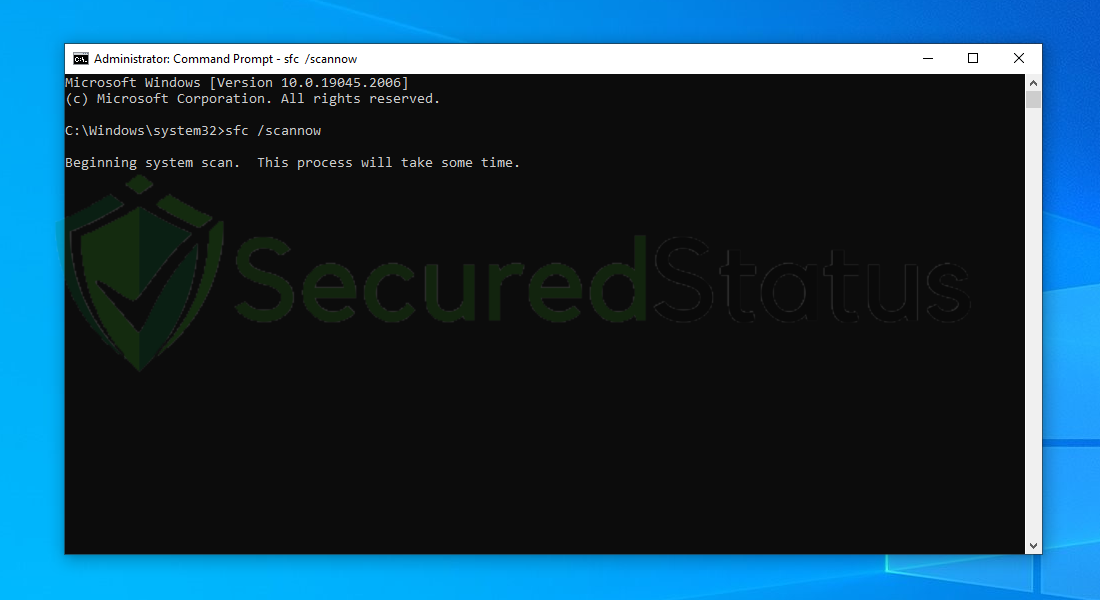
5 After the scanning process it will report that it has successfully found corrupt files and has repaired them.
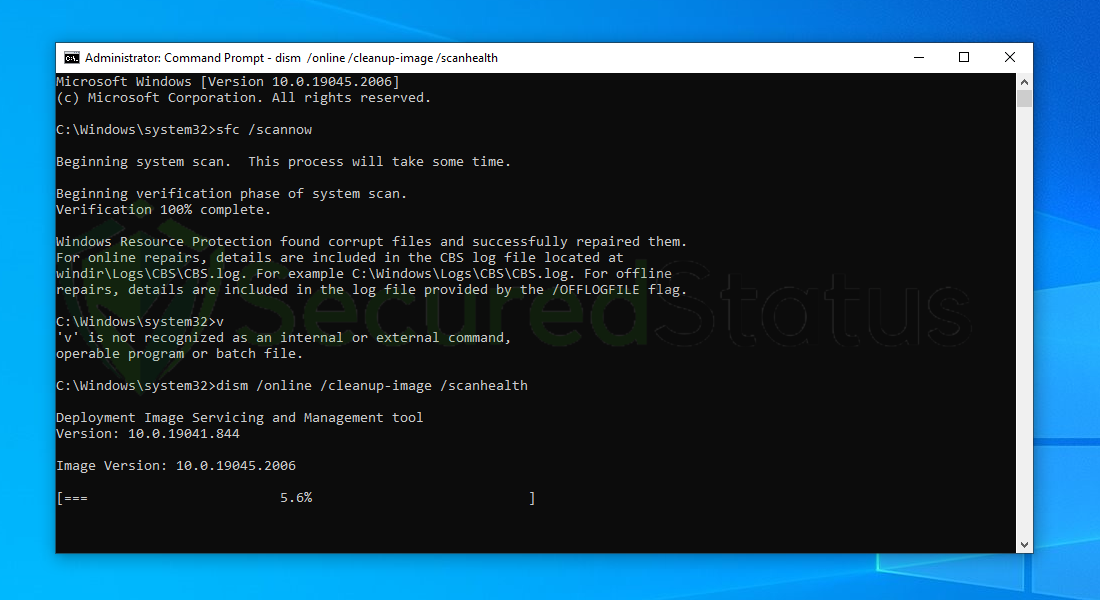
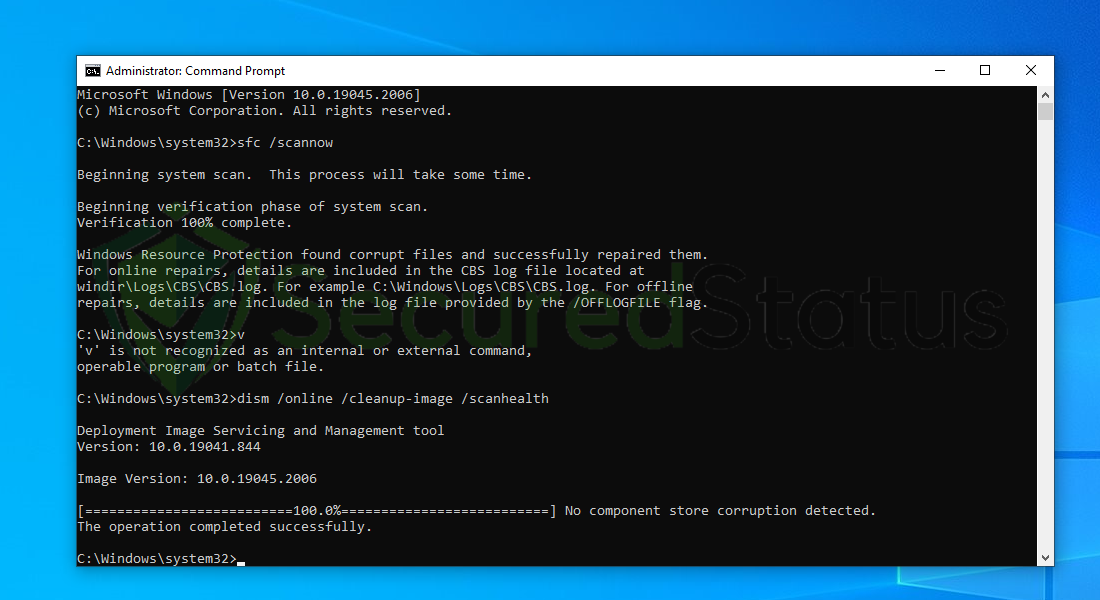
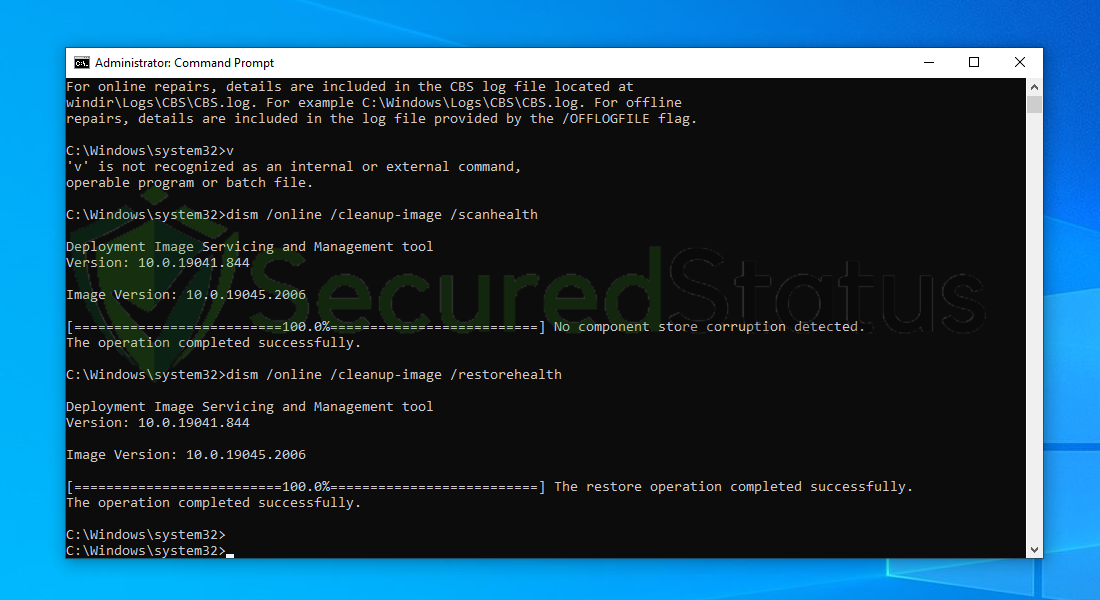
6 Next is to use the DISM Cleanup to patch faulty files in the computer system. Type dism /online /cleanup-image /scanhealth onto the command line and hit enter. Wait for a few minutes while it is scanning.
7 After the scan is complete, it will report that the operation is successful and that all corrupted components will be fixed.
8 Lastly, in order to fix serious windows errors, we will use the restore health command. Type dism /online /cleanup-image /restorehealth and hit enter once again to start the scanning process.
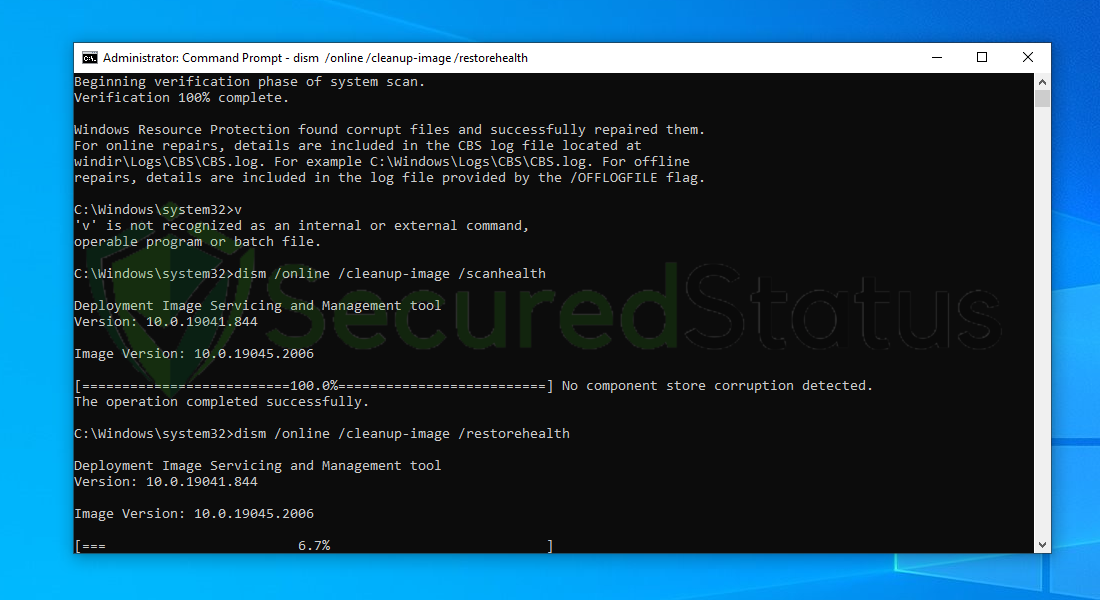
9 Once the scan is complete, it will report that the operation was successful and corrupted files and entries are resolved.
Step 2: Identify and Resolve the Underlying Issue
In many cases, the “Windows Command Processor requesting permission to make changes” message is a sign that a program or script is initiating during startup and demanding elevated permissions. Pinpointing and addressing this root cause can help eliminate these prompts.
1. To begin, press Ctrl + Shift + Esc to access the Task Manager.
2. Within the Task Manager window, navigate to the Startup tab.
3. You’ll find a list of programs and scripts that run automatically when your computer starts. Examine these entries closely.
4. Identify any entries that appear unfamiliar or suspicious. These are potential culprits causing the UAC prompts. If you are unsure about an entry, consider searching online to determine its legitimacy.
5. To disable a specific startup entry, right-click on it and select Disable.
To ensure your computer is free from malware, run a comprehensive system scan using a powerful antivirus. You may do so by following the steps below.
Step 3: Scan with a powerful Antivirus
Most of the time, unwanted permissions are being asked by malware hiding inside the system. When it comes to removing malware-related problems on the computer, it is best to utilize the anti-malware software provided by Malwarebytes.
We have determined that it can remove most types of malicious threats when we conduct malware tests.

Malwarebytes also offers a free 14-day trial when you download it for the first time, so you might want to use the remaining time of the trial to test out the premium features.
1 Click the button above to download the latest version of Malwarebytes Anti-malware.

2 Open the installation file after the download and follow the procedure shown.
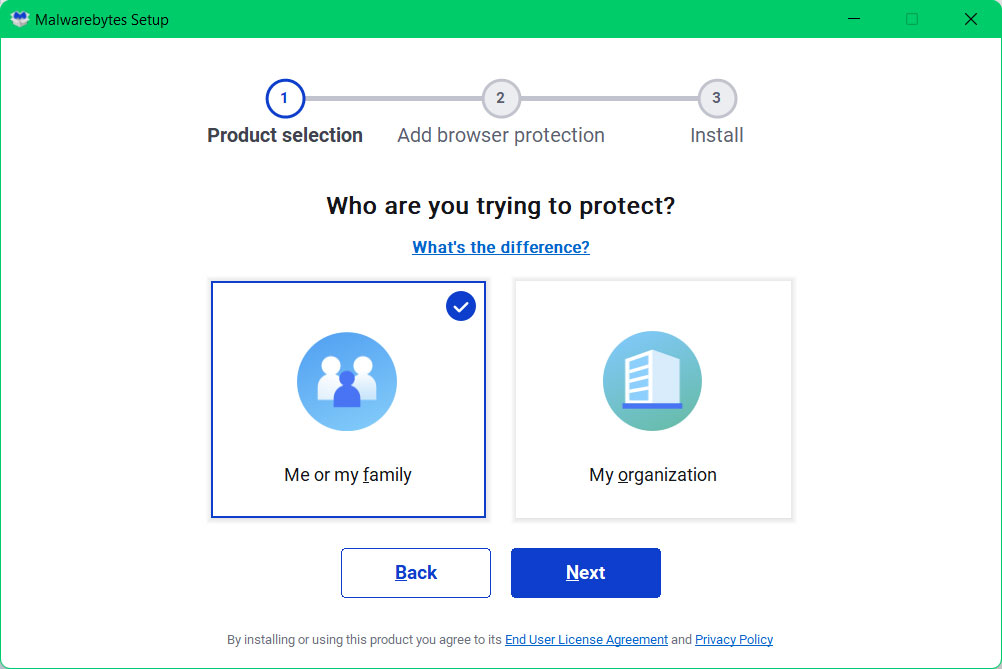
3 After following the software setup instructions, wait for the application to finish installing.

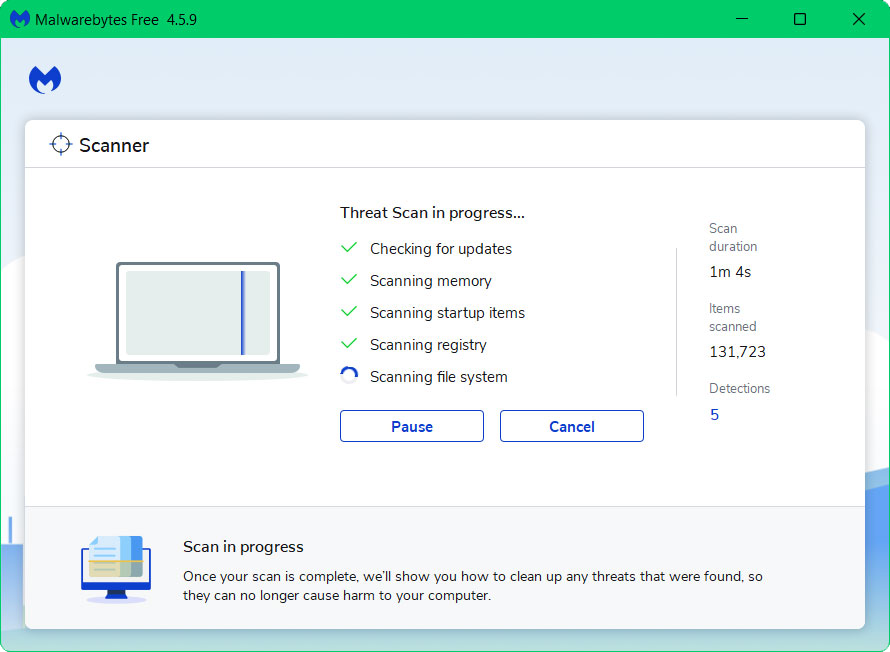
4 Once the application is installed, you may now run your first computer scan and wait for it to finish.
5 All discovered malware on the computer will be displayed on the screen, and you can eliminate them by pressing the “quarantine” button.
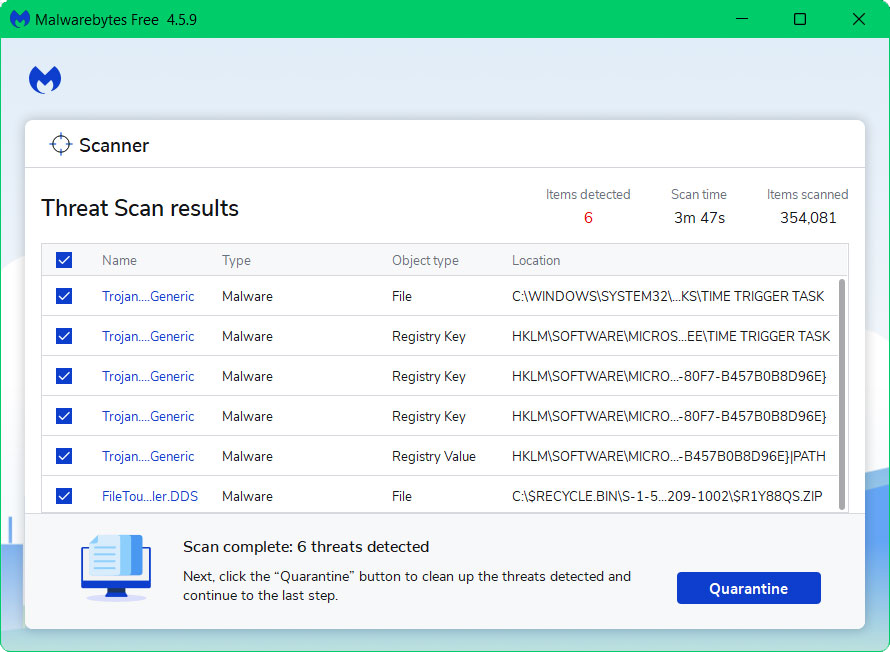
Any potential malware that may have been hiding on your system has now been eliminated, and the modifications it made to the system have been undone.
Step 4: Disable UAC (not recommended for security reasons)
Disabling UAC is a straightforward but high-risk approach that should only be used when all other methods have failed.
By turning off UAC, you essentially remove the protective barrier that alerts you when potentially harmful software or processes attempt to make changes to your system. Use this method with caution and as a last resort.
1. Press Win + R to open the Run dialog.
2. Type msconfig and press Enter.
3. In the System Configuration window, locate and navigate to the Tools tab.
4. Scroll down to find the Disable UAC option and click Launch.
5. A User Account Control (UAC) prompt will appear, requesting permission to continue. Click Yes to proceed.
6. In the subsequent window, click Launch again to confirm your action.
7. To implement the changes and disable UAC, you must restart your computer. Ensure all your work is saved, then restart your computer for the changes to take effect.
We hope that this guide has assisted you in resolving the Windows Command Processor requesting permission to make changes issue. Please forward this article to anyone who is having a similar issue so that it can be fixed. Feel free to contact us if you have any additional questions; we’ll be pleased to assist.
