For computer users, the hourglass cursor is a common sight, signaling that the system is actively loading or processing data. In most cases, it acts as a momentary pause sign, reassuring users that their computer is still operational.
When the hourglass show and cause a system freeze, it’s a strong indication that something is wrong. A computer freezing can be an unpleasant experience, typically indicating an issue that needs fixing.
You are not alone if you are experiencing this problem; many Windows users encounter the persistent hourglass and consequent system freeze.
The primary cause is frequently incomplete loading of a specific process, which leaves the system in a limbo state. This issue has been reported by users of various configurations and hardware combinations, and it has become a prevalent problem.
What causes the hourglass cursor and computer to freeze?
The extended hourglass cursor and computer screen frozen problem are caused by an array of situations. Here are some of the common ones:
One of the primary causes is a system process that consumes a significant percentage of system resources, causing an imbalance and limiting smooth operation.
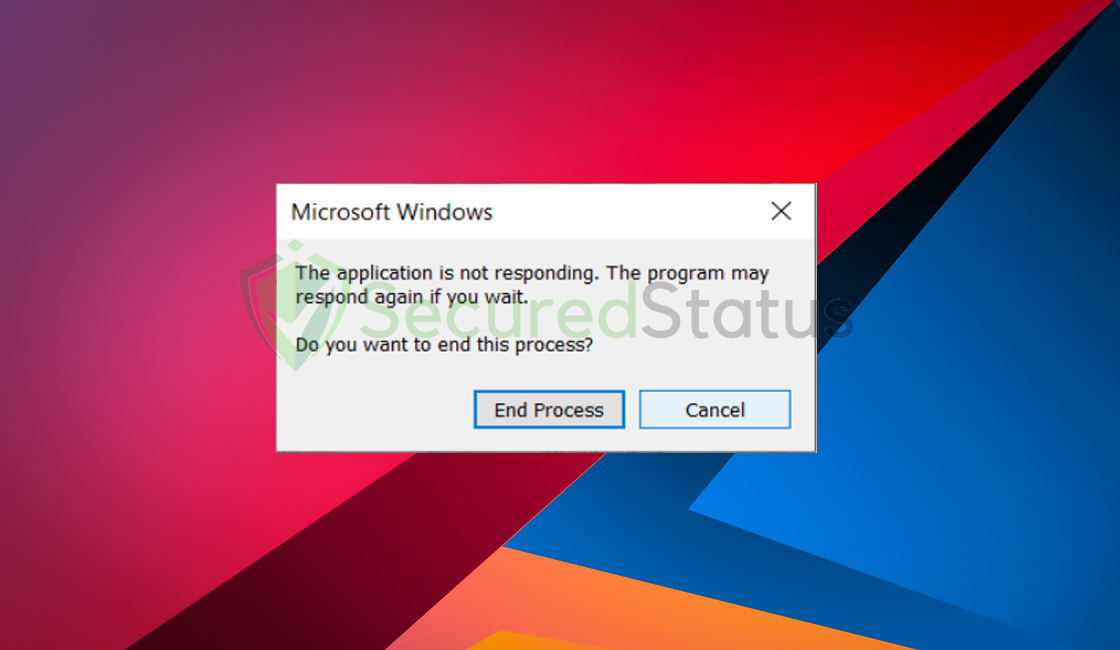
This occurs when a process consumes too much computer hardware, causing other processes to cease functioning owing to a lack of system resources such as the GPU, CPU, and memory.
Malware infections are also a serious threat since they can infiltrate the system and interrupt normal operations. If the computer is infected with malware, it may do undesired tasks in the background, causing the problem.
One of the primary culprits is malware such as CPU miners, which lie in the background while utilizing system resources to mine bitcoins on the user’s computer.
Problems with the current Windows version or corrupt files inside the System process can also cause the persistent hourglass to appear, resulting in a cascade effect that causes the entire system to freeze.
Steps to Fix The Hourglass Cursor Freezing Every Couple of Minutes
Since there could be multiple factors causing this issue, every solution stated below has been tried and tested by our experts. If the first doesn’t work, attempt the following one until the problem is resolved.
Step 1: Scan the computer for potential malware
As previously said, malware infestation is a major source of this problem; therefore, it is critical to scan the computer for malware that may be hiding inside the system.
An antivirus program is your all-in-one solution for dealing with malware. It serves as a preventive and corrective step, quickly detecting and eliminating malware from your device.
We cannot emphasize enough the significance of using antivirus software especially when facing such issues on the computer system.
Having antivirus software on your computer offers several significant benefits, including:
- Detection, filtering, and automatic removal of malware ranging from harmless adware to extremely severe ransomware.
- Providing caution and notifications for possibly risky websites that you may visit, helping you in mitigating online risks.
- Antivirus threat databases are regularly updated to ensure the detection of new viruses and the protection of your device.
- Keeping your operating system clean by protecting all files on your computer, assuring their safety and integrity.
Which antivirus should I use?
The answer is dependent on how you use your computer, as several antivirus applications on the market offer benefits and drawbacks. Because most of them identify and remove malware at the same rate, we recommend choosing your choice based on research.
For example, if you use your computer for resource-intensive applications such as video editing, you might want to avoid resource-consuming antivirus programs.
Fortunately, there are numerous publications that provide extensive comparisons of each antivirus’s merits and cons. However, for the best of all worlds, we recommend one of the following antivirus programs:
The majority of free versions are already sufficient for removing and blocking viruses from your computer. Some antivirus products also provide free trials that allow you to learn more about their capabilities before making a purchase choice. However, in the end, the free version usually provides everything needed to remove malware.
Step 2: Update Your Windows Computer
The hourglass and constant Windows freeze have been very common issues since many users first started using Windows 10.
If your computer has not been updated since we recommend that you update your operating system now to fix the issue and patch vulnerabilities that cybercriminals may exploit to gain access to your computer.
1. Click on the Start menu in the bottom left corner of your screen. Select Settings (gear-shaped icon) to open the Settings menu.
2. In the Settings menu, find and click on Update & Security.
3. Within the Update & Security menu, you’ll find several options on the left side. Click on Windows Update.
4. Once you are in the Windows Update section, click on the Check for updates button. Windows will then scan for available updates for your system.
5. After the scan is complete, Windows will display the available updates. Click on the Download button to start the download process.
6. Once the updates are downloaded, click on the Install button. Your computer may need to restart to complete the installation process.
7. If prompted, restart your computer to allow the updates to take effect.
In some cases, a single update may not be enough. It’s a good practice to repeat the process until Windows Update indicates that your device is up to date.
Step 3: Utilize System File Checker and DISM Cleanup
DISM Cleanup and the command-line tool Windows System file checker can be used to verify the stability of all significant system files. Additionally, it checks to determine whether any system files are missing or corrupted by comparing them to their original versions.
1. Click the Windows Button from the keyboard and search for CMD or Command Prompt.
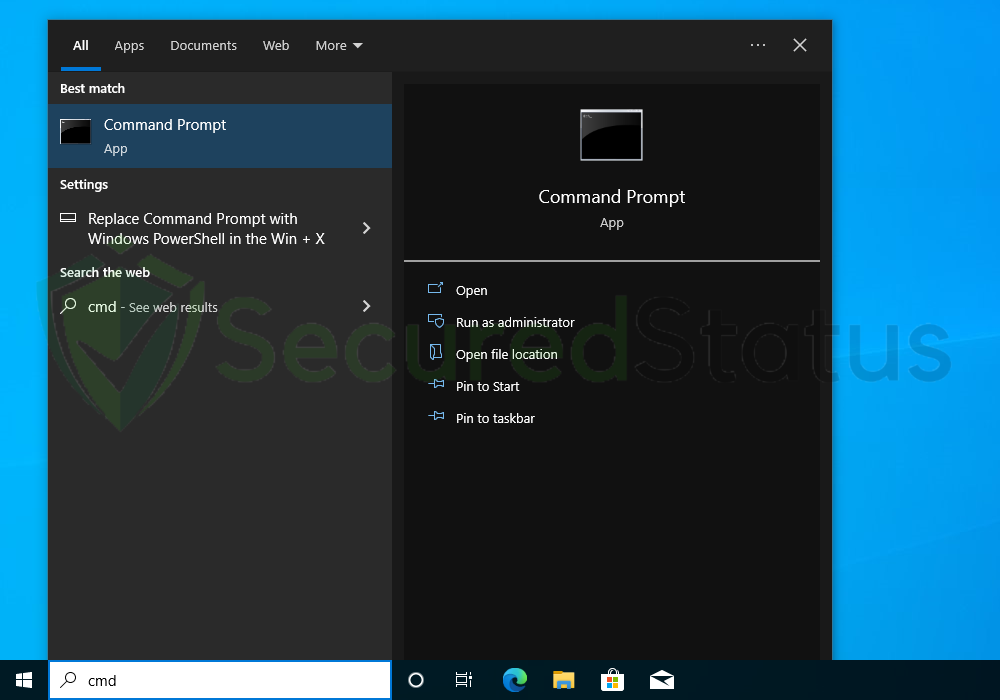
2. Right-click the Command Prompt application and select Run as administrator.

3. The User Account Control confirmation message will pop up, click Yes to proceed.
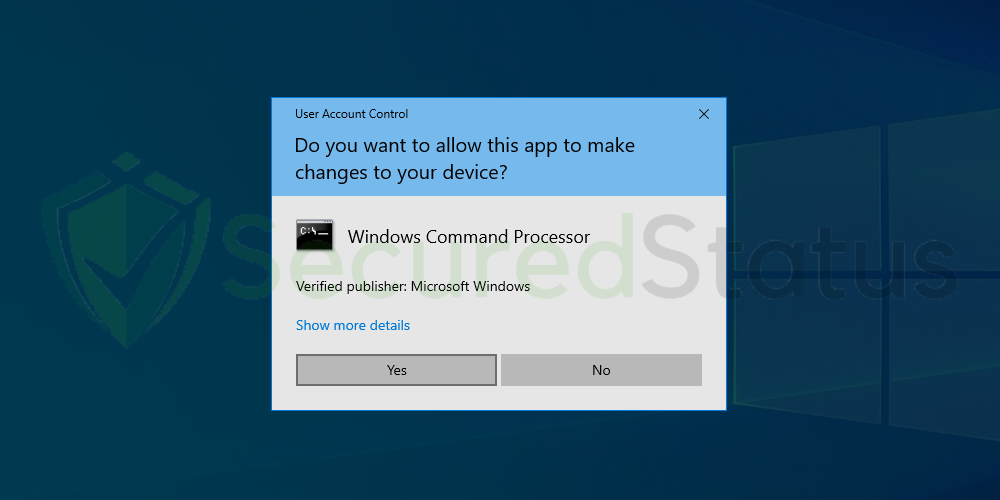
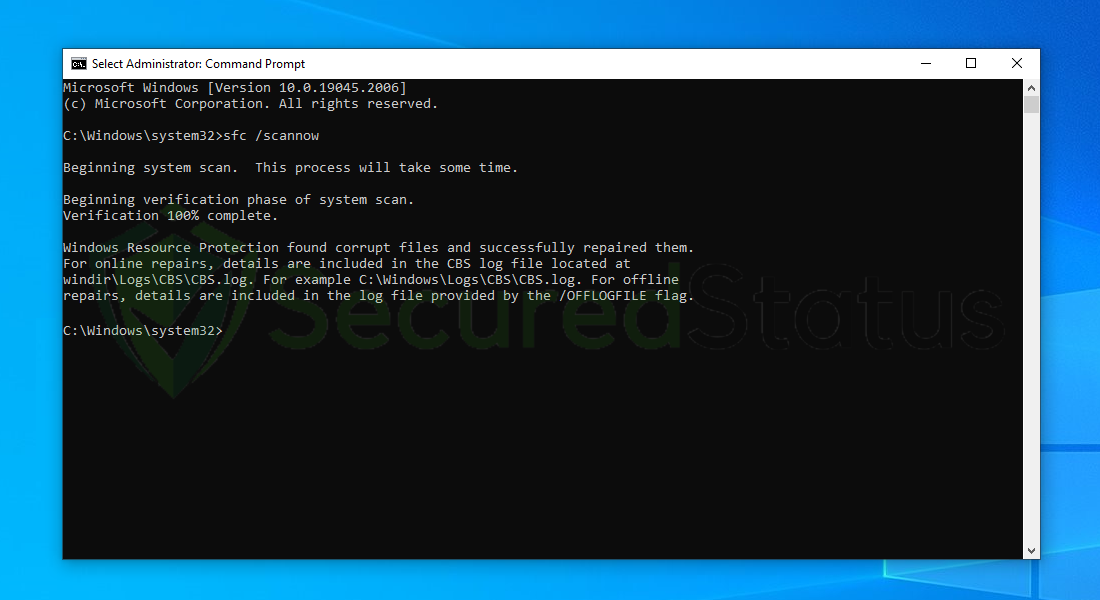
4. Once the Command Prompt opens, type sfc /scannow and hit enter. Please be patient for a few minutes as the scan will start and could take some time.
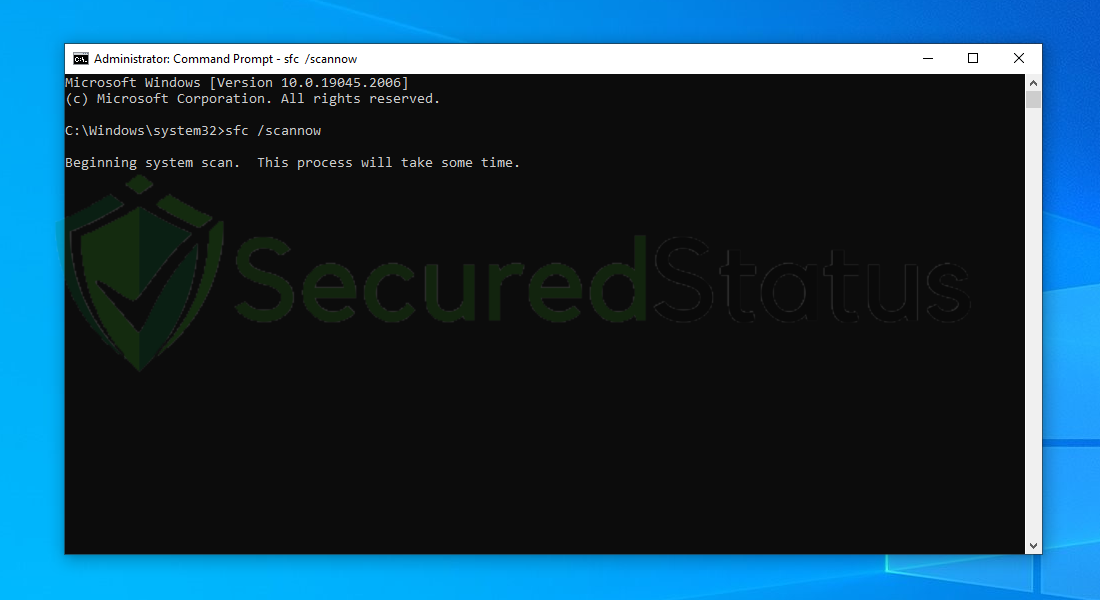
5. After the scanning process it will report that it has successfully found corrupt files and has repaired them.
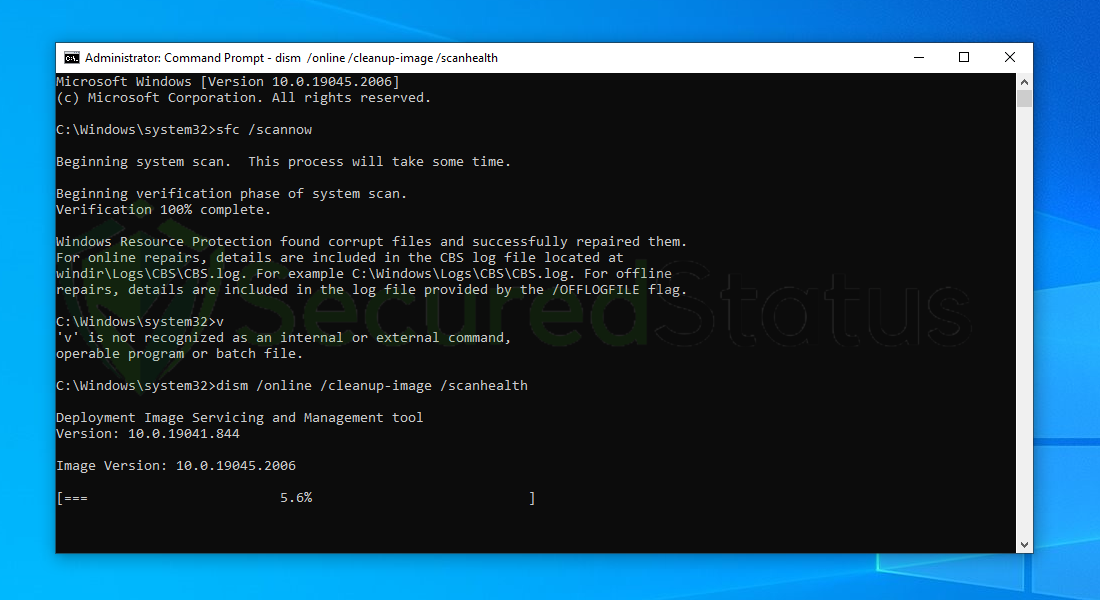
6. Next is to use the DISM Cleanup to patch faulty files in the computer system. Type dism /online /cleanup-image /scanhealth onto the command line and hit enter. Wait for a few minutes while it is scanning.
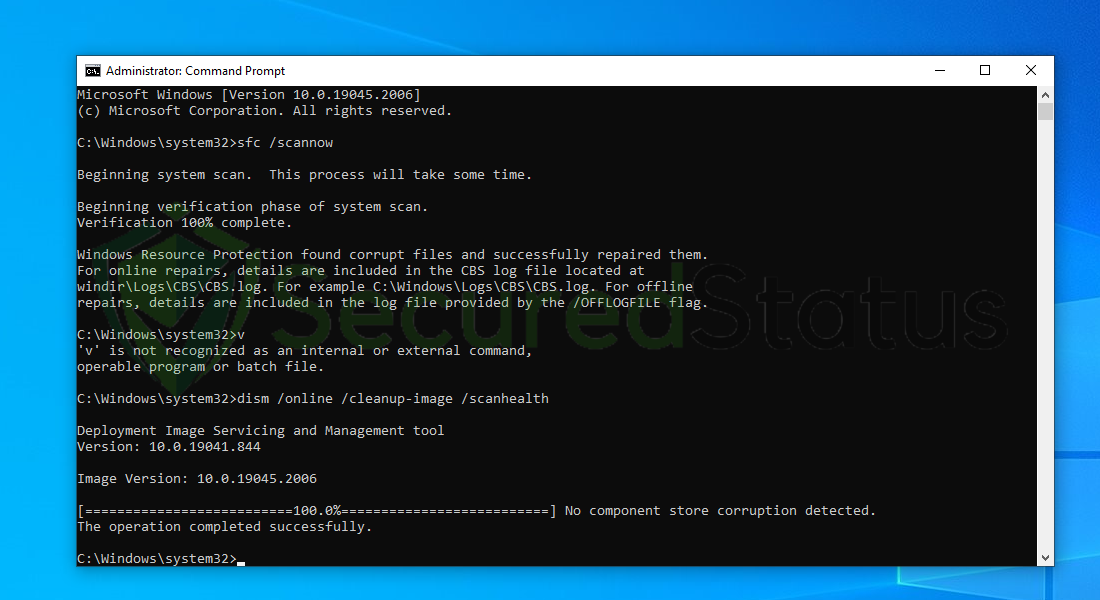
7. After the scan is complete, it will report that the operation is successful and that all corrupted components will be fixed.
8. Lastly, in order to fix serious windows errors, we will use the restore health command. Type dism /online /cleanup-image /restorehealth and hit enter once again to start the scanning process.
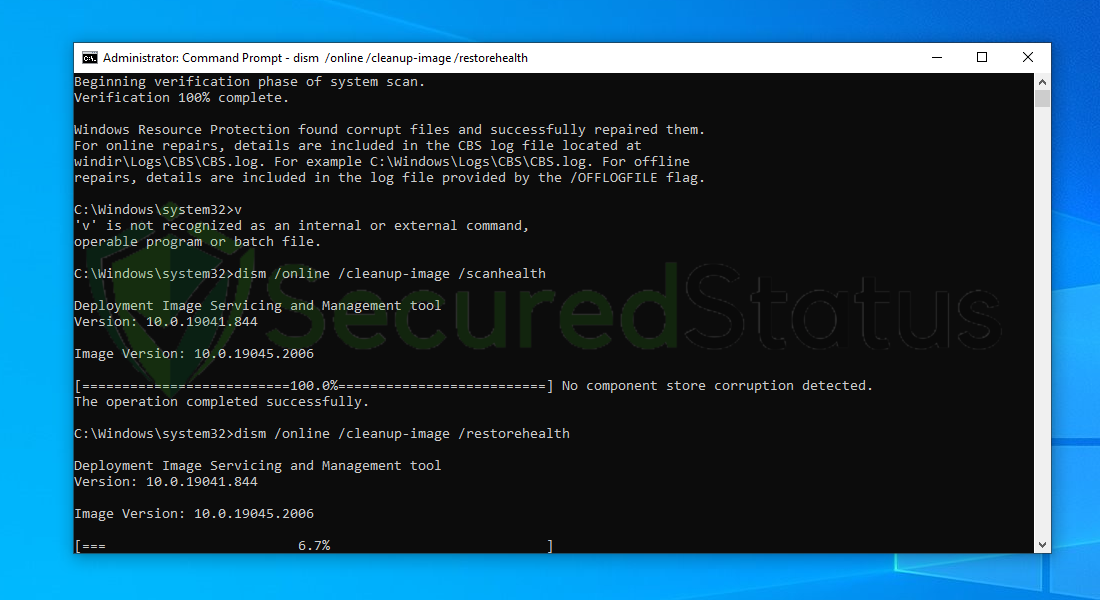
9. Once the scan is complete, it will report that the operation was successful and corrupted files and entries are resolved.
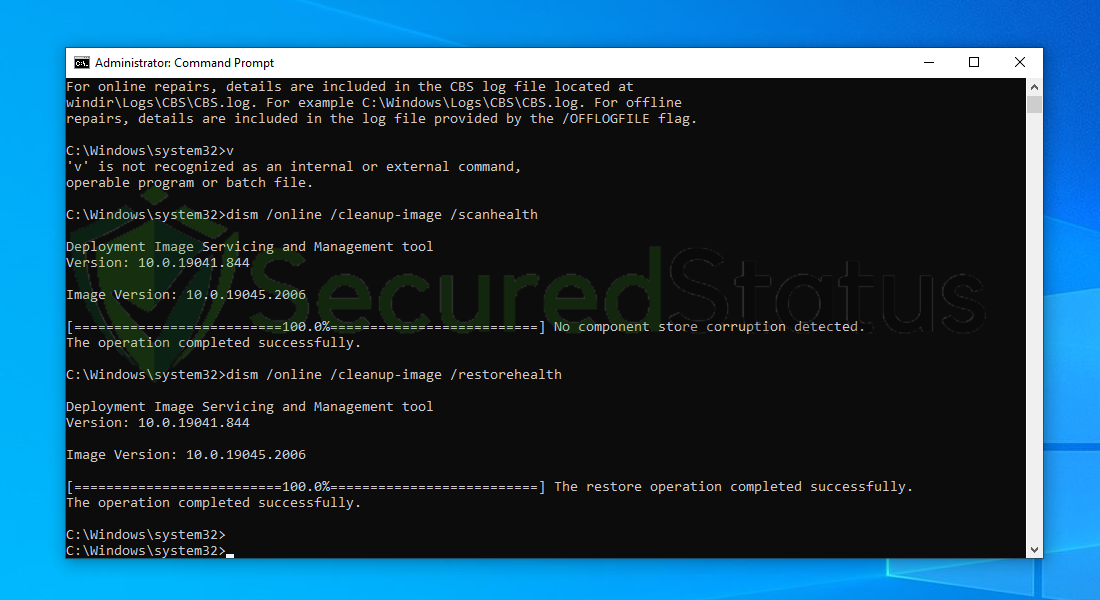
The corrupted system processes in your computer would have been recognized and fixed after you typed the lines in the Command Prompt.
Step 4: Restart NVIDIA Display Container LS
Whether the computer has NVIDIA, as most have nowadays, such freezing difficulties are usually caused by NVIDIA Display Container LS, and restarting it will fix the problem.
1. Press the Windows key + R on your keyboard. This will open the Run dialog.
2. In the Run dialog, type services.msc and press Enter. This will open the Services window.
3. In the Services window, look for NVIDIA Display Container LS in the list of services. You can scroll down or use the alphabetical order to find it more quickly.
4. Right-click on NVIDIA Display Container LS in the list.
5. From the context menu that appears, select Restart. This action will stop and then restart the NVIDIA Display Container LS service.
6. After restarting, you can check the service status in the Status column in the Services window. It should change from Stopping to Running once the restart is complete.
7. Close the Services window once you’ve verified that the NVIDIA Display Container LS service has restarted successfully.
Restarting the NVIDIA Display Container LS service is especially important if you are experiencing display-related issues, driver issues, or unusual behavior with NVIDIA graphics.
Keep in mind that this step does not affect your graphics driver, but it may fix certain software-related issues with the display container service, such as freezing and hourglass issues.
