It has been questioned if using a system restore point may help remove malware from a computer system. Given that some malware can be quite difficult to remove, this is a relatively regular occurrence.
But first, what exactly is a system restore? It is a Windows utility tool that aids in rolling back operating system changes to a certain saved point.
Since it is the system from which everything is stable and before modifications are done, it is highly beneficial for problems and errors identified within the system.
Users should be aware that, in terms of computers, system restoration is not the same as time travel and the malware in the system may still persist after a restoration is complete.
Cases Why System Restore Point Would Not Be Effective
It also depends on the particular kind of malware, such as if it is a worm or rootkit that is not persistent. Hence, if malware wants to survive a system restoration, it needs to make configurations in places like the task scheduler and the registry.
Moreover, it has the ability to conceal itself within system files needed for system restoration, which would leave them in place even after the alteration has been made.
As the primary Windows system directory, the System32 directory is one of the most frequent locations where malware hides itself.
There are situations where malware can be located within the computer’s RAM and the task scheduler, which is a typical installation location.
Malware can conceal itself anywhere in the system and not just on the Windows folder. They may also do so within the storage device or in the System BIOS. Malware can spread over other networks and has a wide range of attack methods.
Should I Use System Restore Point to Remove Malware?
If you are planning on using system restore point in order to remove a persistent virus, we should note that users should be able to choose a specific restore point where the malware is not yet active in the system. There’s a good chance that the malware has been hiding on the system for a while.
Most of the time, a regular antivirus scan eliminates the threat quickly, avoiding the need to restore the system to a previous time when it was clean because doing so would roll back the majority of Windows operations and files.
Conclusion: Yes and no, respectively, would be the response. Simple restore points can quickly remove common infections, however rootkit software is more difficult to remove.
So you can lose your present Windows and files for nothing if you don’t know what kind of malware you have, this is why.
Furthermore, we can simply scan the system for malware to be eradicated rather than having to go through restoration points, which would be less work. Rootkit and other forms of malware can be removed from the system using tools as well.
Instead of utilizing a system restore point, feel free to follow the removal instructions below if you need assistance removing malware from the system.
Removal Instructions For Removing Malware
This procedure will assist you in removing persistent malware infection from the computer system. You can rest assured that the information provided below has been tried and tested.
Step 1: Use Malwarebytes Anti-Malware
If you have trouble locating the malware threat in the system, you may utilize a powerful antivirus software. Malwarebytes Anti-Malware is one of the most effective anti-malware programs available. 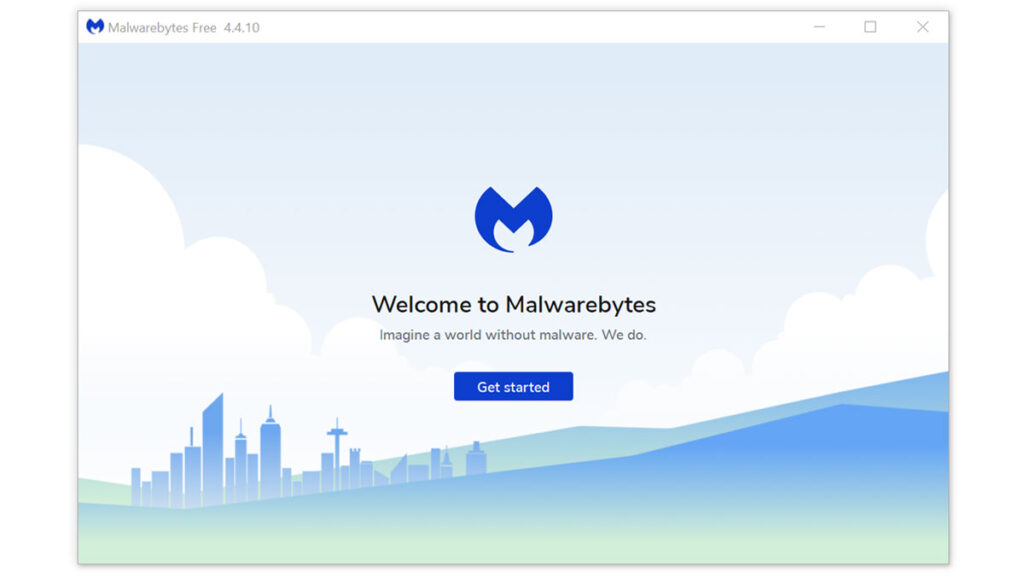 They have some of the greatest threat detection software, ensuring that any unwanted threats on your computer are totally eliminated. If neither of those methods work, you can utilize this antivirus program to complete the task. Furthermore, even after the malware is removed from the computer, we recommend that you run a complete scan just in case.
1 Visit the antivirus website or click the button above to download the most up-to-date version of the software that best suits your requirements.
2 Follow the software installation instructions until they are completed.
3 Run a complete malware scan on the machine and wait for it to finish.
4 All the detected threats found on the computer will be shown on the screen and clicking the “quarantine” button to remove them.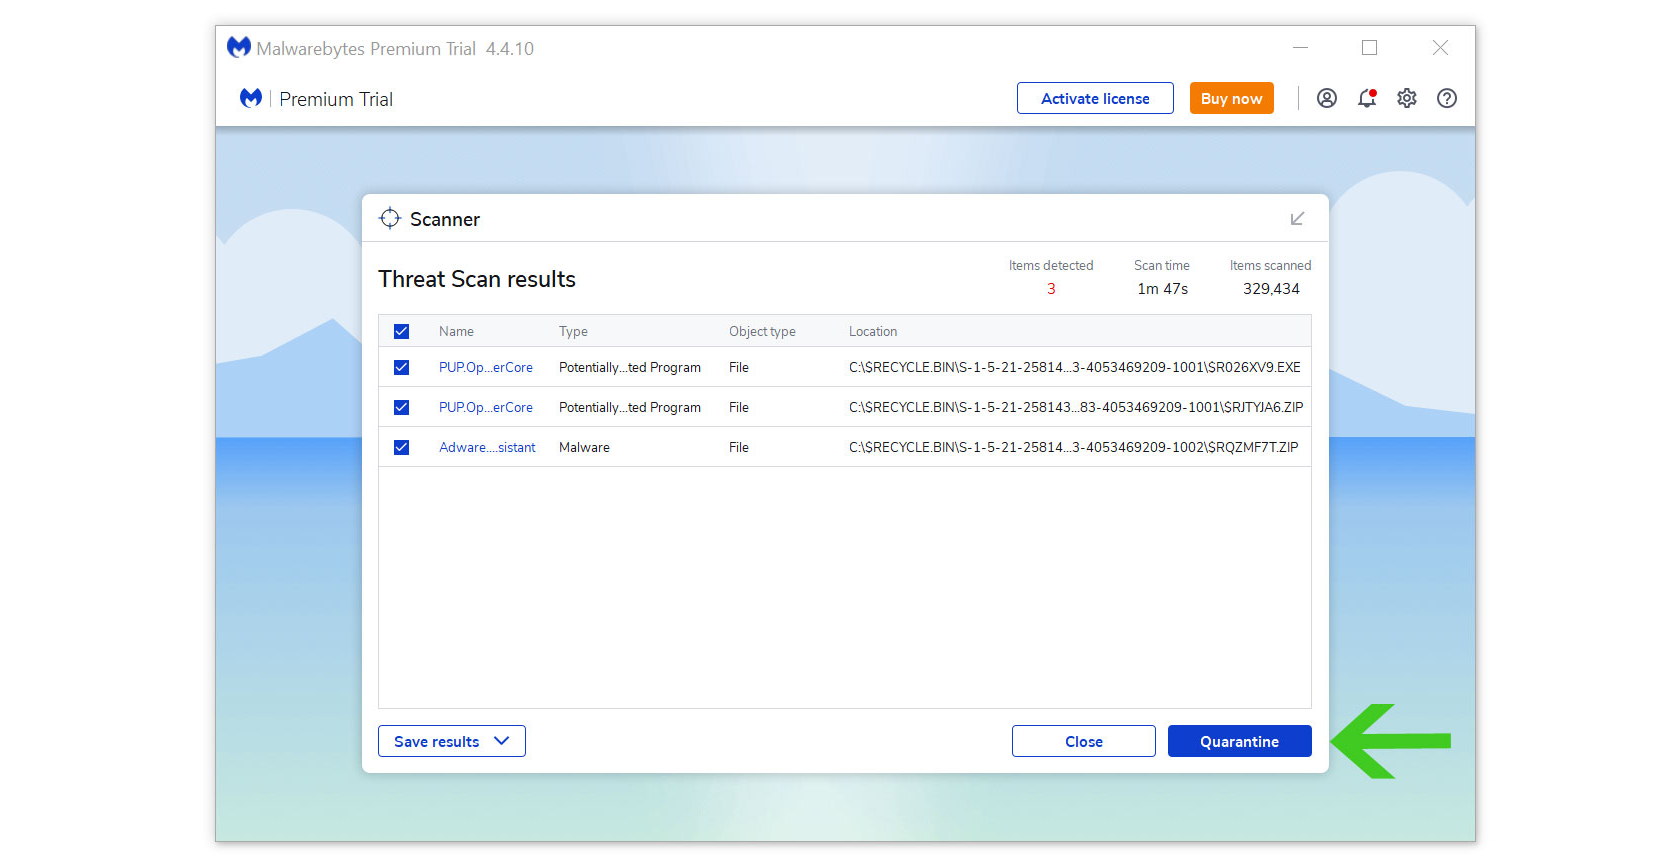
After removing the malware from the computer, you have the choice to remove the application if you want to. While doing so will disable Windows Defender Real Time Protection, following the removal of Malwarebytes, you can follow this article to reactivate it again.
Step 2: Find and Remove Unwanted Program
Since this type of computer threat takes the appearance of an application, it’s essential to try and locate the source of the program and remove it from the system as soon as possible to avoid further harm.
It is worth noting that locating the program can be tricky because many malicious programs disguise as legitimate programs or system files. You may locate the program by utilizing the Task Manager and finding suspicious applications that are currently running when you are facing the browser hijacker symptoms.
Remove Program via Control Panel

1 Search Control Panel in the Windows search bar then click it.
2 The Control Panel should open, from there click Programs then Programs and Features.
3 A list of installed software will show on the screen after a moment.
4 Scroll down and find any suspicious programs you did not download then right click the application and select Uninstall.
Utilize Revo Uninstaller
For computer users who are not sure of what to do. You may resort to using Revo Uninstaller since it is much more effective and easy to use. Revo Uninstaller is a very useful tool for Windows users.
This uninstaller not only removes programs from the computer but it also deletes their changes from the Windows Registry, Host File and etc.
1 Click the button above and download the latest software that is compatible with your system.
2 Open the downloaded file and it should guide you through the setup.
3 Follow the installation procedure and wait until the installation of the software is complete.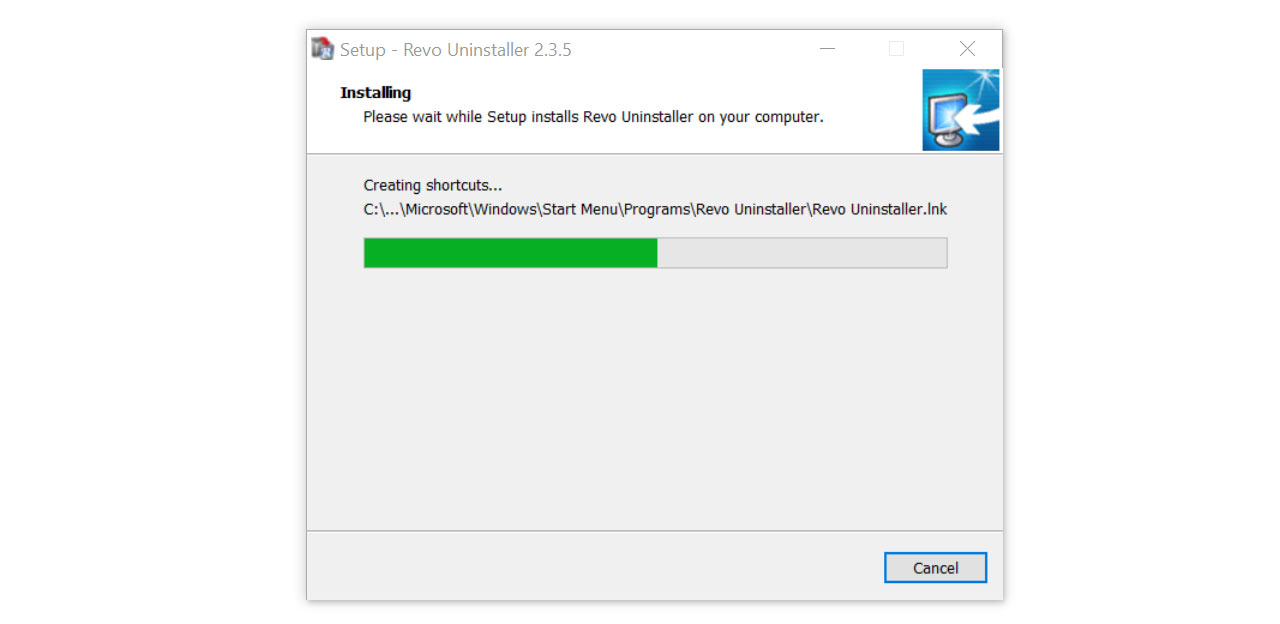
4 After the installation is finished, tick the box that says Launch Revo Uninstaller then click finish.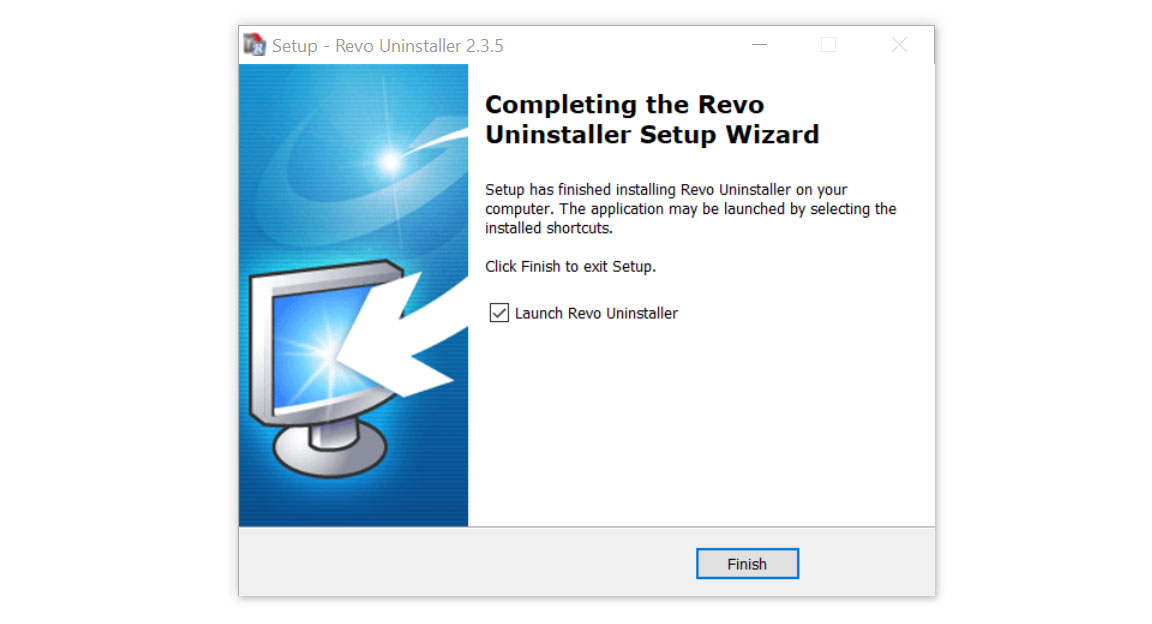
5 Once the software has launched, find the unwanted application that is needed to be removed, double click the program to uninstall.
6 Click on the Continue button and follow the procedure to start uninstalling the program.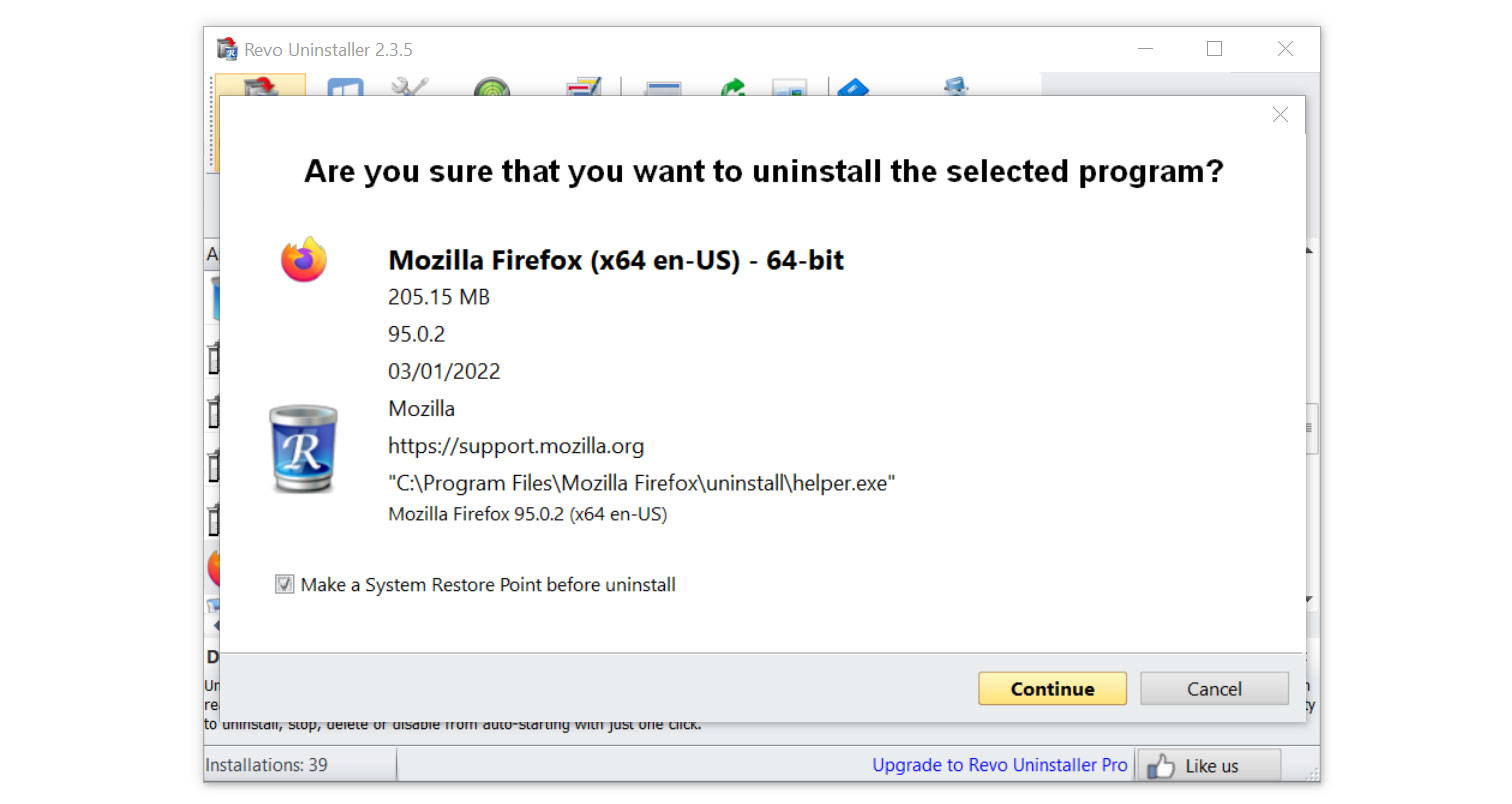
7 Once it is uninstalled, a window will pop-up. Select the Advanced option for the scanning mode then click Scan to find remnants of unwanted applications and malware.
8 A window will pop-up and show all of the leftovers and changes made by the program uninstalled a while ago.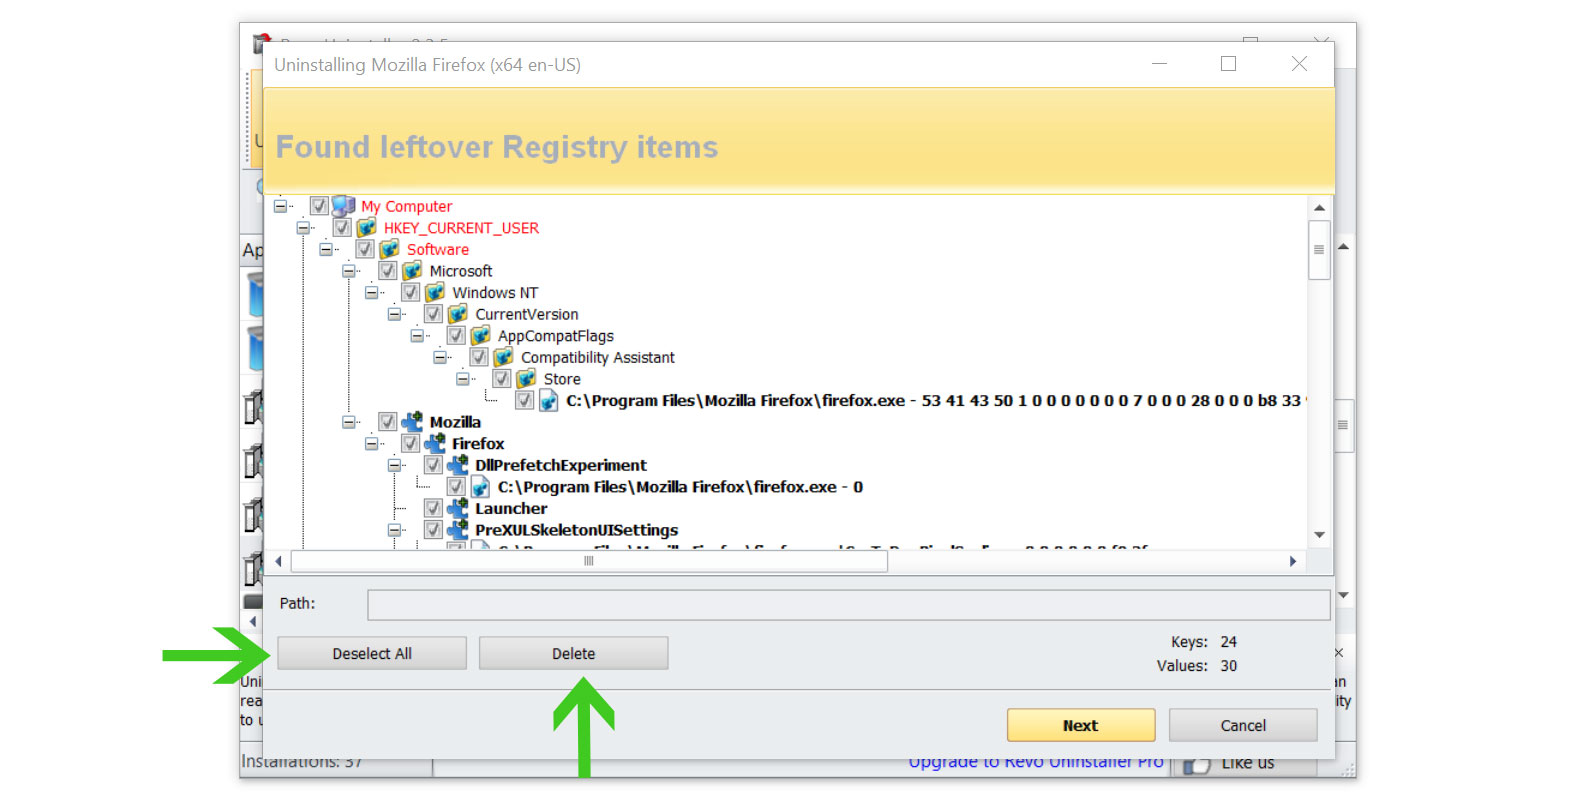
9 Click the Select All button and hit Delete to remove the leftovers found on the Windows Registry.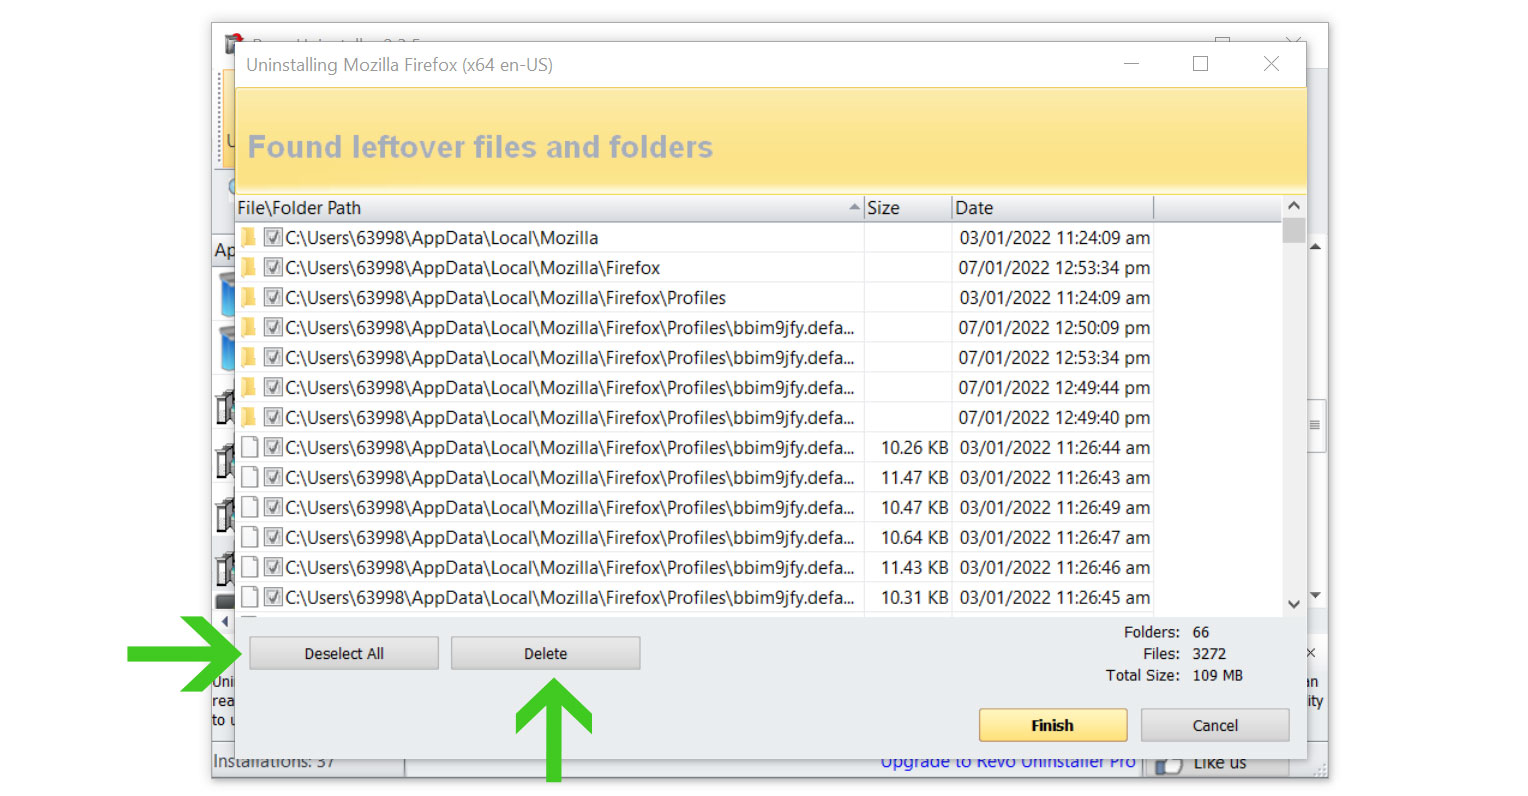
10 Some leftover files may be found, click Select All then Delete them as well.
11 Once the window closes, you have successfully removed the malware threat from your system.
Step 3: Reset the Browser to Default Settings (Optional)
Once malware has been removed from the system, we need to make sure that the changes it made from the browser should be turned back to normal. Rather than changing the default homepage and permissions manually, it is much easier to reset the browser to its default settings.

Google Chrome
1 Open Google Chrome and click the three dots in the upper right corner of your screen to access the Google Chrome menu.
2 Click the Settings button, then click the Advanced menu on the left side of the screen from the settings screen.
3 On the drop down menu, select Reset and Clean up
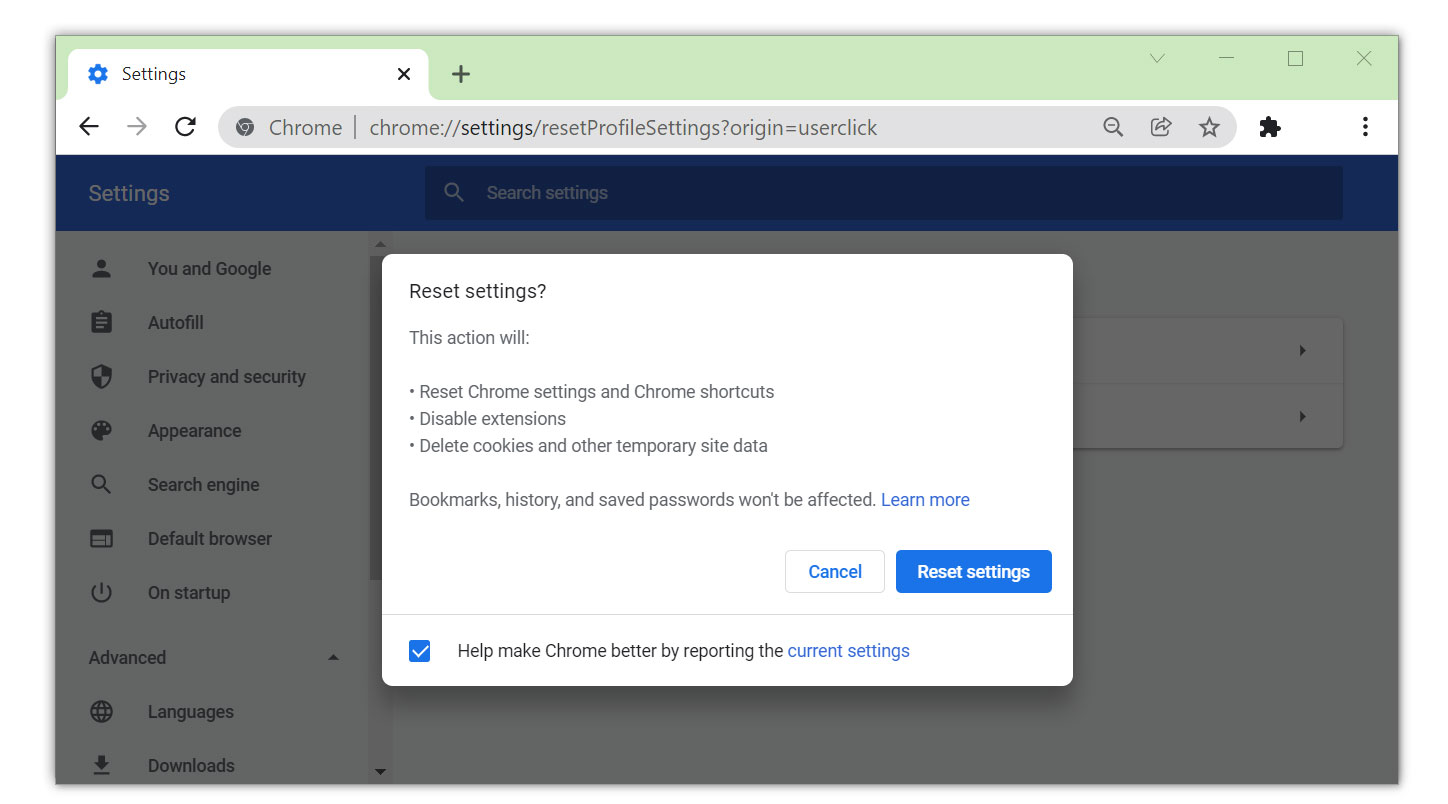
4 Click on the Restore settings to their original defaults.
5 Then a small window will appear and click the Reset Settings.

Mozilla Firefox
1 Launch Mozilla Firefox browser then open the menu by clicking on the three horizontal lines located in the upper right corner.
2 Navigate down and click Help then select More Troubleshooting Information from the options given.
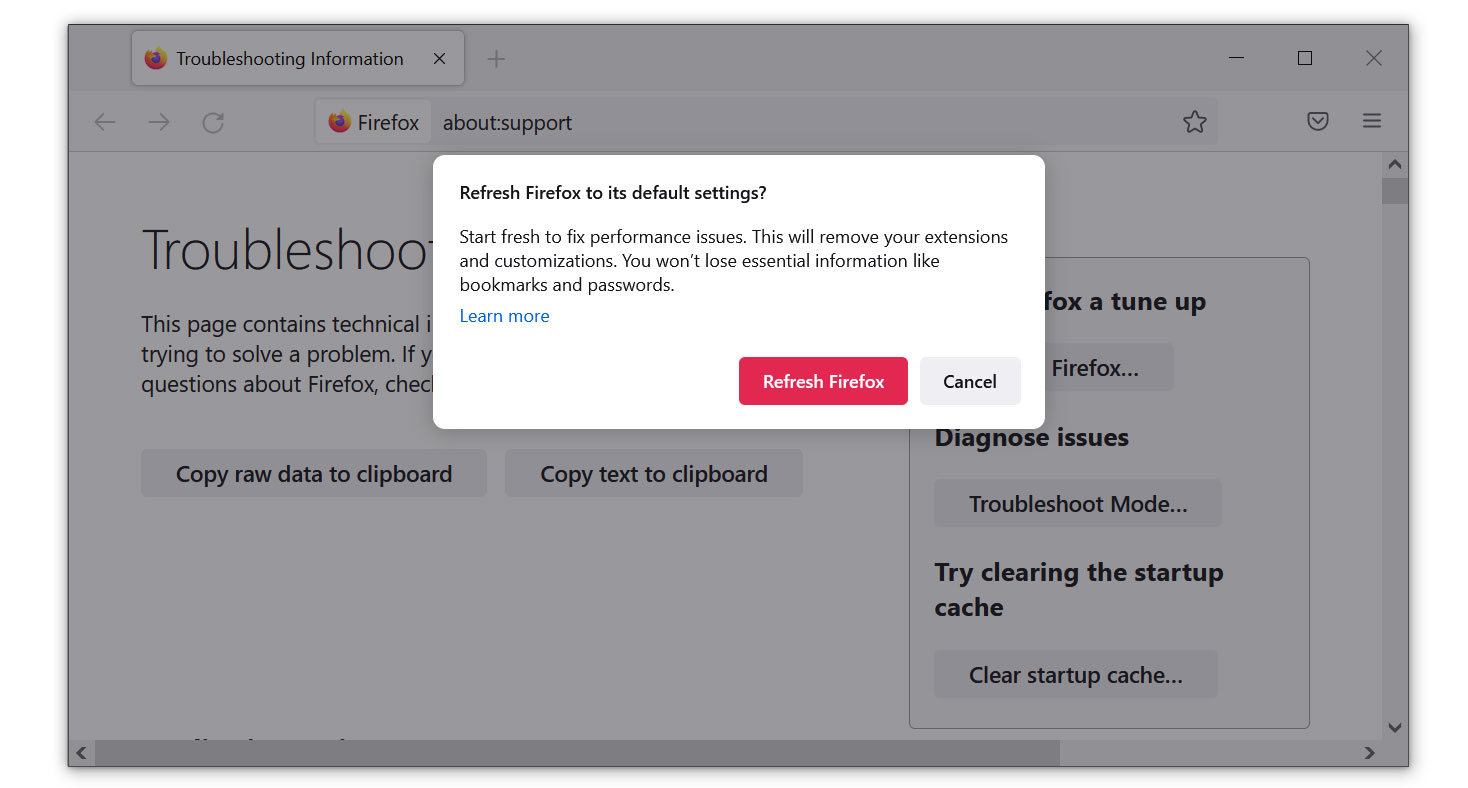
3 Select the Refresh Firefox button.
4 Click Refresh Firefox on the confirmation window that appeared.

Microsoft Edge
1 Run Microsoft Edge on the computer and click three dots icon on the upper right corner.
2 Click on the Settings button from the drop down menu.
3 Find and click the Reset Settings from the left sidebar.
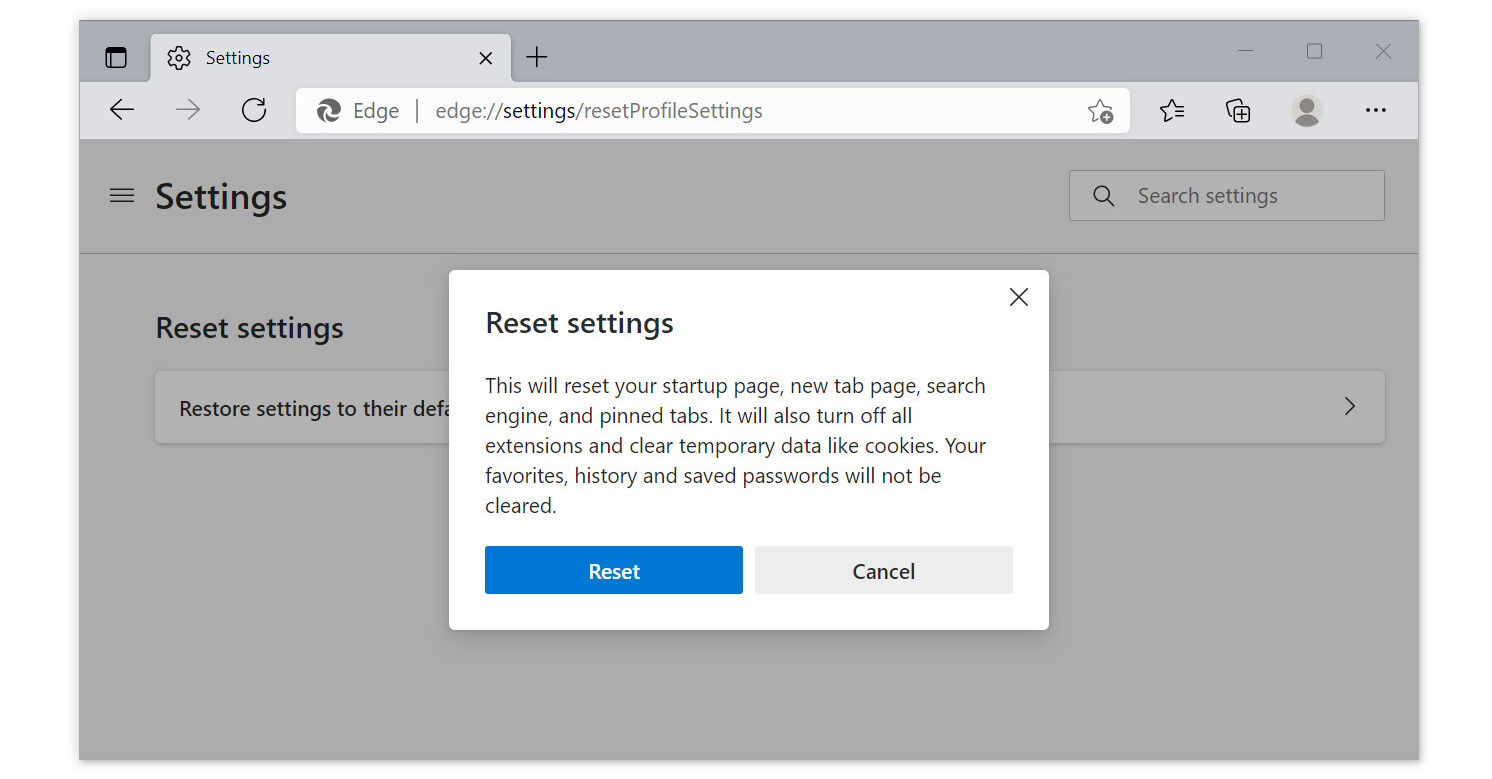
4 Then click on the option Restore settings to their default values.
5 A warning window will appear that you are about to reset the browser, click Reset and the browser should return to its default settings.
Step 4: Scan with Kaspersky Antivirus for Hidden Malware
If you frequent several forums and websites, you will always see the majority of people concurring that Kaspersky is among the top antivirus programs on the market. Even after we have removed infestations from the computer system, there is a possibility that malware is still present.

Since each antivirus application has its own threat database, Kaspersky’s detection technology may be able to find viruses that the prior program missed.
We recommend conducting a scan just in case to make sure the malware infection is completely removed from the system. Additionally, if this is your first time downloading the application, you will get a 31-day premium trial.
1 Download the Kaspersky Security Cloud by clicking the button above.

2 Once the setup has finished downloaded, open the file and start the installation.

3 Wait until the wizard finds the latest version of the application or click Skip to install the current version stored.

4 Review the License Agreement. If you agree to its terms, click Continue.

5 Follow the installation instructions as shown then finally click install. (You may choose to uncheck the options shown if you do not want those features.)

6 Wait for the application to finish installing, then after the process is complete, click done.

7 Apply the recommended settings then start the application by clicking apply. Feel free to untick the options you do not desire.

8 You will be prompt to create an account and once you are finished, you will be redirected to the main screen. Select the Scan tab then click the run full scan and wait for it to complete. (Before scanning, we recommend you update the database to ensure any new malware variants are detected.)

9 After the scan has finished, the detected threats will be deleted from the computer.

Simple tips to be safe online
- Never acquire software or programs from unknown sources, as this is one of the most common ways for adware and other types of malware to attack your computer. Only download from reputable and legitimate websites. To be safe, stay away from torrent downloads and cracked software download sites, as there will always be malware in the files.
- Using a firewall is one of the most foolproof ways to be safe online. It serves as a first line of defense against dangerous websites, shielding visitors from potential risks. It protects the user’s network and device from intruders. A firewall will safeguard a user from the threats hiding on the vast internet in today’s age.
- It is essential to keep anti-virus software up to date on a computer since hundreds of new malware threats are released every day that target the machine’s vulnerabilities in order to infect it. Anti-virus updates include the most recent files required to counter new threats and safeguard your machine.
- Only visit websites that has a secured connection. A site with HTTP connection does not encrypt the data it receives and therefore is not considered secure. Entering personal information such as email addresses, phone numbers, and passwords on a website with an HTTP connection is risky since it could be compromised and your information stolen. Websites with HTTPS connections, on the other hand, are secure since data is encrypted and attackers are unlikely to gain access to information exchanged within the site.
- Backups are critical for ensuring the safety of your data. Without a thorough backup of the data, several computer dangers and irreversible damage can arise. Backing up your data is a crucial step in ensuring the safety of your information. Having a backup copy of the system and data will be extremely useful in the event of a harmful malware attack.
