What is Shield-key.com?
Shield-key.com is a website that forces people to download an undesirable program and redirects them to malicious websites. You should avoid interacting with the contents displayed on the said website because it may do you harm.
It will display bogus advertising advising you that your device is infected or that you need to download something to make your phone faster.
If you previously permitted websites to display notifications on your device, this could be the major reason you are receiving advertisements from Shield-key.com.

Messages such as “click to allow notifications” are used to grant permission to display this advertising. In addition, you may have subscribed to a rogue website to add calendar events on your Apple device.
Another option is that you installed an adware application on your phone and it changed some settings.
Shield-key.com must be erased from the phone since the contents it may display may be dangerous. You could be duped into downloading a keylogger or a stealer, putting your device at risk.
Pop-up infections are not as dangerous as they appear, but they can do harm if ignored. In the section below, we’ll show you how to get rid of Shield-key.com and the advertisements it displays. Please carefully read and follow the instructions.
Shield-key.com Removal Procedure
This procedure will assist you in removing Shield-key.com as well as malicious threats inside your device. You can rest assured that the information provided below has been tried and tested.
 For Android Devices
Scroll down below to access the instructions for the iOS operating system.
Step 1: Remove Shield-key.com from Browser
You keep seeing pop-up ads because Shield-key.com has interfered with your web browser settings. The problem will almost definitely be resolved by reverting the changes made in the browser preferences.

Google Chrome
1 First open Google Chrome then go to the upper right corner of the browser and click the three dots menu button.
2 From the shown menu, select Settings.
 3 Scroll down and click Site Settings under the advanced section.
4 Once the Site settings menu appears, click Notifications.  5 Find Shield-key.com from the website's list and remove its access by blocking it.
 6 To be safe just in case, go back to the Site settings menu and go to Pop-ups and redirects.
  7 Block Pop-ups and redirects from the browser.
  8 Go back to the Site settings again and go to Ads.
  9 Block Ads by toggling the switch off.

Mozilla Firefox
1 Launch Mozilla Firefox browser then click the three horizontal dots on the lower right corner to open the menu.

2 Click the Settings option.

3 Hover over to the Privacy and Security section and click Site permissions.

4 Click Notifications from the Site Permissions menu.

5 Set Notifications to Blocked.

Step 2: Remove Adware from the Device.
One of the causes of Shield-key.com ads on the device could be because of advertisement-supported software (adware). We should also delete the malicious application if one exists to deal with this.
1 Go to the Settings application and head over to the application menu. It is the menu wherein installed applications are seen. Since many Android devices are different, there are also different locations for this menu.  2 Scroll down the installed applications and find suspicious ones that you might not recognize or installed.
 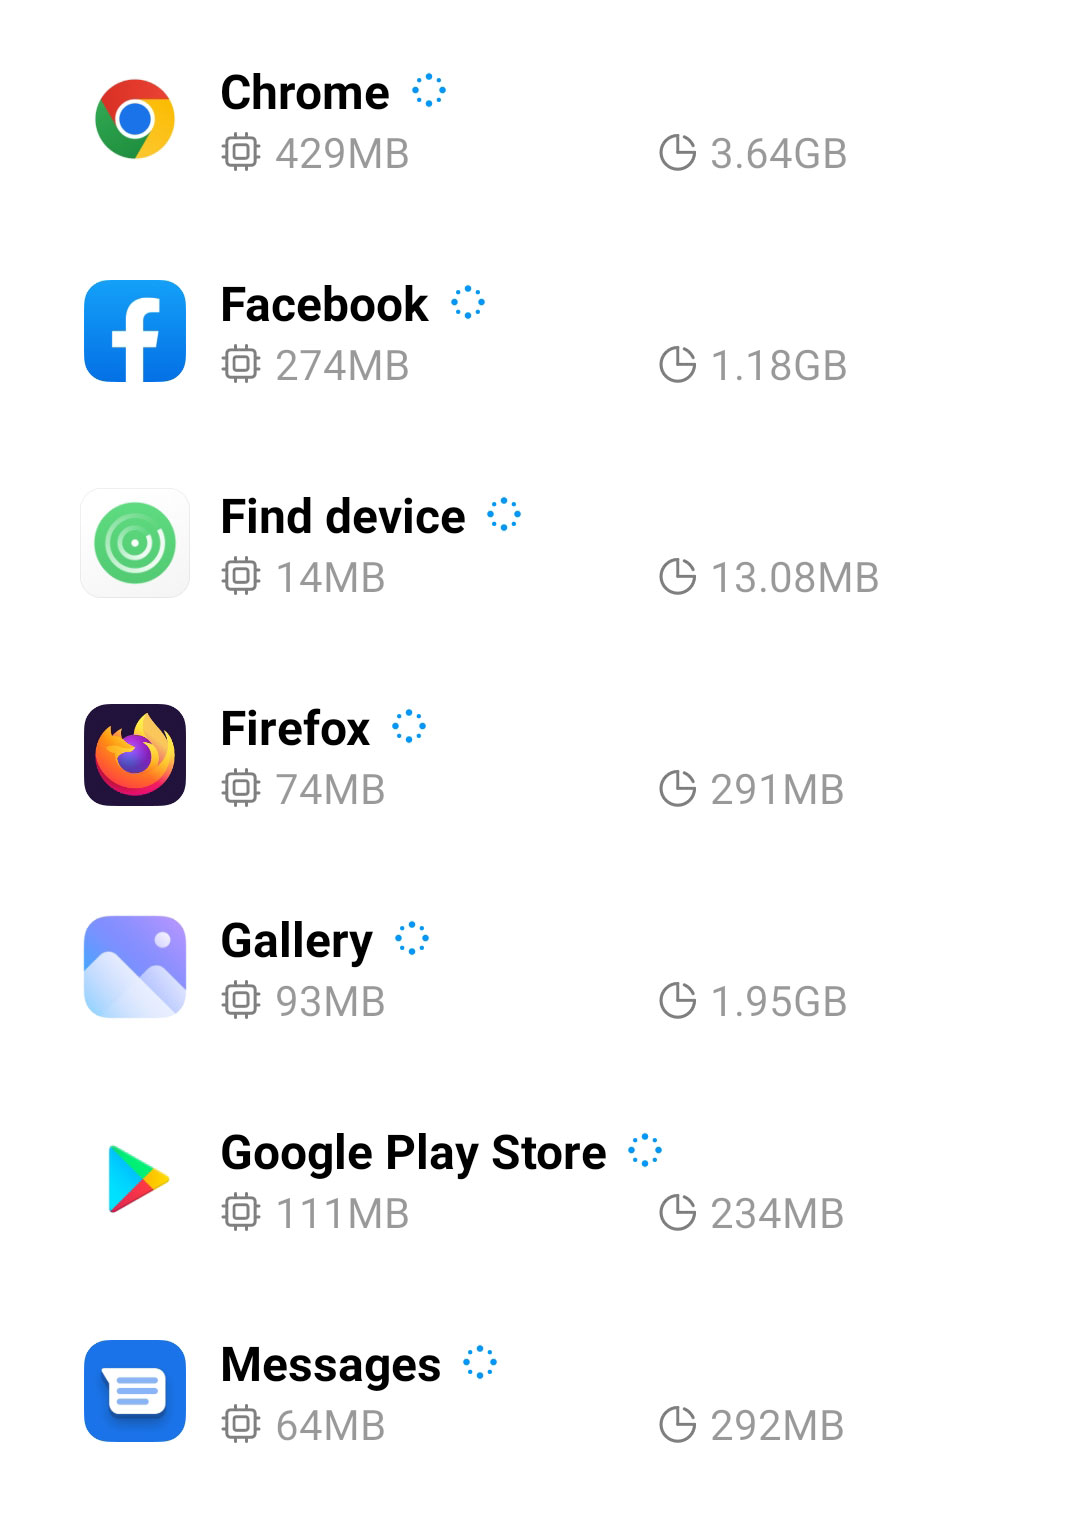 3 Once you find the suspicious application, click it and uninstall it. For this guide, we are using Smart Cleaner Ultra as an example.

Step 3: Scan with Malwarebytes Anti Malware
Malwarebytes is a renowned anti-malware tool and it has one of the best threat detection rates. After removing Shield-key.com from the browser as well as uninstalling the adware, it is important to scan the device for potential threats just in case.
Every device should be scanned every once in a while. With this tool, not only Shield-key.com but also other threats that are lurking on the device can also be eliminated.
1 First, go to the Google Play store and install Malwarebytes Anti Malware.  2 Once installed, it will ask you for permission to access files. Allow it access to manage the files on the device, it is needed to detect malicious threats

3 Click Run a full scan to detect potential threats on the whole device. Since this may take a while, you can simply close the application and let it run in the background. You can see the progress of the scan through the notifications.

4 After the scan is complete, the detected threats will be shown on the screen and all that is left to do is to eliminate them. Click the Remove Selected to get rid of the threats.

We advise you to run a routine scan of the device to ensure that it is continuously malware free. We also recommend using Malwarebytes Real-Time Protection, which will secure your machine and detect any threats as soon as they appear.
 For Apple Devices
Step 1: Enable the Block Pop-ups Feature
If Shield-key.com remains even after closing the browser and the tab. You can utilize the exclusive to Apple devices Block Pop-ups feature.
It is a useful function designed to prevent the browser from opening undesirable websites. Here's how to activate it so that undesirable websites will be automatically blacklisted, assuming you haven't already done so.
1 Open the Settings application, you may do so by searching or simply clicking it from the home screen.

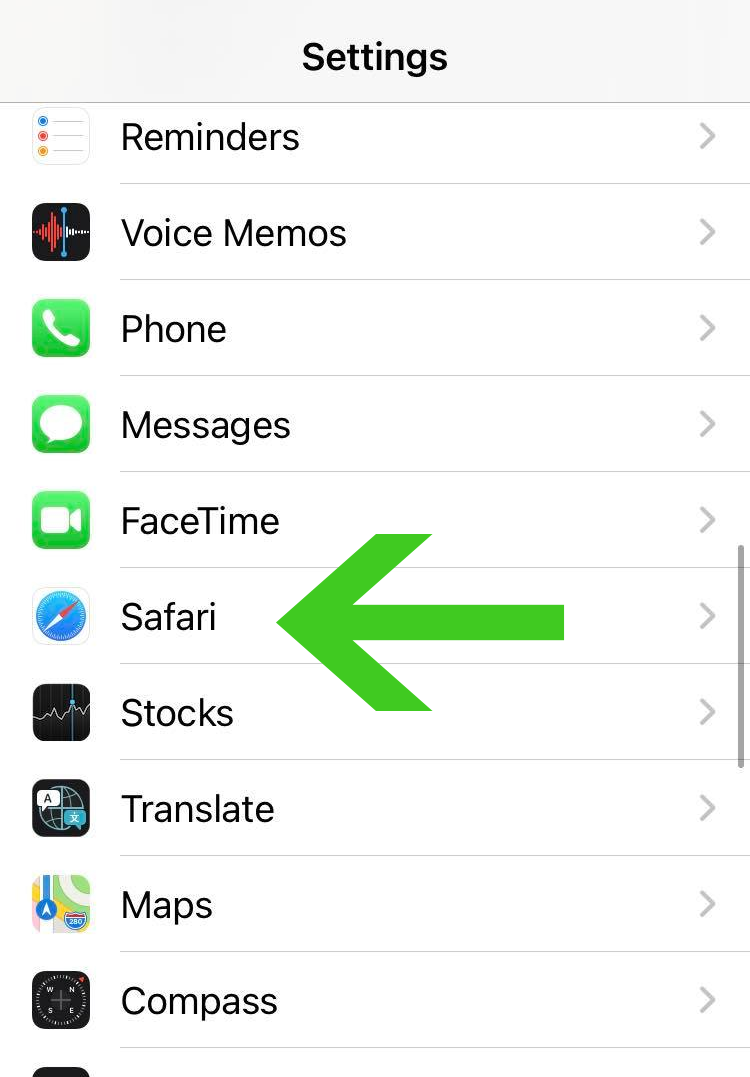
2 Once you are inside the Settings application, scroll down and click Safari from the list of applications as seen in the picture below.
3 Inside the Safari settings, you can find the Block Pop-ups feature under the General section. Toggle the switch to enable it unless you haven't yet. This option is enabled by default unless you disabled it under uncertain circumstances.
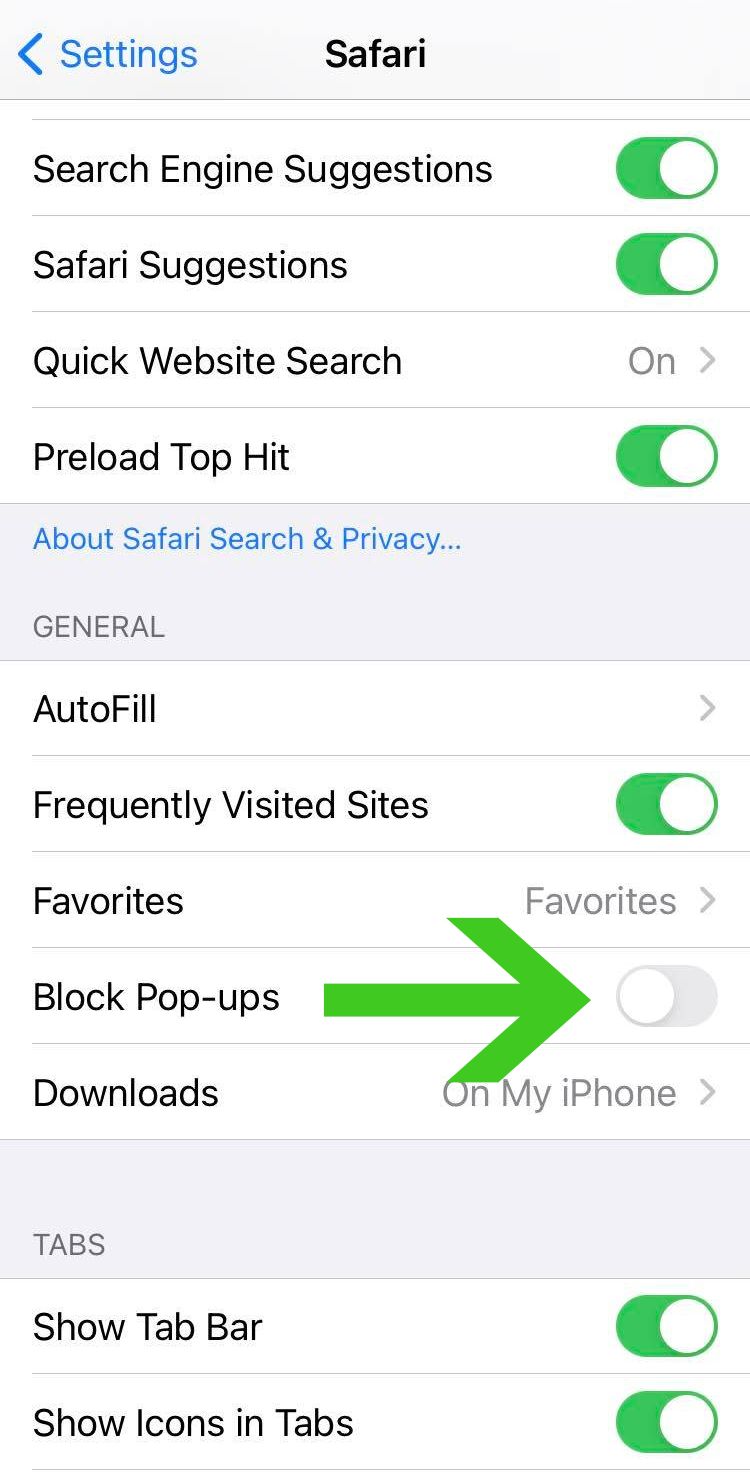
4 Now that the Block Pop-ups feature is enabled, any unwanted and suspicious websites will be blacklisted and will no longer show up in your Safari browser.
Step 2: Manually Block Shield-key.com from Device
If you are still unsure about the appearance of the website and want assurance that the said website will never appear again. You may utilize the Content & Privacy Restriction feature to blacklist the website itself from the device.
1 To start, head over to the Settings application of your device, scroll down and click the Screen Time option with the hourglass icon.
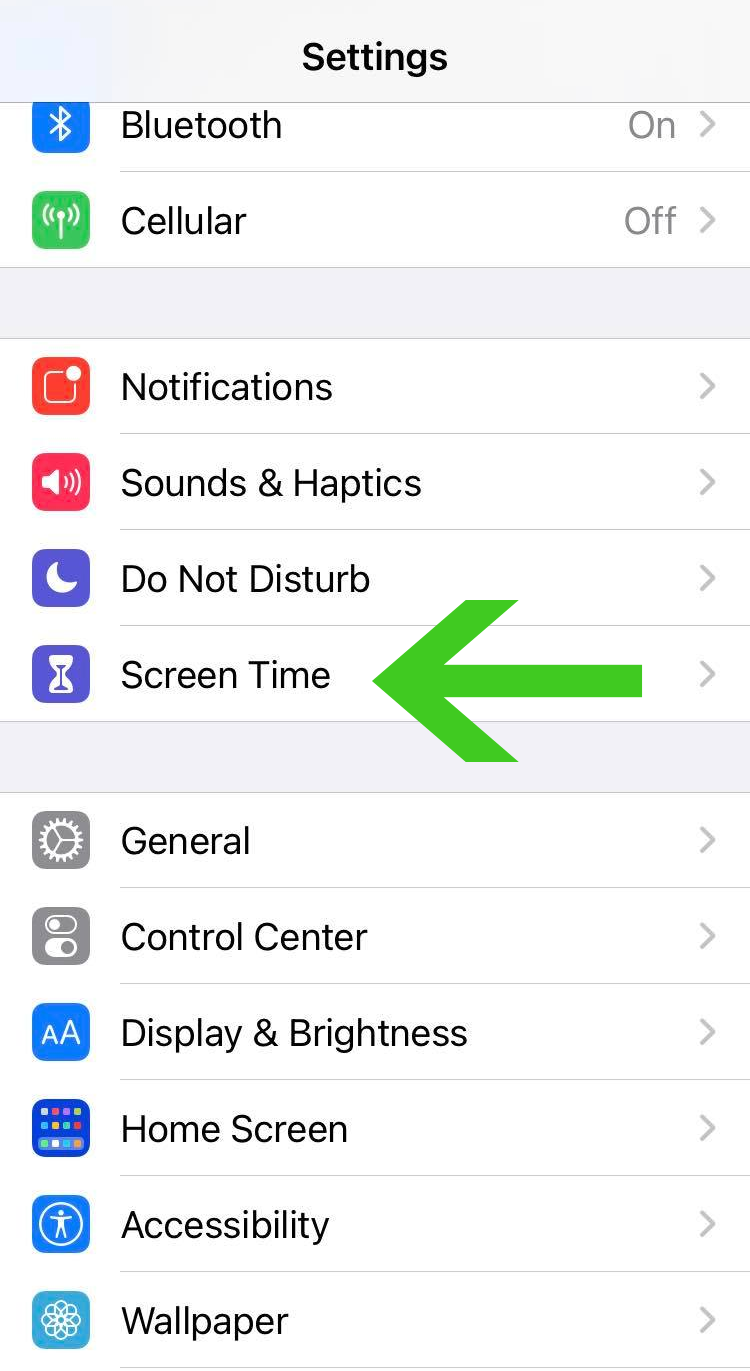
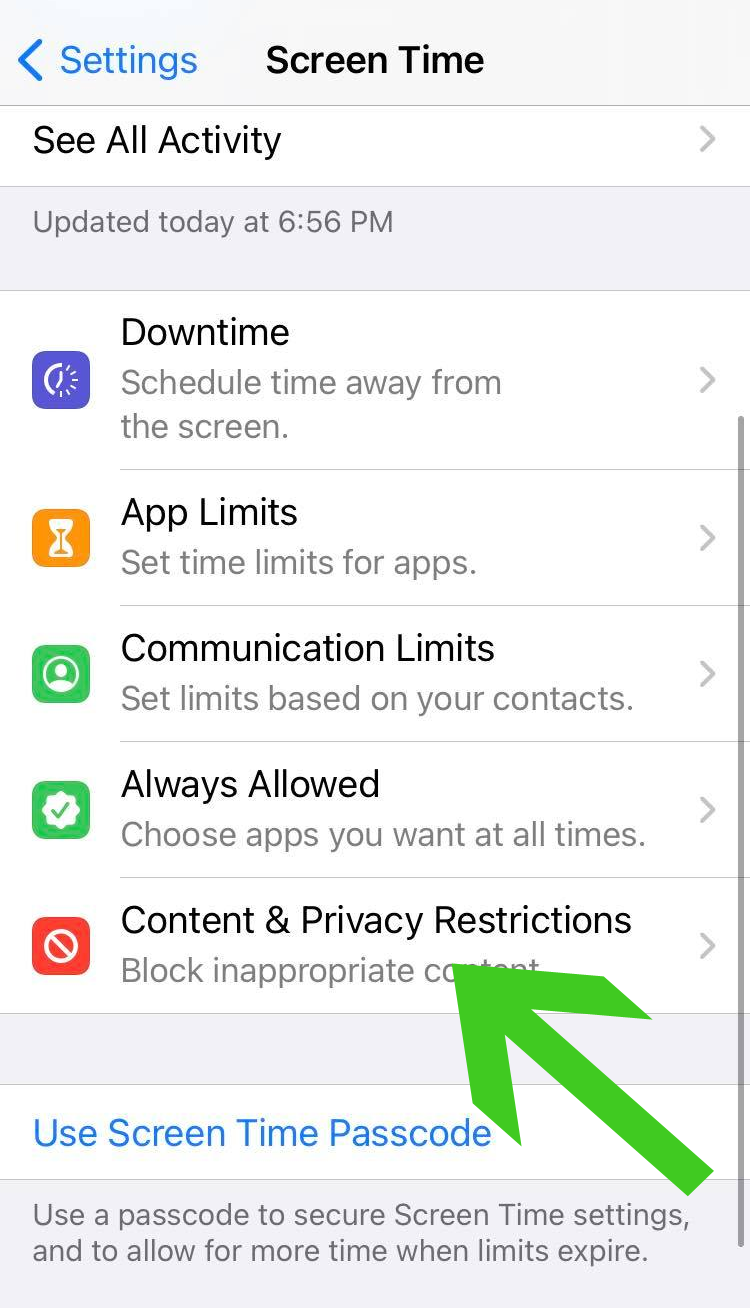
2 From the Screen Time settings, click on the Content & Privacy Restrictions option as seen in the image below.
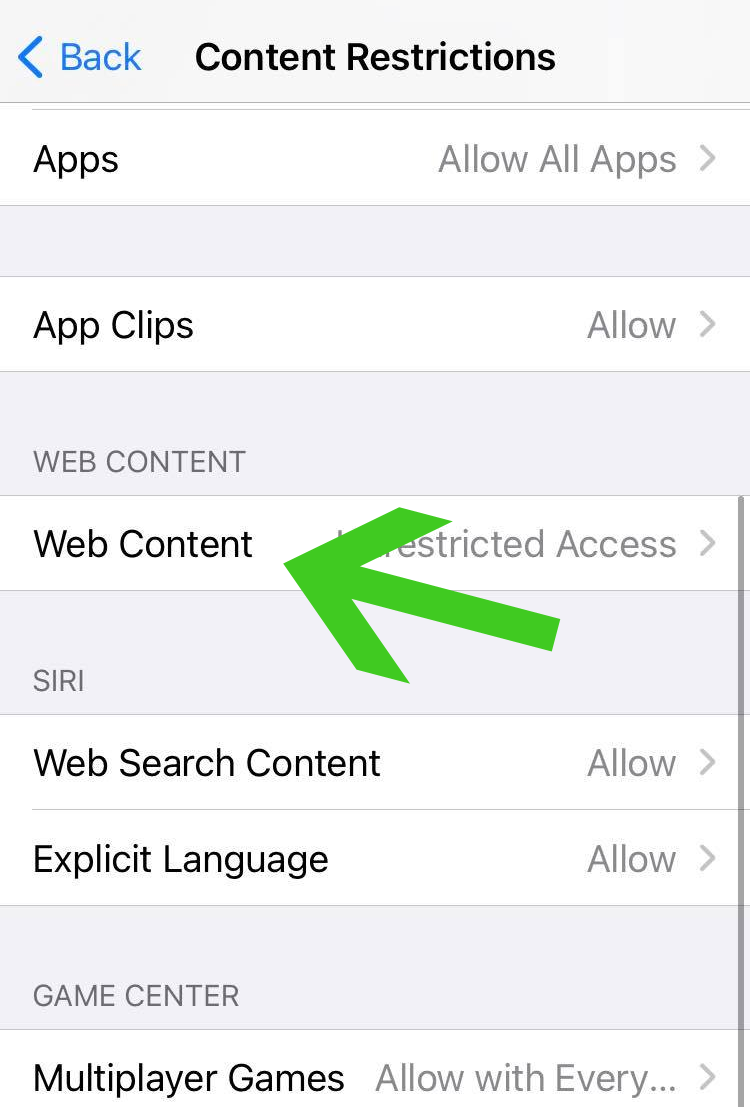
3 Once inside the Content & Privacy Restrictions settings, scroll down and click Web Content from the list of features and options it has.
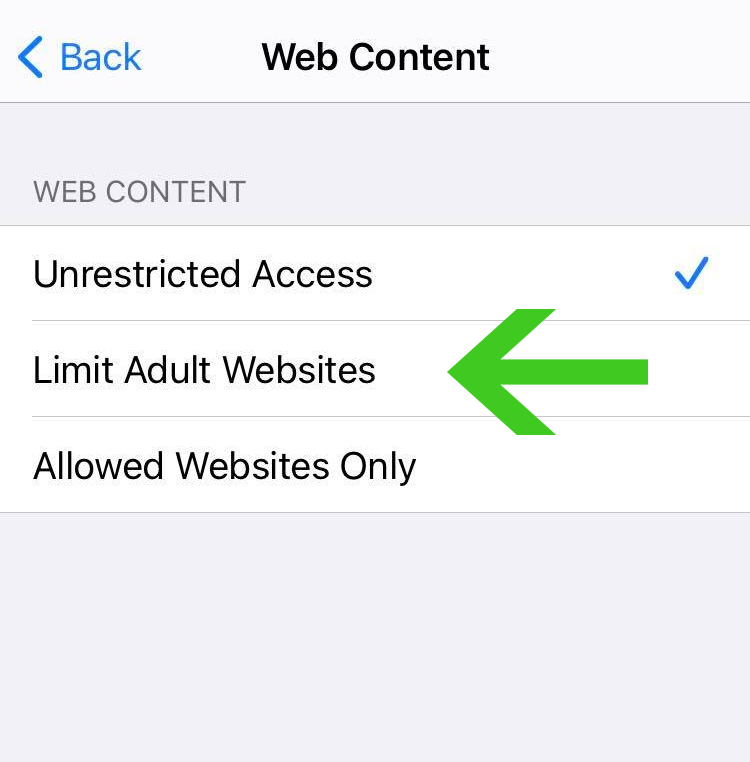
4 From here on you are presented with three options, unless you have never used this feature, it will be set to default with Unrestricted Access. Click on the Limit Adult Websites as we are going to use this option to block Shield-key.com from the browser.
5 Two options should show up after clicking the Limit Adult Websites button. Click the "Add Website" button under the Never Allow section.
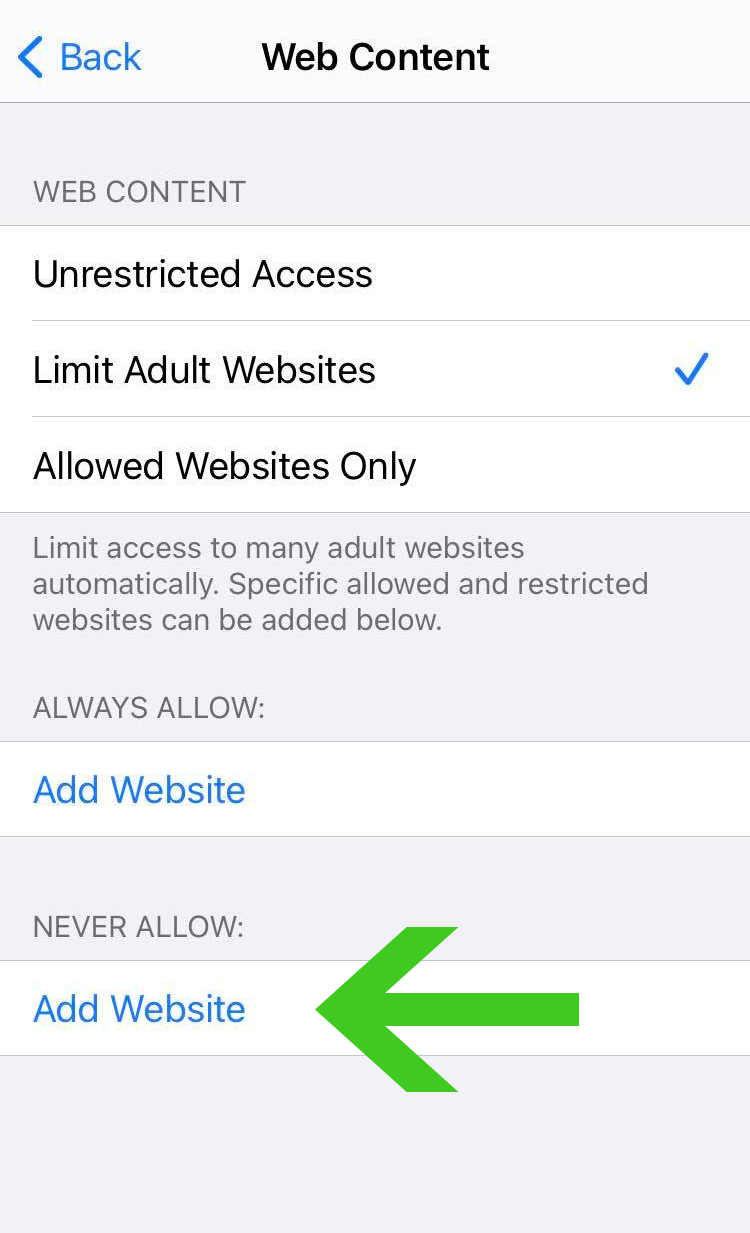
6 A URL bar should display after you click the Add Website button so you can insert the URL of the website you want to block. In the URL bar, enter Shield-key.com and press Done.
Now, the domain that you blocked will never again appear in the browser. You can use this feature once again if you want a particular unwanted website to not show up. However, because the Block Pop-up function was enabled, it is unlikely that you will ever see these websites again.
Step 3: Clear History and Website Data (Optional)
Additionally, you have the option of deleting webpage history and data from your browser. Knowing that one of the websites you visited directed you to Shield-key.com may be one of the causes of the phony alerts and giveaways you have seen. From such websites, you might want to delete website data.
This is merely an option because doing so would also wipe website data from social media and forum sites, which would require you to re-enter your login information.
1 To do so, open the Settings application on your device. Scroll and click Safari once again from the list of applications as shown in the image below.

2 From the Safari settings, scroll down and click the Clear History and Website Data option. A confirmation pop-up will appear and confirm that you want to clear website data and history.
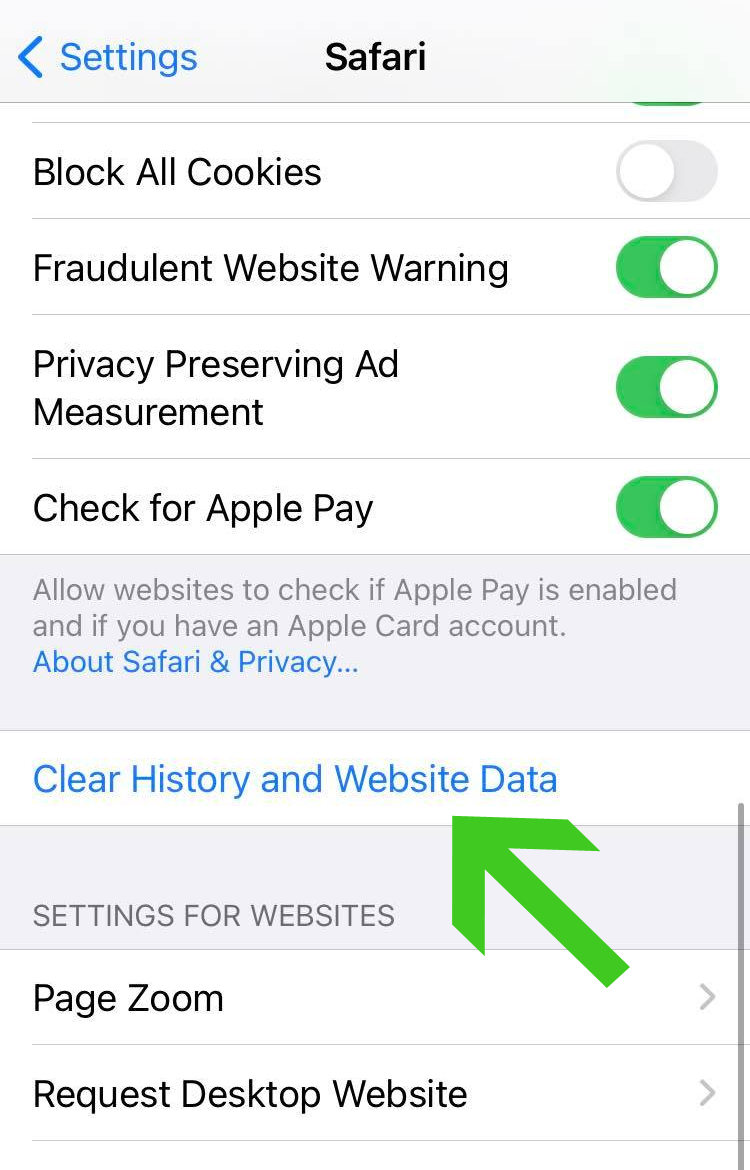
All previously saved website data, including user credentials, search suggestions, and autofill information, will now be erased from every website you've visited in your Safari browser. Additionally, the history of your browser will also be erased. Since cleaning website cache and cookies may enhance browser speed, you should notice that your browser is faster.
Tips to be safe online
- It is preferable to avoid websites with unique domain extensions other than .com, .org, .net, and.edu. Because most infected websites have extremely distinct TLDs, always verify the last part of a domain to ensure that you are visiting a safe site, unless the site has been reputable ever since.
- Only visit websites that have a secured connection. A site with an HTTP connection does not encrypt the data it receives and therefore is not considered secure. Entering personal information such as email addresses, phone numbers, and passwords on a website with an HTTP connection is risky since it could be compromised and your information was stolen. Websites with HTTPS connections, on the other hand, are secure since data is encrypted and attackers are unlikely to gain access to information exchanged within the site.
- Only download from reliable sources. Everything you download from the internet cannot be guaranteed safe and malware free. It has been known ever since that one of the main ways malware can get into a device is through cracked downloads and torrents. It is preferable to download only from Google Play and similar verified markets. As wise people say, it is always better to be safe than sorry.

