You might be alarmed to find that your computer is using up all of your disk space – even when there’s nothing open yet. If you’re experiencing 100% disk usage on startup, there’s a good chance that you’re running into problems with your computer.
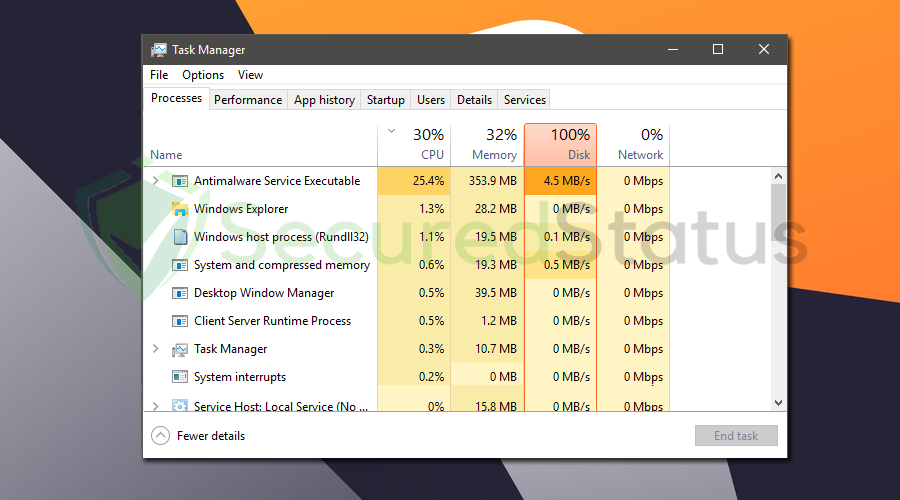
Disk usage on startup can vary depending on a number of factors, including the type of computer you are using and the applications that you have installed. However, as the system and application processes would have to start upon booting, 100% disk utilization at startup may be considered normal.
Causes of High Disk Usage
Although there are numerous variables that could affect disk utilization, the following are some of the most frequent issues that users may have:
- Using a Hard Disk Drive (HDD). An SSD uses flash memory while hard drives use magnetically sensitive platters that are moved by a motor. As a result, even though it is significantly more expensive, a solid state drive is far faster than a hard disk. An HDD would undoubtedly use a lot of resources when it comes to booting a lot of applications and their processes.
- Having too many applications on startup. These processes will run as soon as the computer turns on. Therefore, if there are too many startup applications, they will all load at once and use up all of the disk’s resources. To avoid cluttering up the computer, consider removing unnecessary launch programs.
- System is infected with viruses. Malware, or crypto miners specifically, use the victim’s hardware to mine cryptocurrencies including Bitcoin, Litecoin, Ethereum, and Monero. Checking the task manager for strange processes may identify the malware that is hiding in the computer.
- Computer Hardware Issues. A typical issue that has several potential causes is computer hardware. These include dropping the device unintentionally or pouring liquid on it. It could possibly be a hardware issue, in which case some components need to be replaced.
Methods to Fix High Disk Usage on Startup
In order to assist you with the issue of experiencing a very high disk utilization during computer startup, we developed a few solutions.
Please give each a try and see which one works best for you as there are numerous potential causes for issues like high disk utility.
Method 1: Disable Superfetch/Sysmain
In order to speed up loading times, Superfetch (also known as Sysmain in newer versions) preloads data into memory by examining user behavior patterns.
For individuals who use HDDs, this feature might be useful, but SSD users might not need it and it might even slow down the computer for them, so you might try turning it off and seeing if the disk utilization stabilizes.
1 Open the Windows Run application by clicking the Windows button and R at the same time.
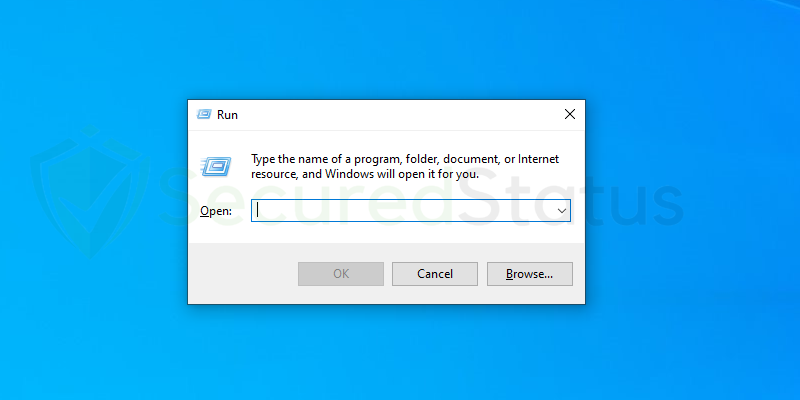
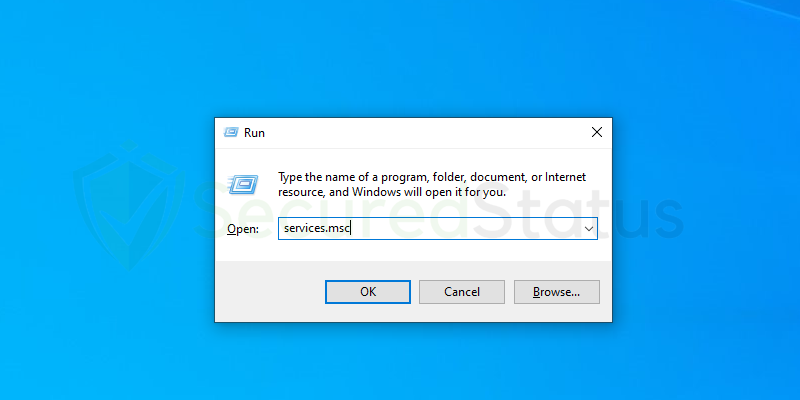
2 Type services.msc into the text box and click OK.
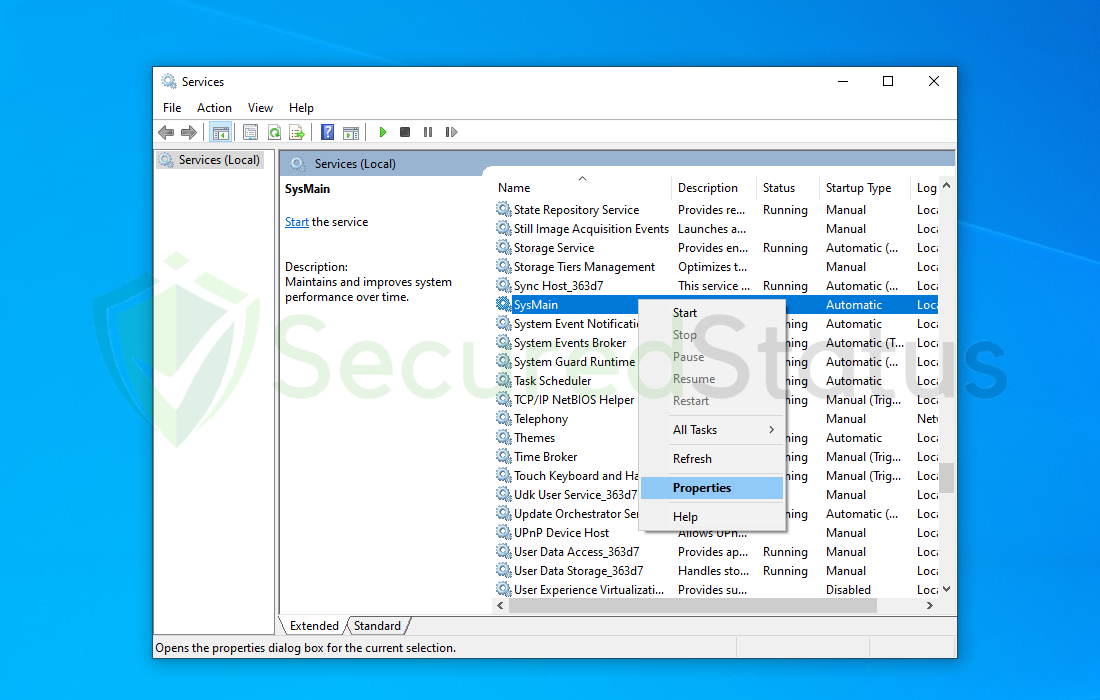
3 Once the Services application launches, scroll down and locate Superfetch or Sysmain for Windows 10 and above. Right click the said service and click Stop.
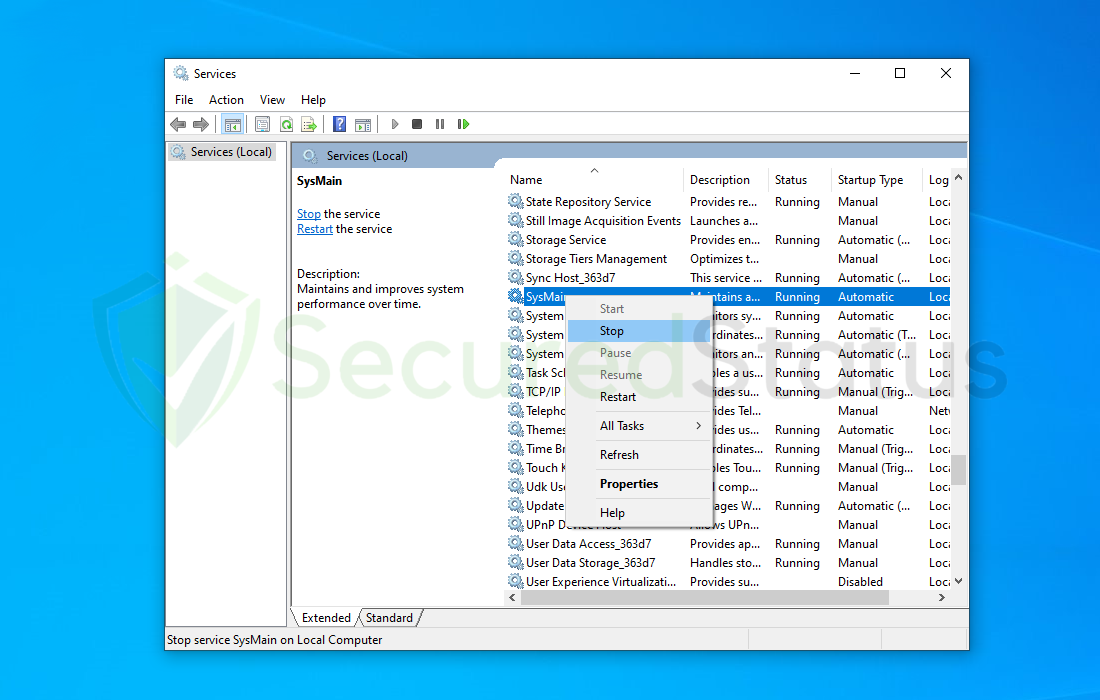
4 Right click the said process again and click Properties.
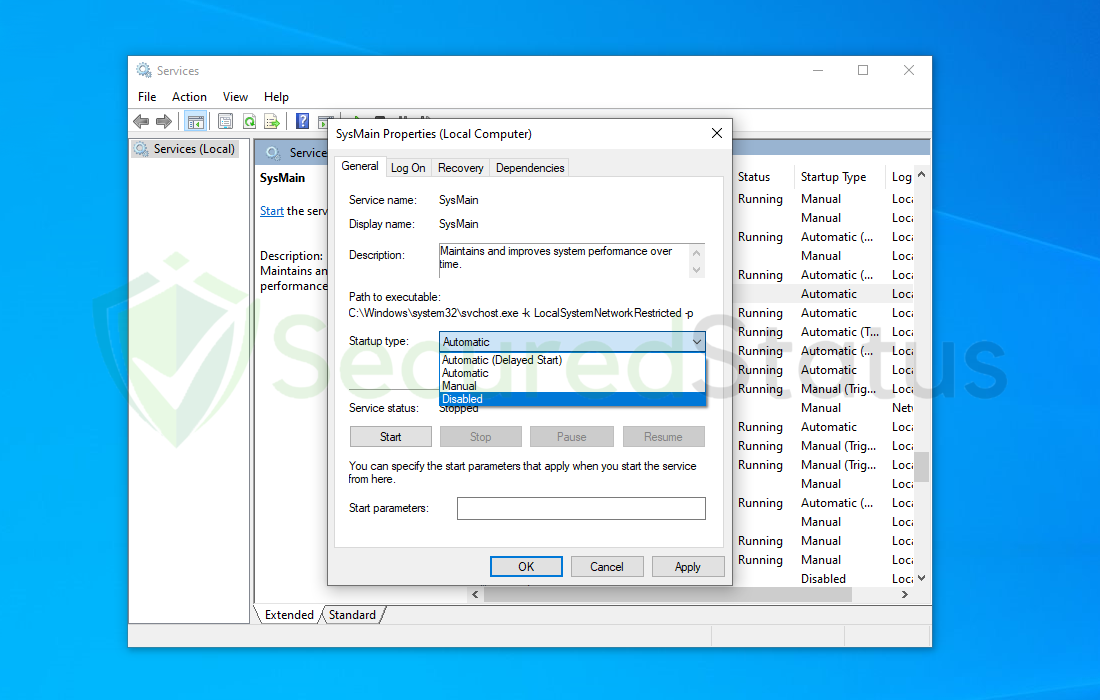
5 Set the Startup type to Disabled then click Apply and OK.
Method 2: Check Apps Using High Disk Usage with Resource Monitor
Since you can see a dashboard indicating the availability and consumption of resources like the CPU, storage, and RAM, utilizing Resource Monitor is preferable than using Task manager.
These are organized by process, include a description and status, as well as a visual graph of a certain resource, displaying its utilization and activity, which will make it easier for us to identify the process consuming a lot of disk space.
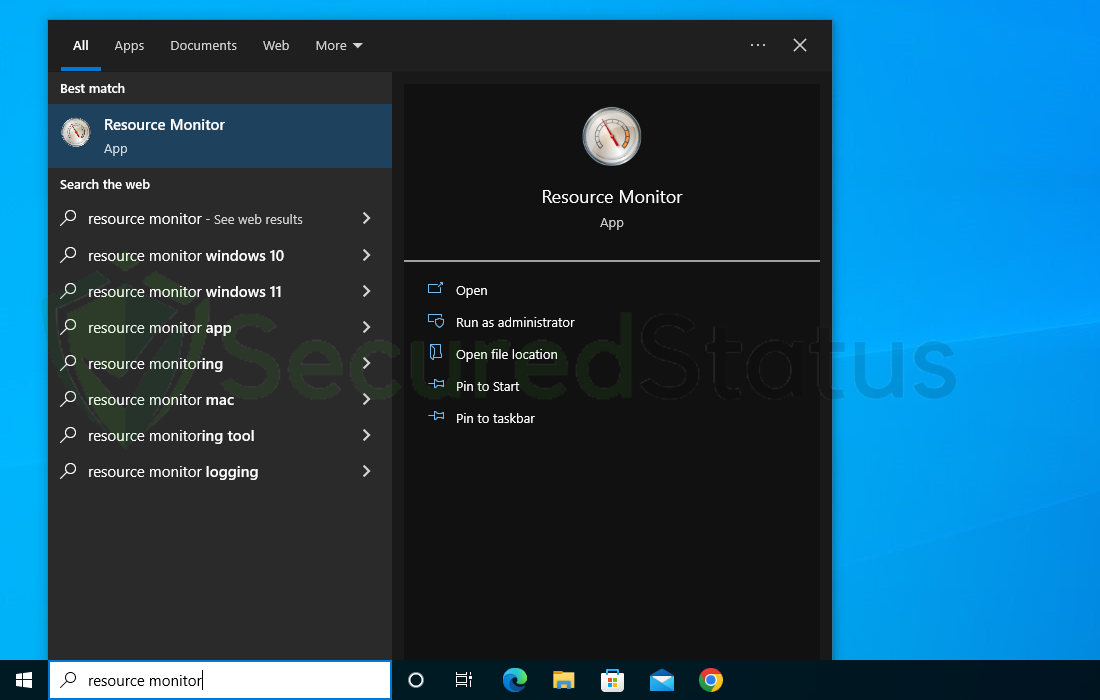
1 Click the Windows button and search Resource Monitor.
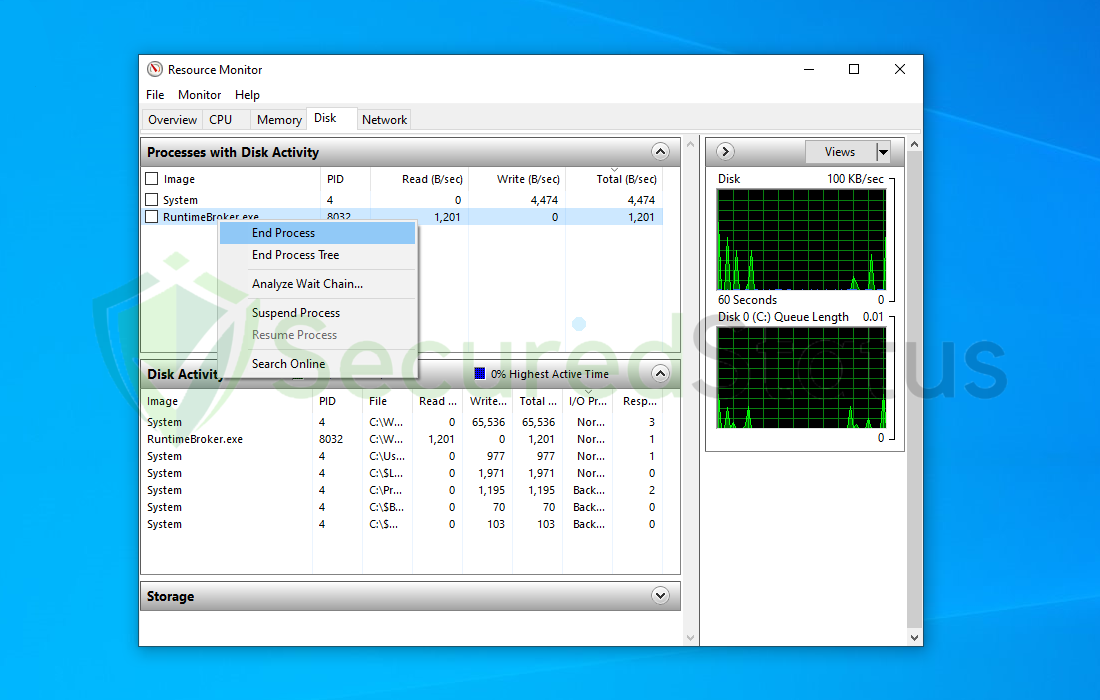
2 Once Resource Monitor is open, go to the Disk tab and look for processes utilizing a great amount of resources. Right click the selected process and click end process. (Note: Avoid the processes System and Registry since they are both important for the operating system.)
You may not be able to find suspicious processes so if this didn’t work for you, try the alternative methods below.
Method 3: Optimize and Defragment Drive
Windows’ optimize and defragment drive feature optimizes the hard drive of the computer to improve performance. You can use this feature to see if it can help if it has recently been acting strangely and using a lot of disk space.
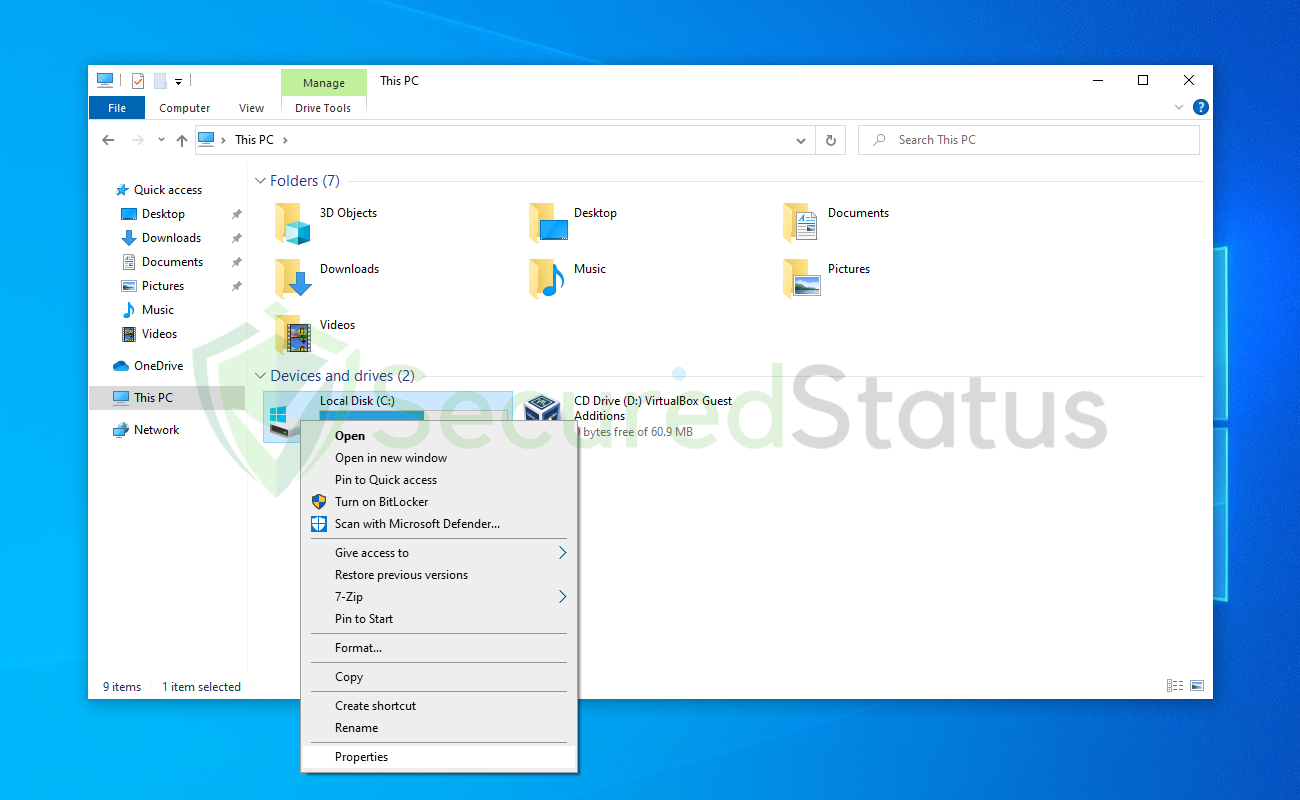
1 Open Windows Explorer and select This PC on the left sidebar. Right click the computer’s drive and select Properties.
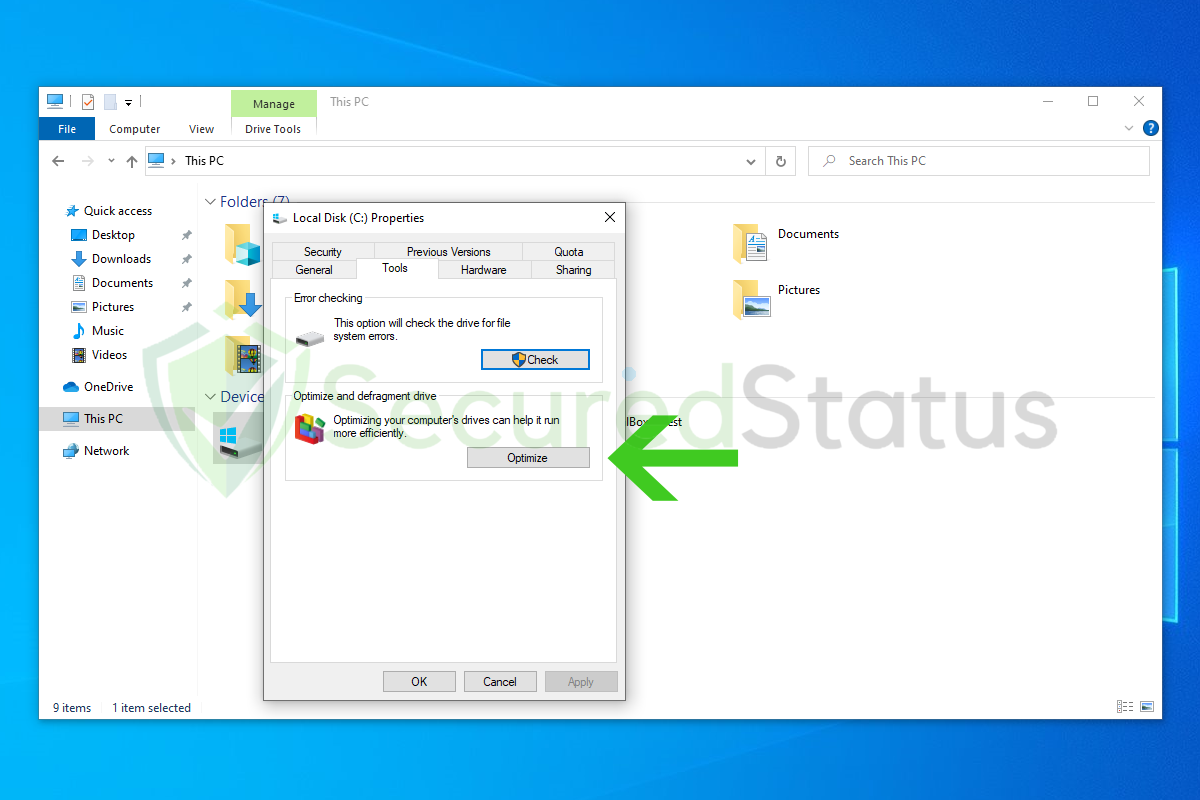
2 Click the Tools tab and select Optimize under the Optimize and defragment drive option.
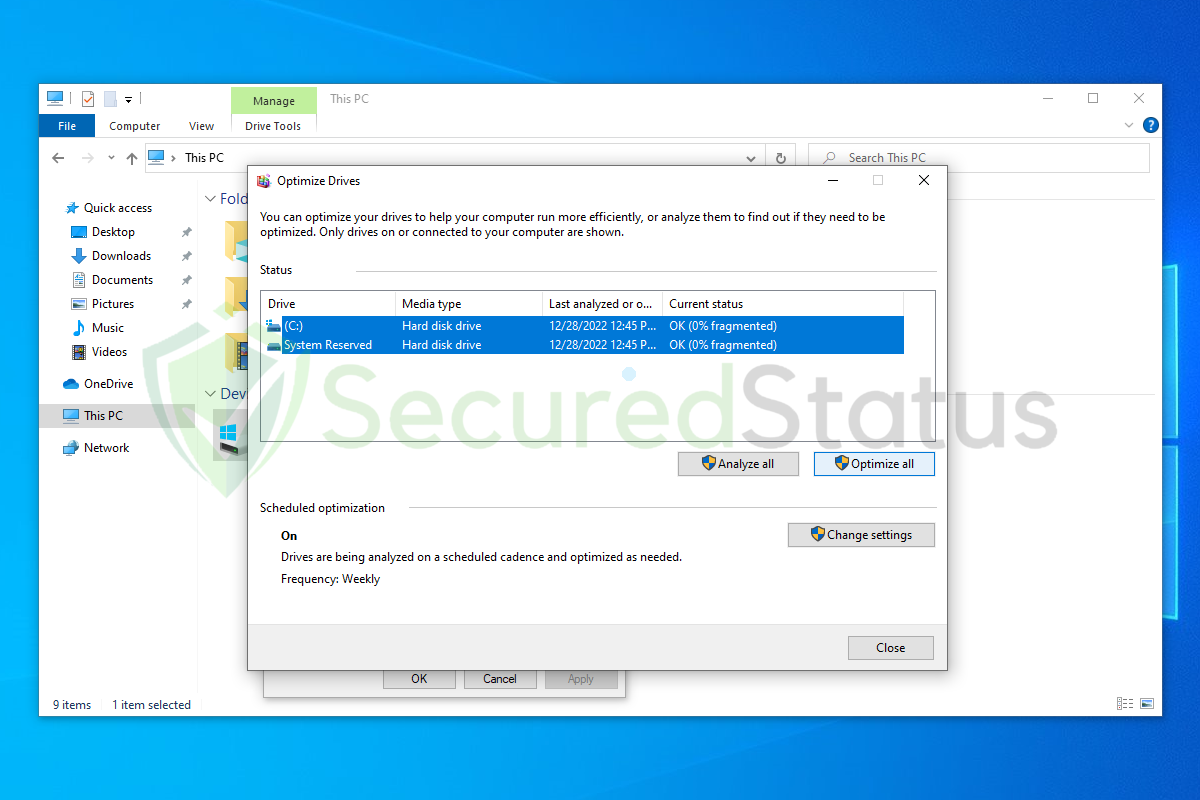
3 Select your computer’s drive/s and click Optimize/Optimize All. Wait for it to finish and check if it helped reducing the utilization of disk.
Method 4: System File Checker and DISM Cleanup
System file corruption might result in malfunction and increase disk use. In this situation, we must search for and remove any such files from the system.
DISM Cleanup and the command-line tool Windows System file checker can be used to verify the stability of all significant system files. Additionally, it checks to determine whether any system files are missing or corrupted by comparing them to their original versions.
1 Click the Windows Button from the keyboard and search for CMD or Command Prompt.
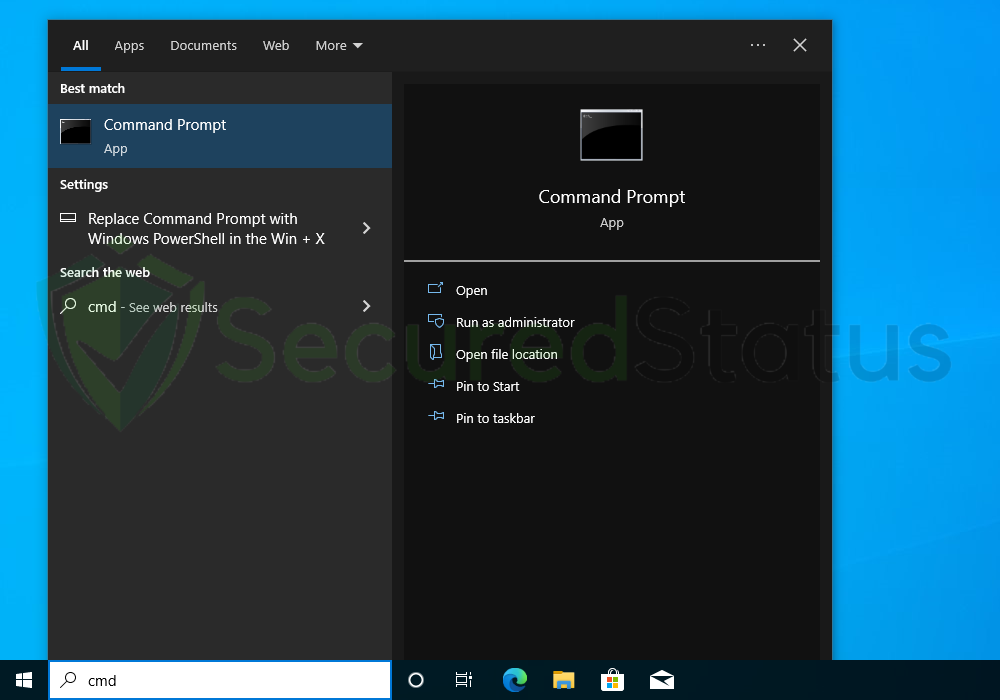
2 Right click the Command Prompt application and select Run as administrator.

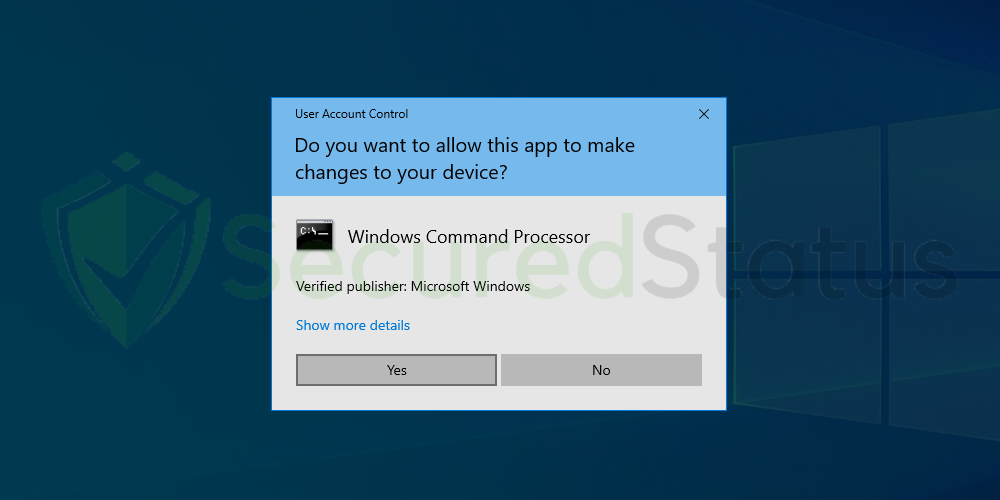
3 The User Account Control confirmation message will pop-up, click Yes to proceed.
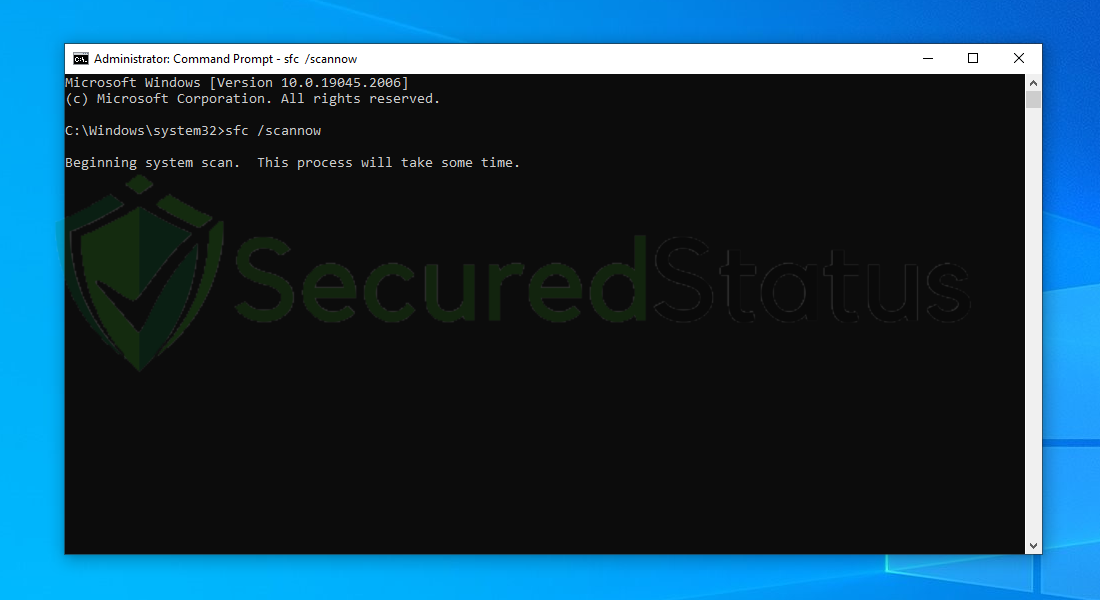
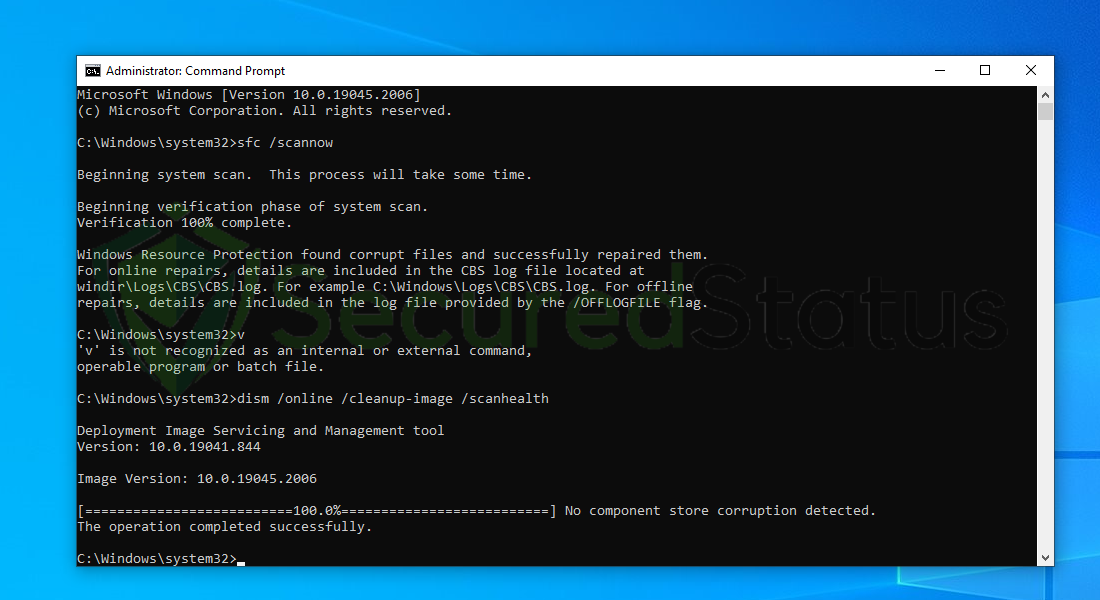
4 Once the Command Prompt opens, type sfc /scannow and hit enter. Please be patient for a few minutes as the scan will start and could take some time.
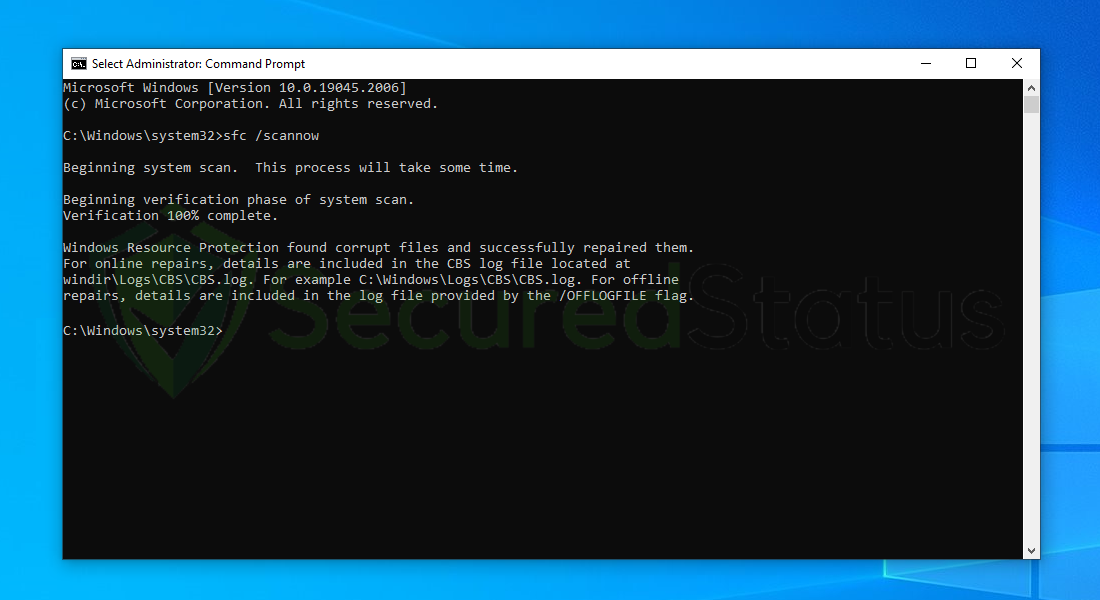
5 After the scanning process it will report that it have successfully found corrupt files and have repaired them.
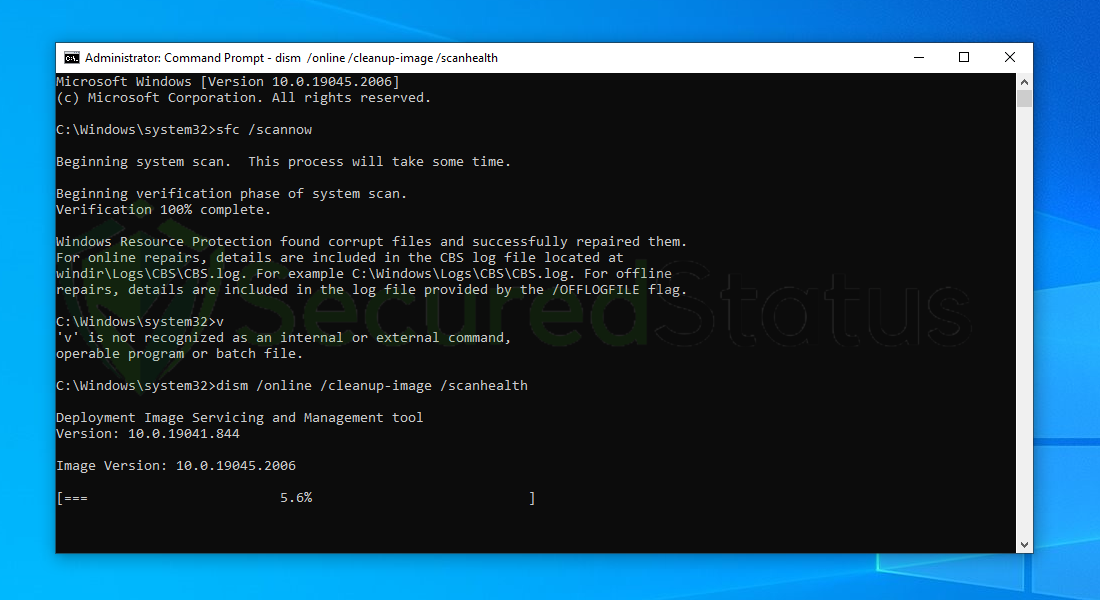
6 Next is to use the DISM Cleanup to patch faulty files in the computer system. Type dism /online /cleanup-image /scanhealth onto the command line and hit enter. Wait for a few minutes while it is scanning.
7 After the scan is complete, it will report that the operation is successful and that all corrupted components will be fixed.
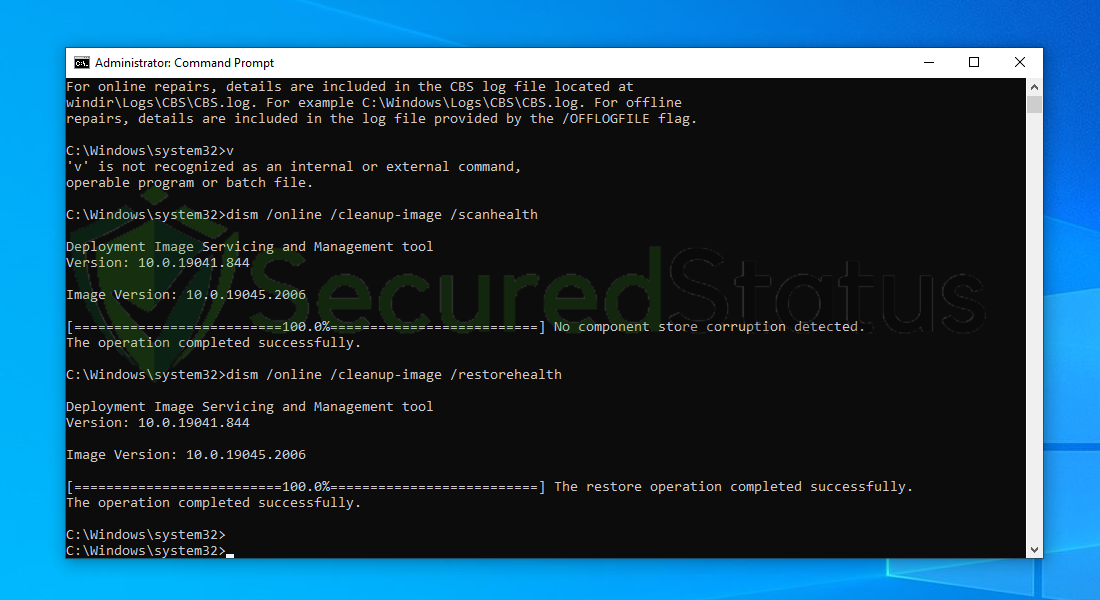
8 Lastly, in order to fix serious windows errors, we will use the restore health command. Type dism /online /cleanup-image /restorehealth and hit enter once again to start the scanning process.
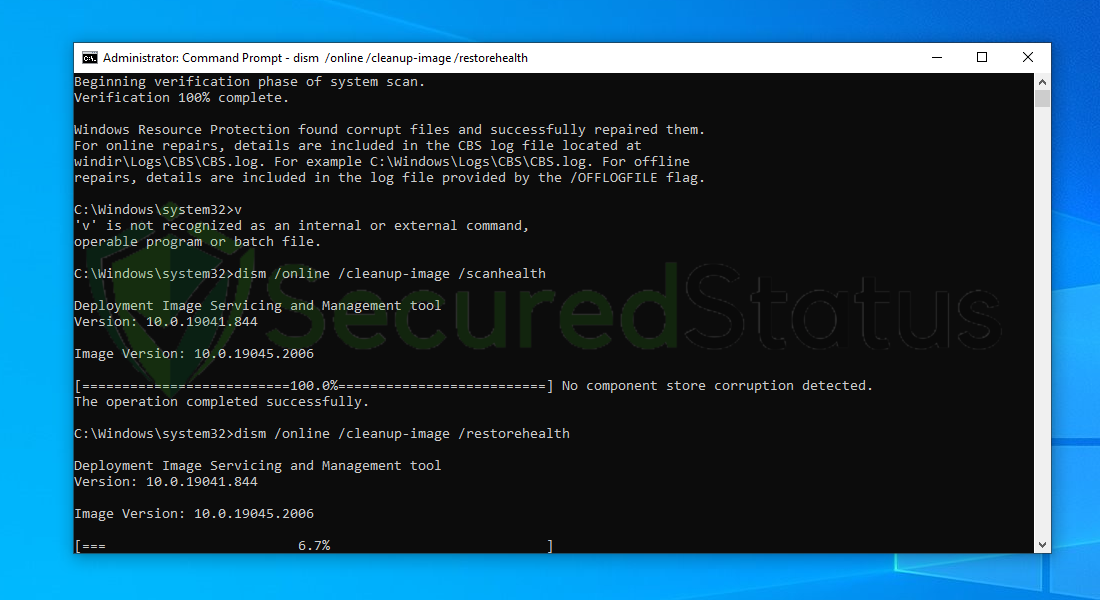
9 Once the scan is complete, it will report that the operation was successful and corrupted files and entries are resolved.
Method 5: Scan for Malware
Most of the time, high computer hardware utilization is a result of a crypto miner present in the system. When it comes to removing malware-related problems on the computer, it is best to utilize the anti malware software provided by Malwarebytes.
We have determined that it can remove most types of malicious threats when we conducted malware tests.

Malwarebytes also offers a free 14-day trial when you download it for the first time, so you might want to use the remaining time of the trial to test out the premium features.
1 Click the button above to download the latest version of Malwarebytes Anti-malware.

2 Open the installation file after the download and follow the procedure shown.
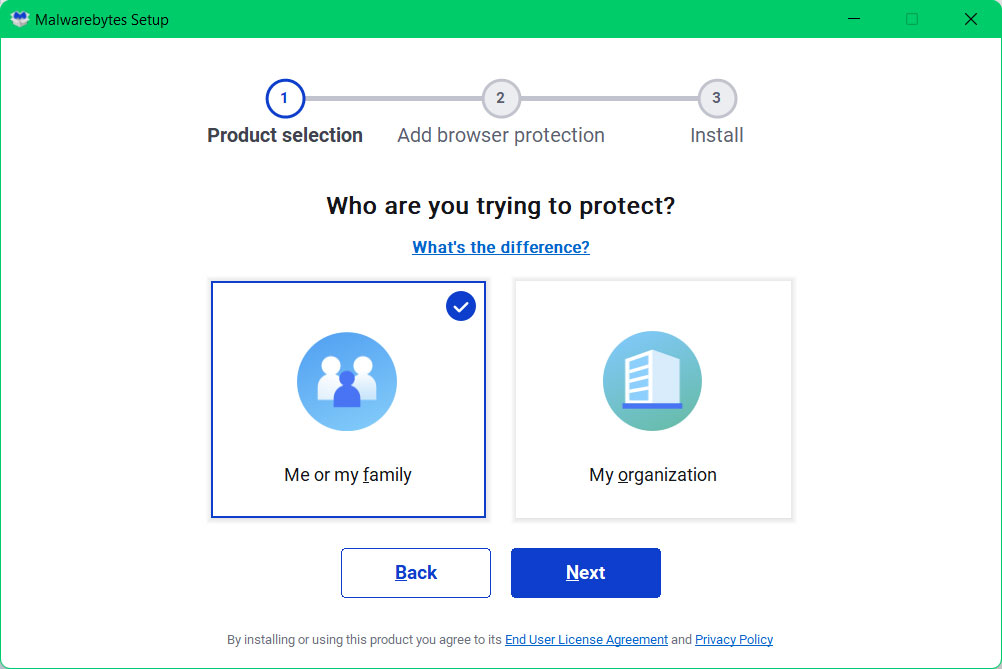
3 After following the software setup instructions, wait for the application to finish installing.

4 Once the application is installed, you may now run your first computer scan and wait for it to finish.
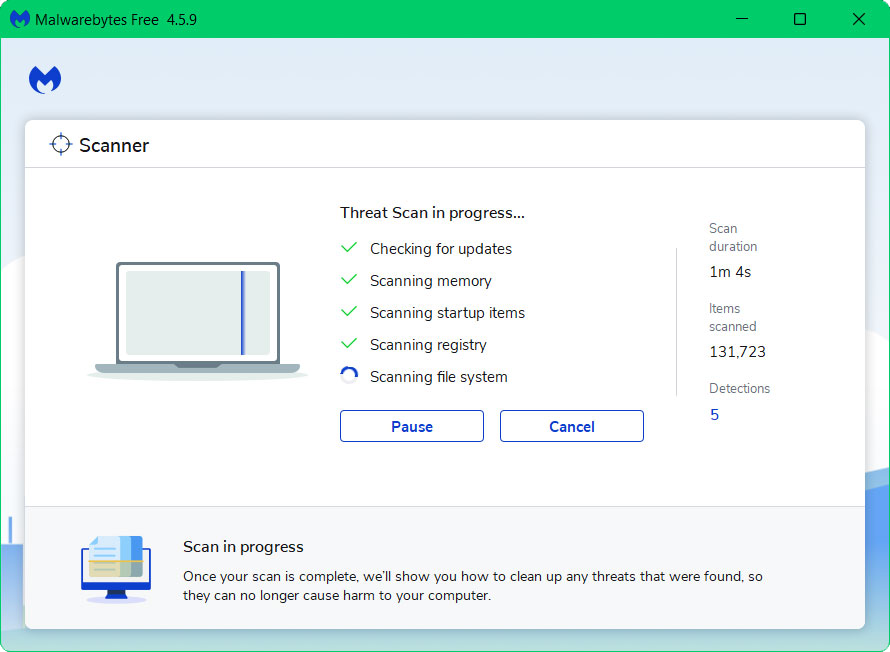
5 All discovered malware on the computer will be displayed on the screen, and you can eliminate them by pressing the “quarantine” button.
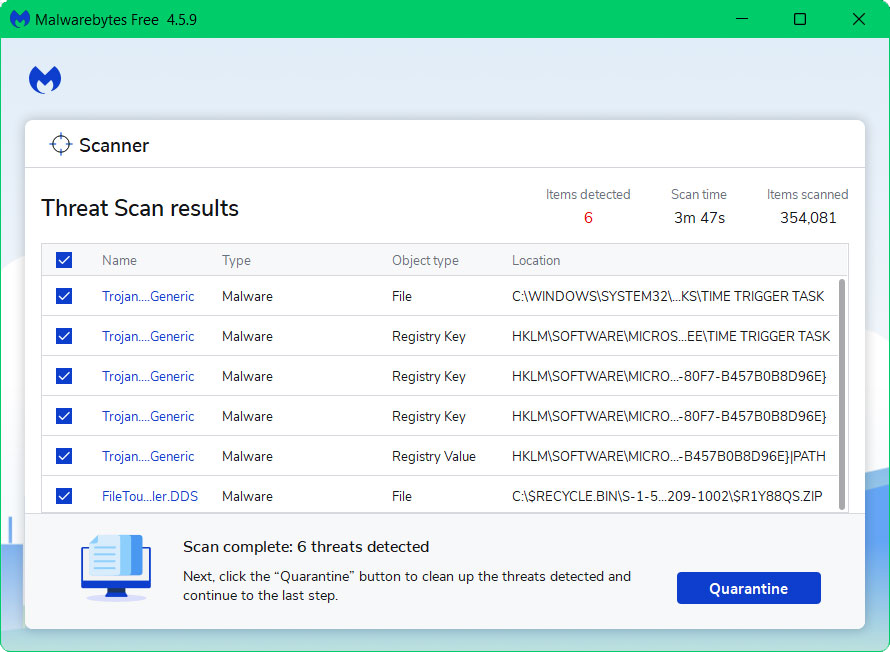
Any potential malware that may have been hiding on your system has now been eliminated, and the modifications it made to the system have been undone. You can check if disk utilization is fixed after running a virus scan.
Method 6: Reset the Computer
If none of the previous approaches were successful, this should be the last resort. Reinstalling Windows will essentially solve the issue because it will return everything to default settings as if the computer were brand new.
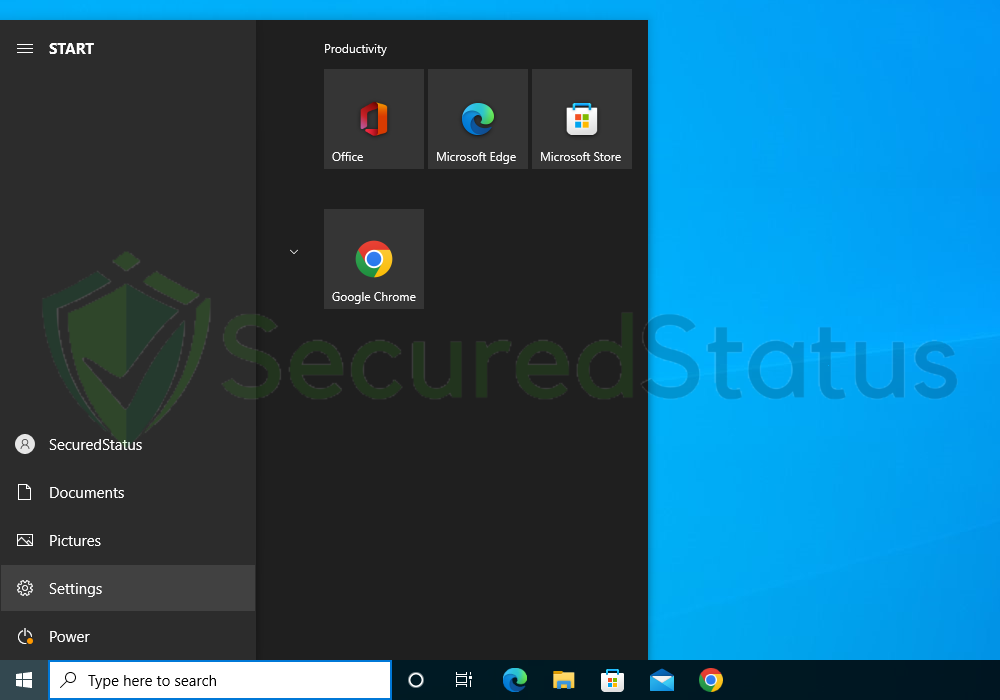
1 Click the Windows Button and select Settings (cog wheel icon) from the left sidebar
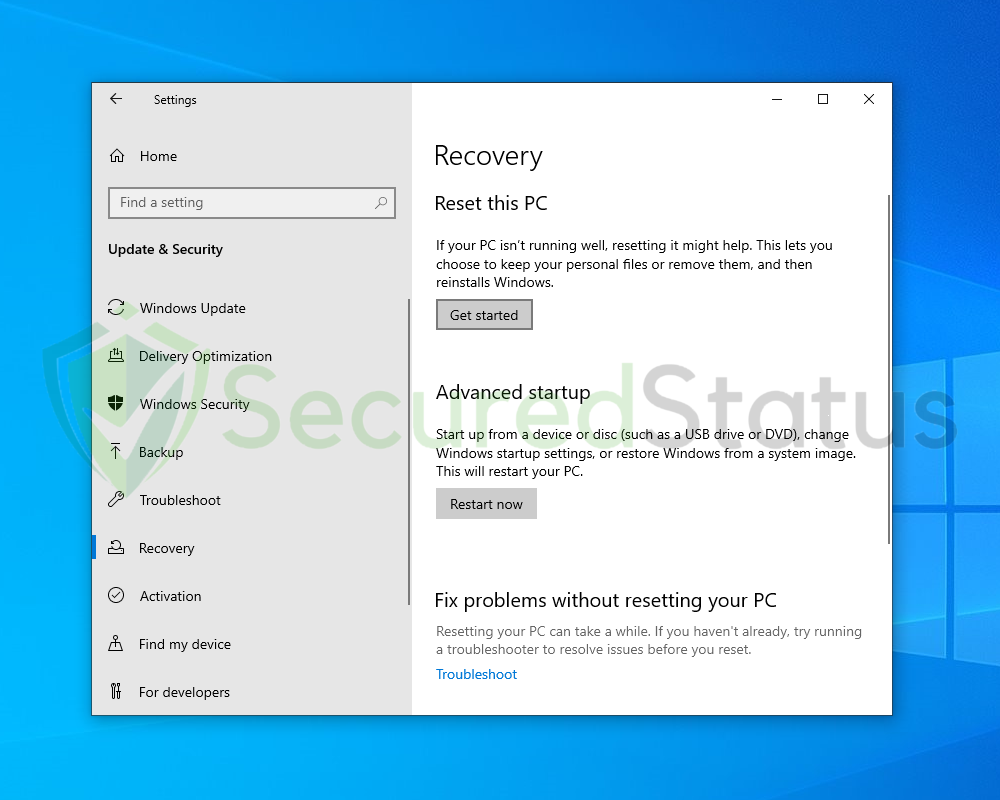
2 Once Settings opens up, scroll down and click Update & Security.
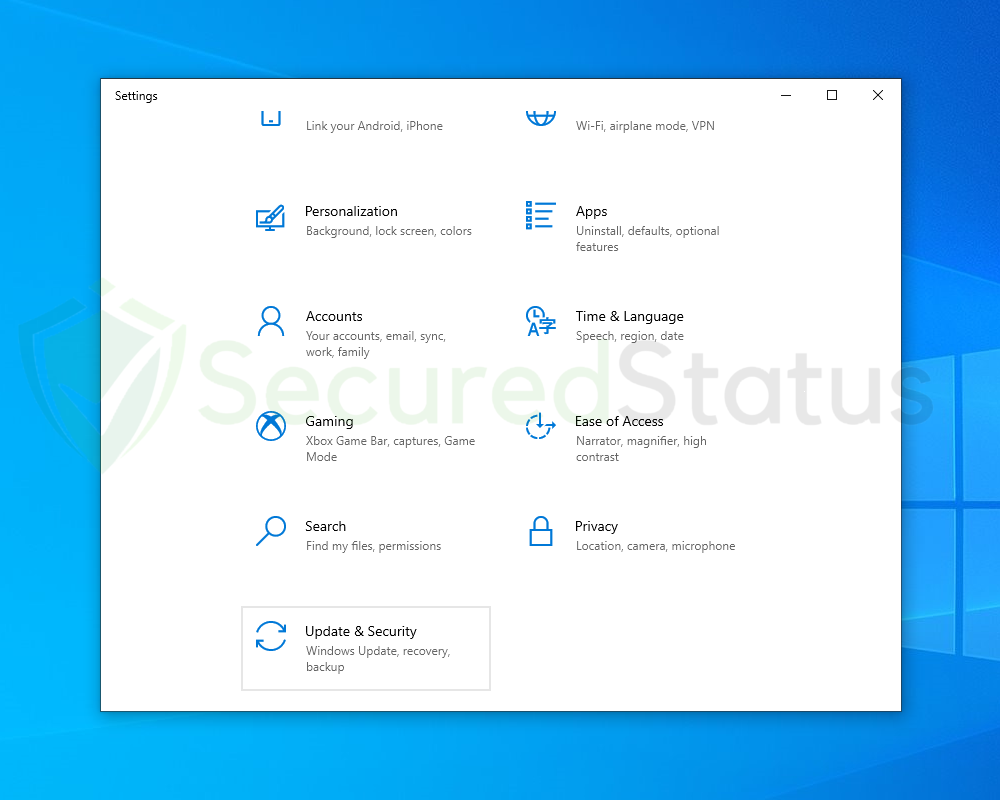
3 Select Recovery from the left sidebar and under Reset this PC, click Get started.
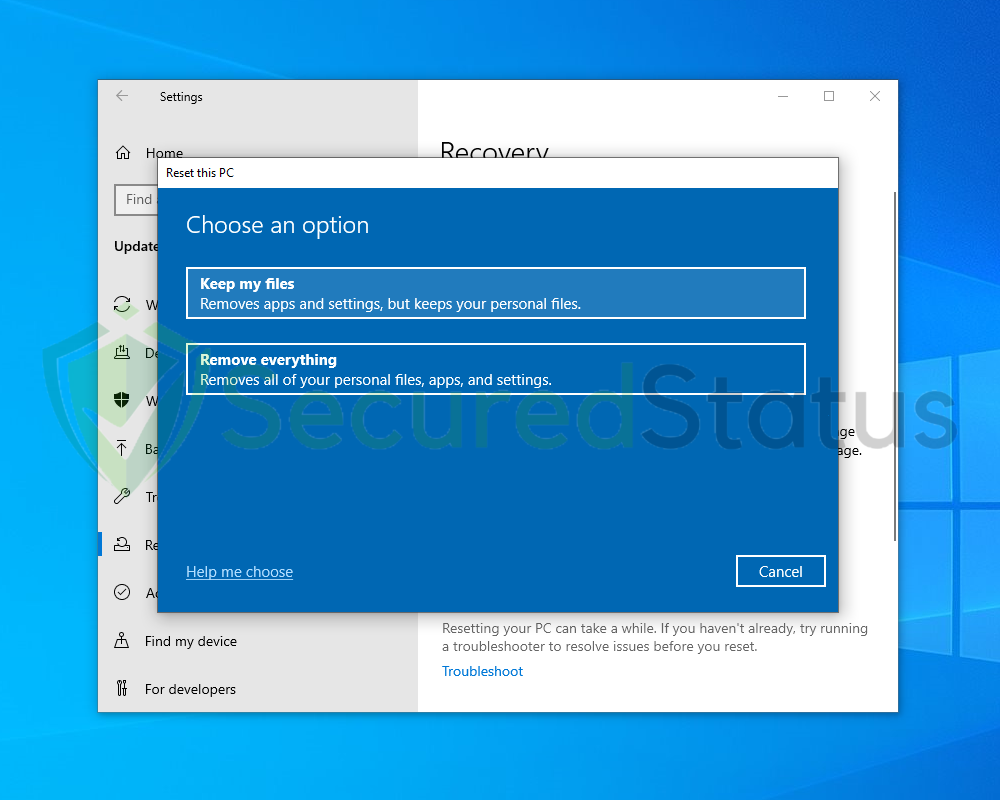
4 You will be presented with two options. Select Keep my files if you wish to retain everything in your computer or choose the later if you would like to reset everything. Follow the instructions and wait until the reset is complete.
Final Thoughts
We hope that this guide has assisted you in resolving your computer’s high disk use issue. Please forward this article to anyone who is having a similar issue so that it can be fixed. Feel free to contact us if you have any additional questions; we’ll be pleased to assist.
